My Online Course is Two Years Old!
Wow, time is flying by…
Two years ago, I set out to create an online course with the help of my wife. We had just had our newborn girl and my wife decided to leave her job to help as a SAHM for the time being. We jumped at the opportunity to work with each other on an online course all about helping others learn how to paint with gouache. You might not know this, but this was all while I was working full-time as a graphic designer. We recorded when we could, wrote the material at night, and edited on the weekends; all while managing a little one during a pandemic. Although it was really hard managing everything, we did it! All for you guys!

Filming the course
I remember always reading comments asking if I had an online course, and this is what drove me and my wife to create that course. It continues to drive me to make the next one. That year was challenging for me. My wife wasn’t working, we had a new one to take care of, inflation was on the rise, and living in San Diego wasn’t making it easy with my salary. But this course saved me. You guys saved me and my family. I can’t thank you enough for choosing me as a teacher.

My wife Ashley and daughter Autumn
Later on, after the launch, my wife found a great job and went back to work. Since we both were working remotely, we changed my studio into an office for two. I love sharing the space with my wife, but I lost a filming space. Once I gain some space to film, I plan on creating another course. All for you!
Fast forward two years later and I’d say we’ve had a major success in helping people achieve their goals of learning how to paint with gouache. To date, we’ve helped 845 Students! I never imagined that many people would want to learn from me. I’m more than honored. Thank you, ALL!
If you’re interested in signing up or learning more about my online course, click here to learn more.
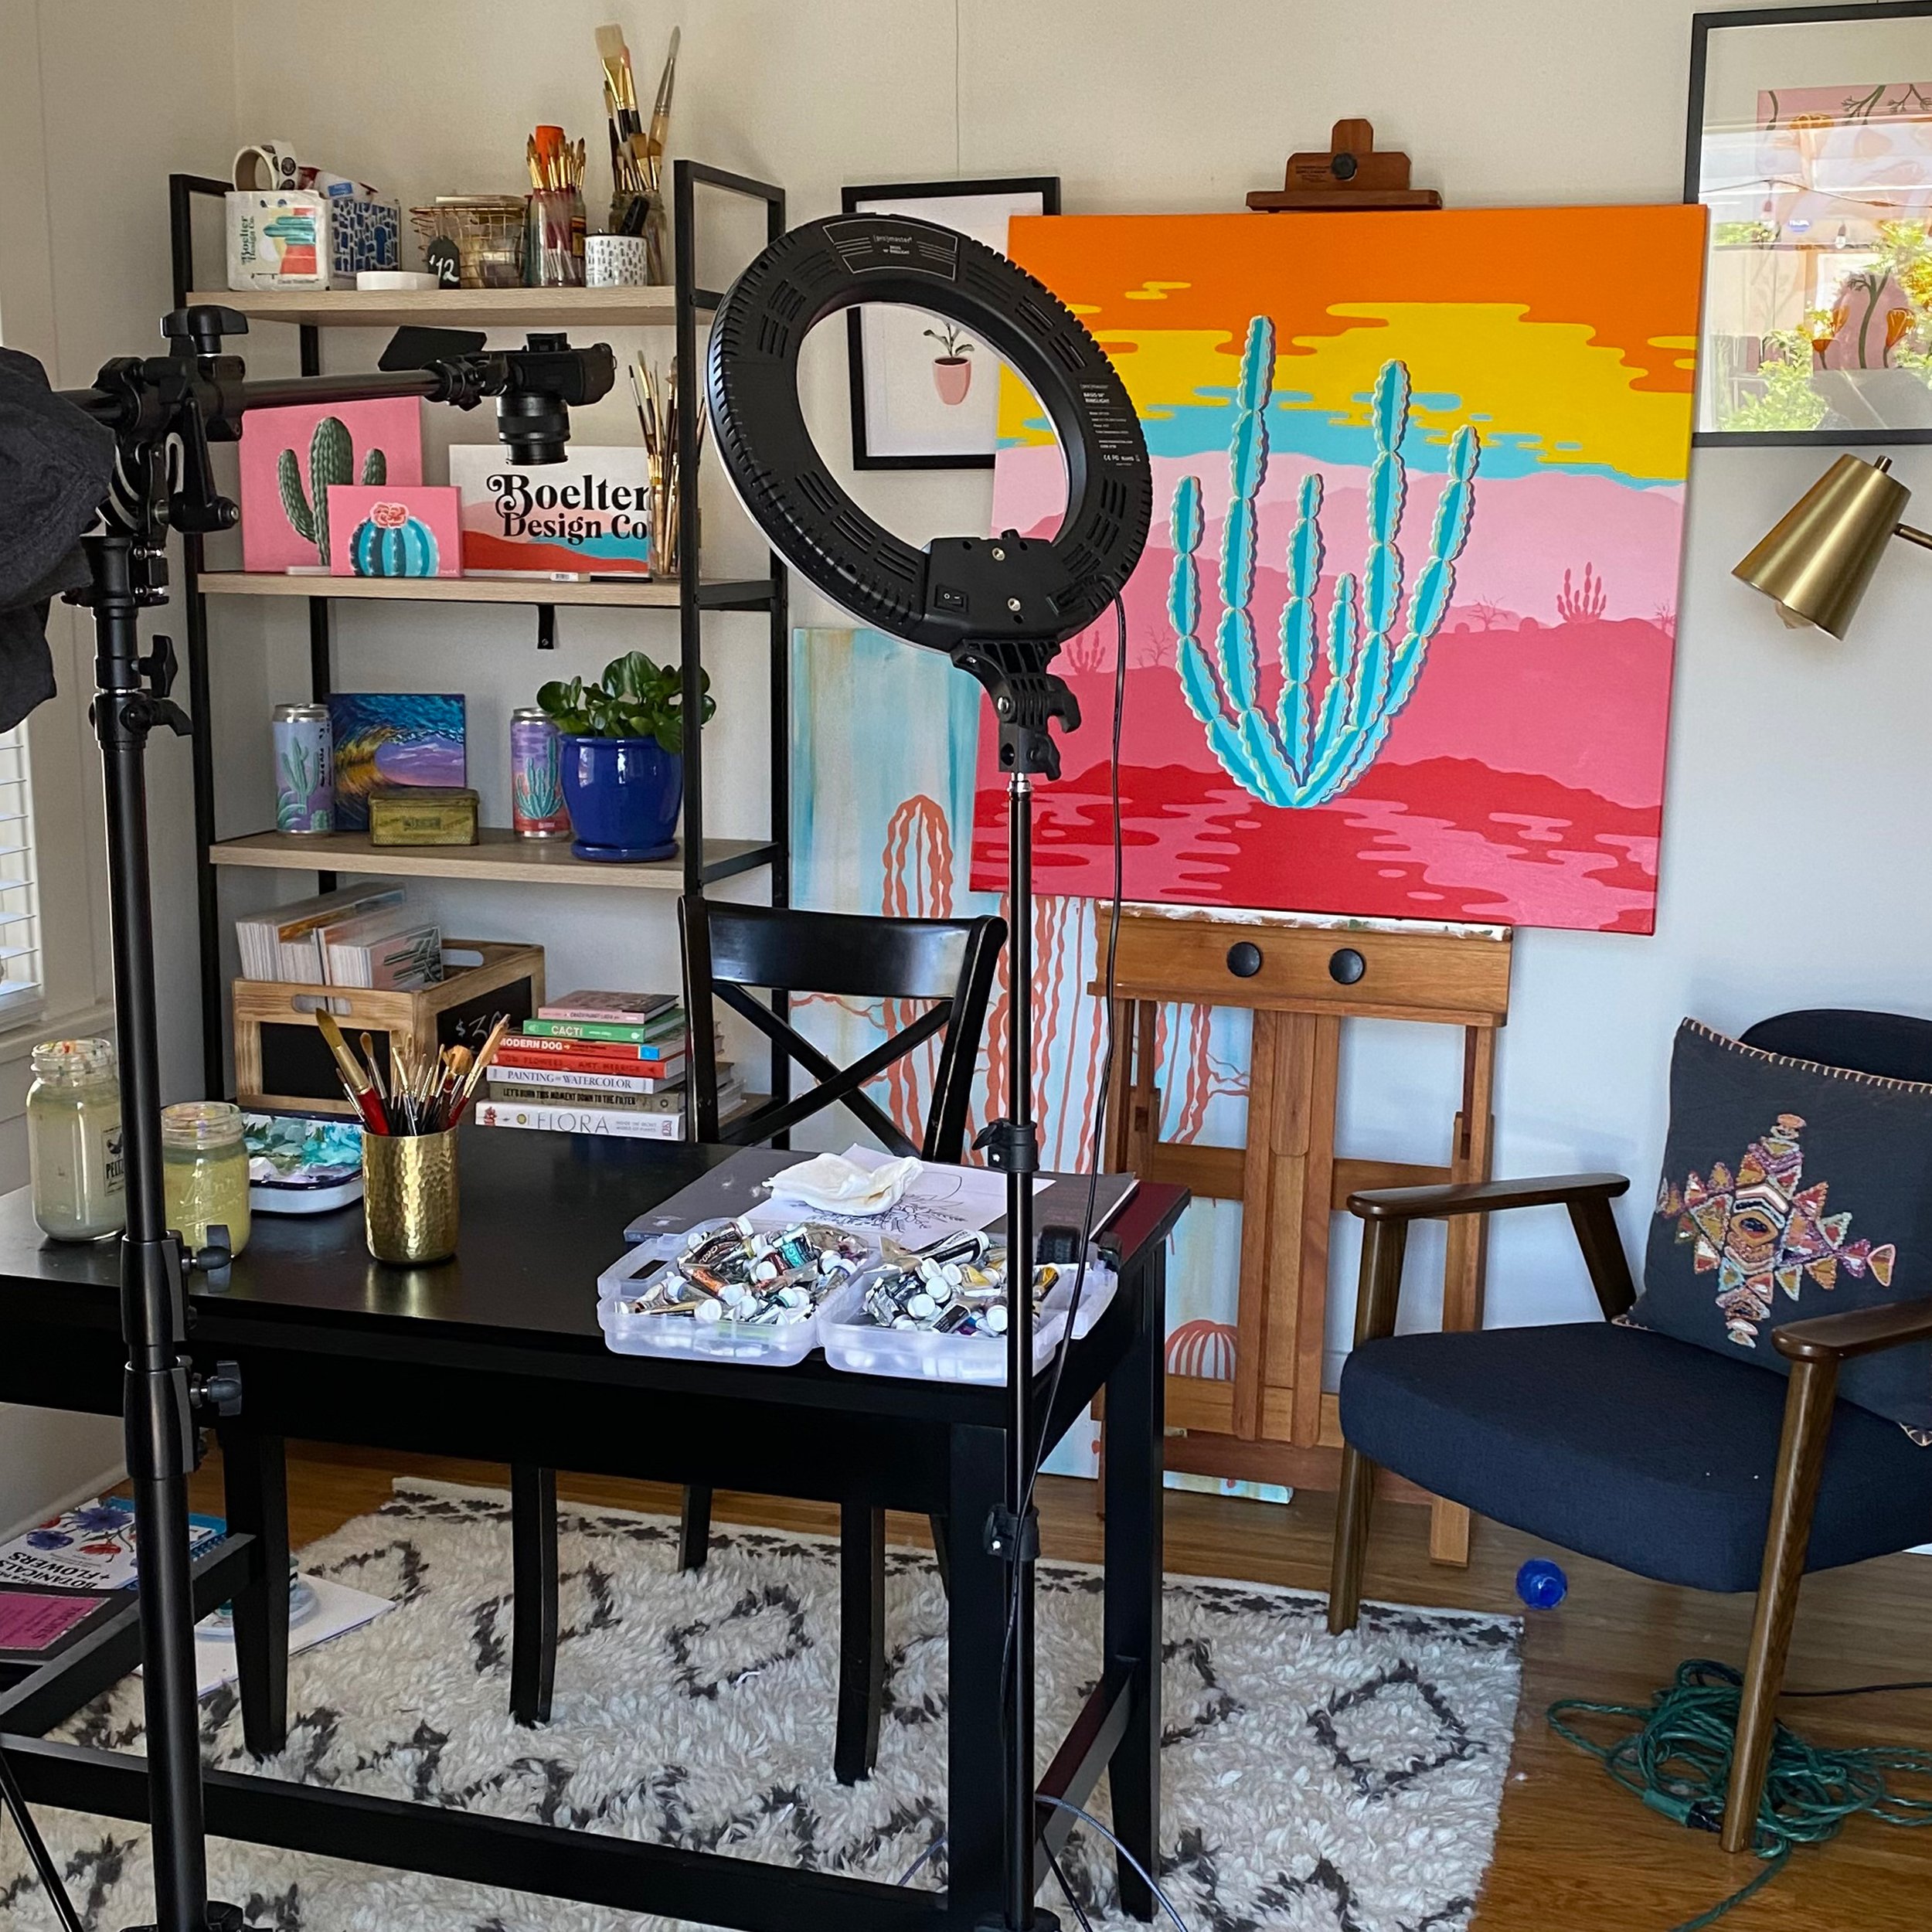
My office space during filming

Before Covid
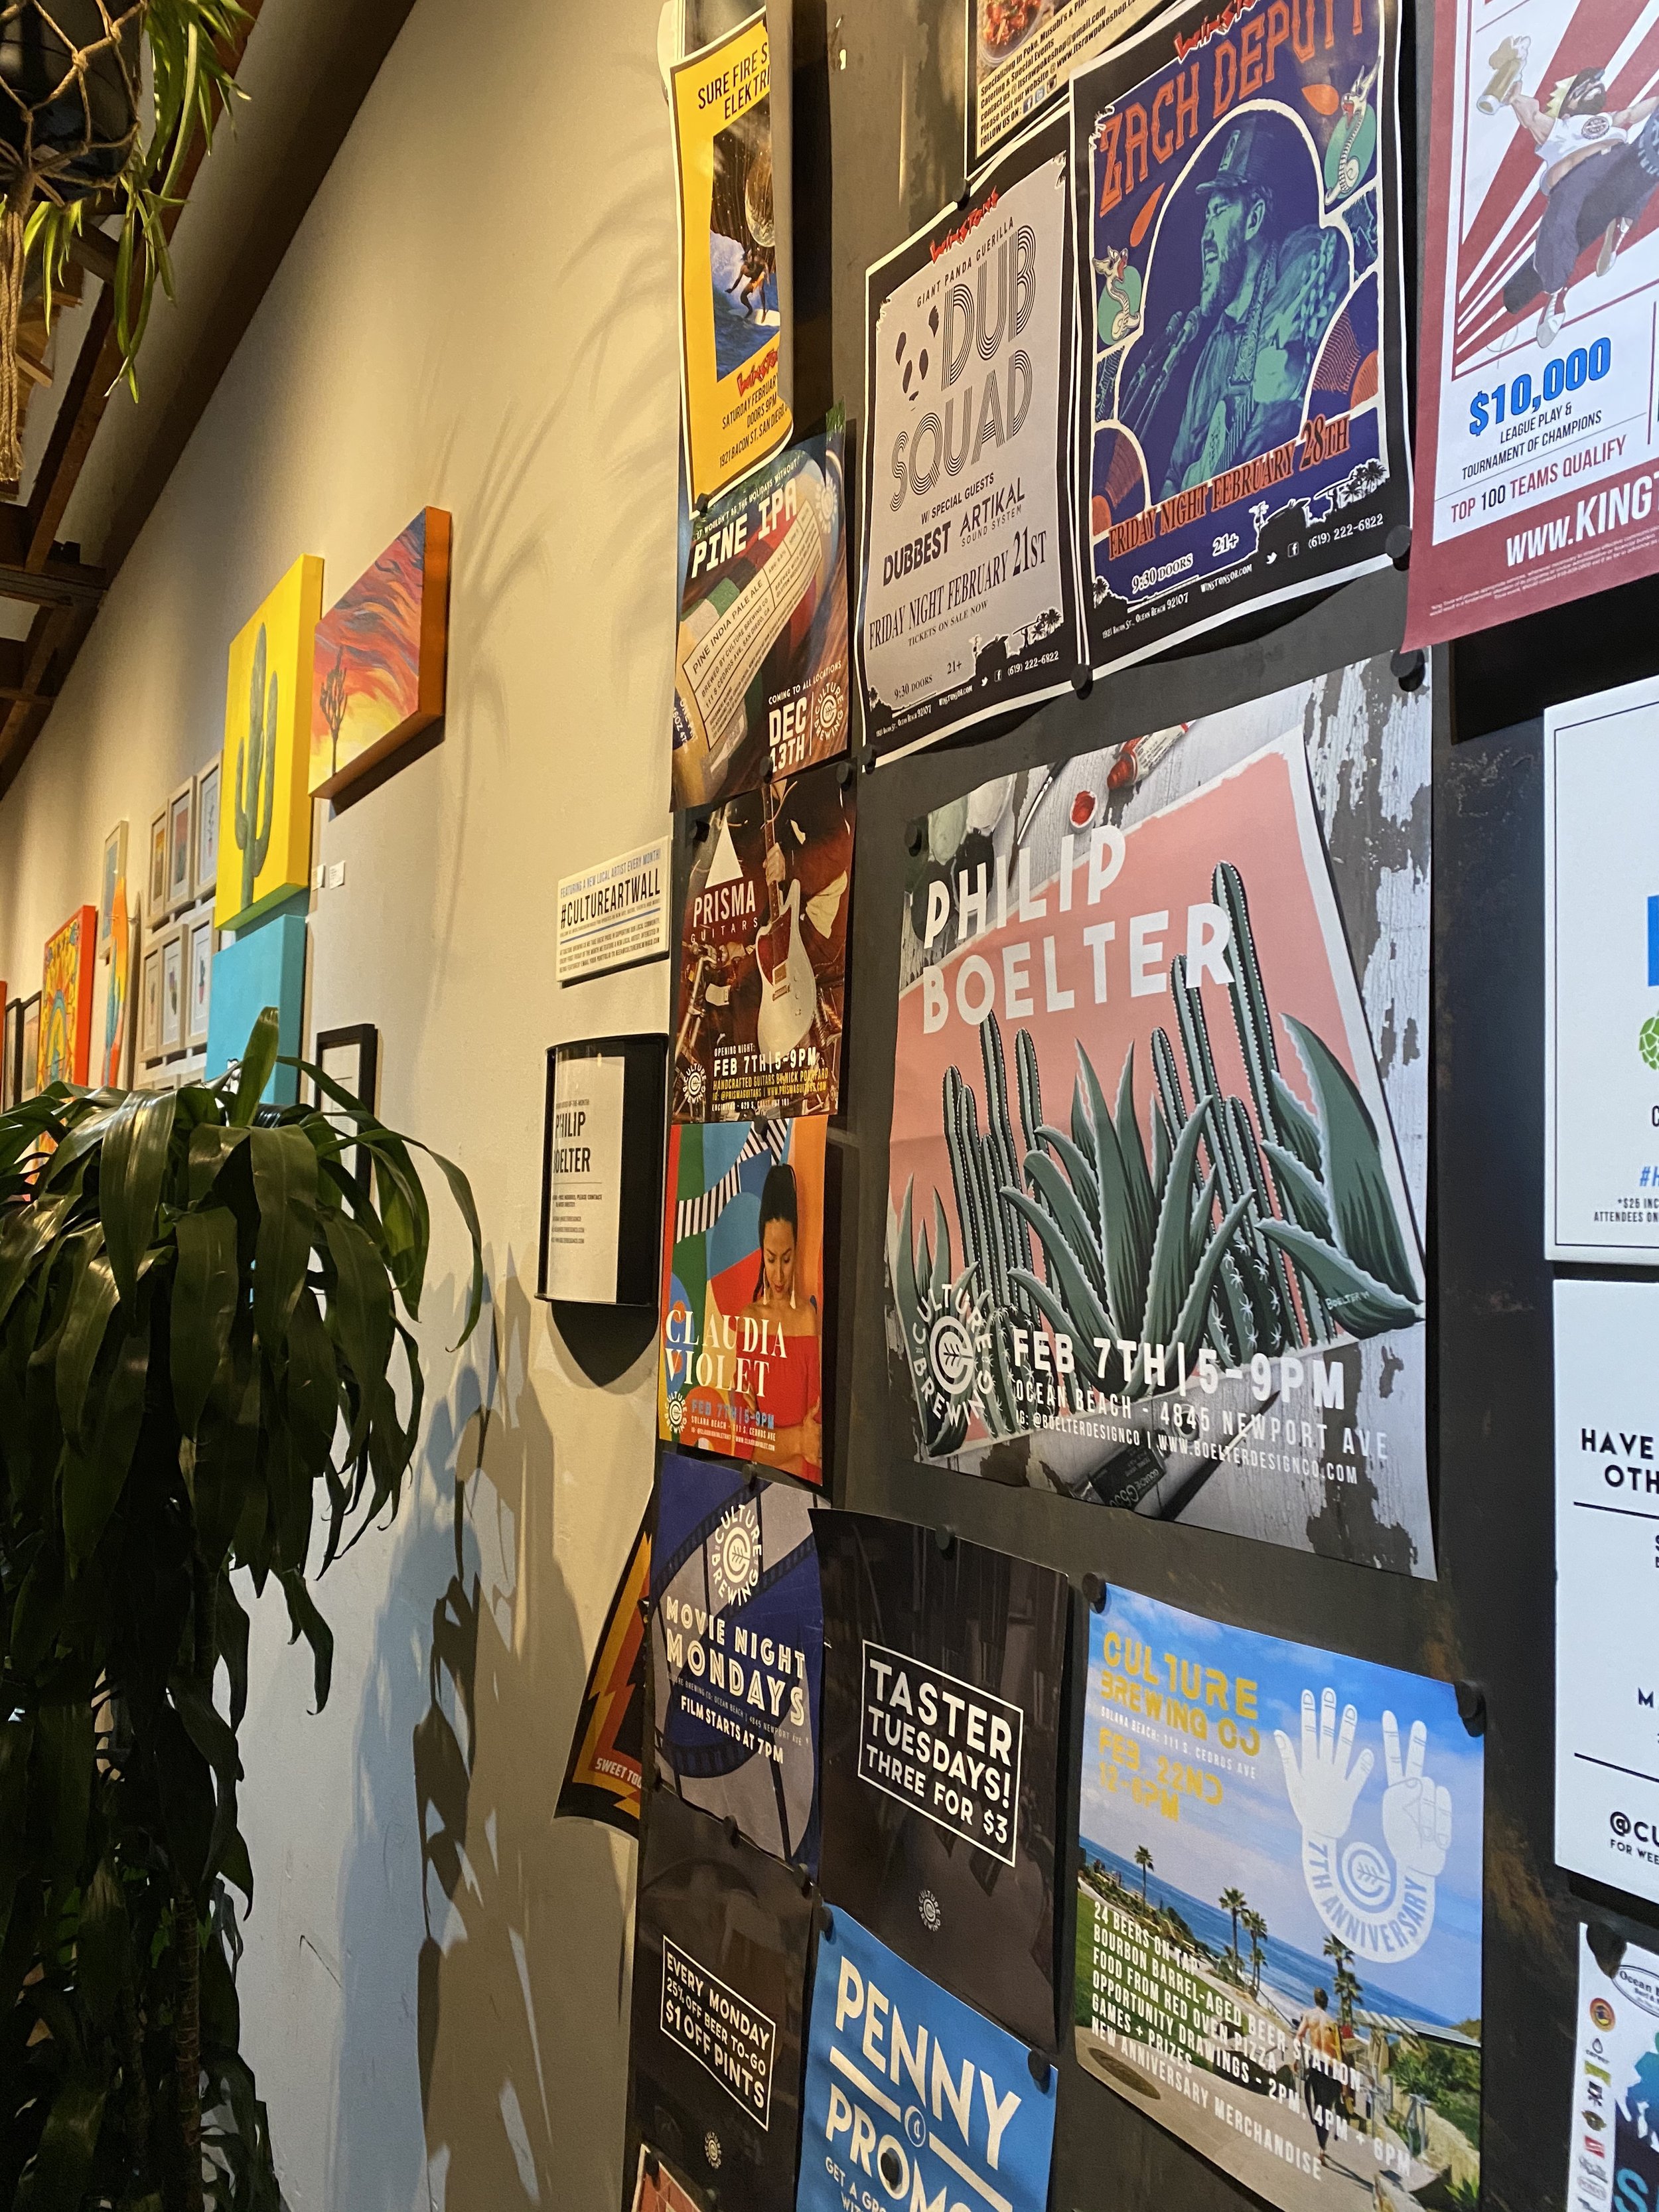
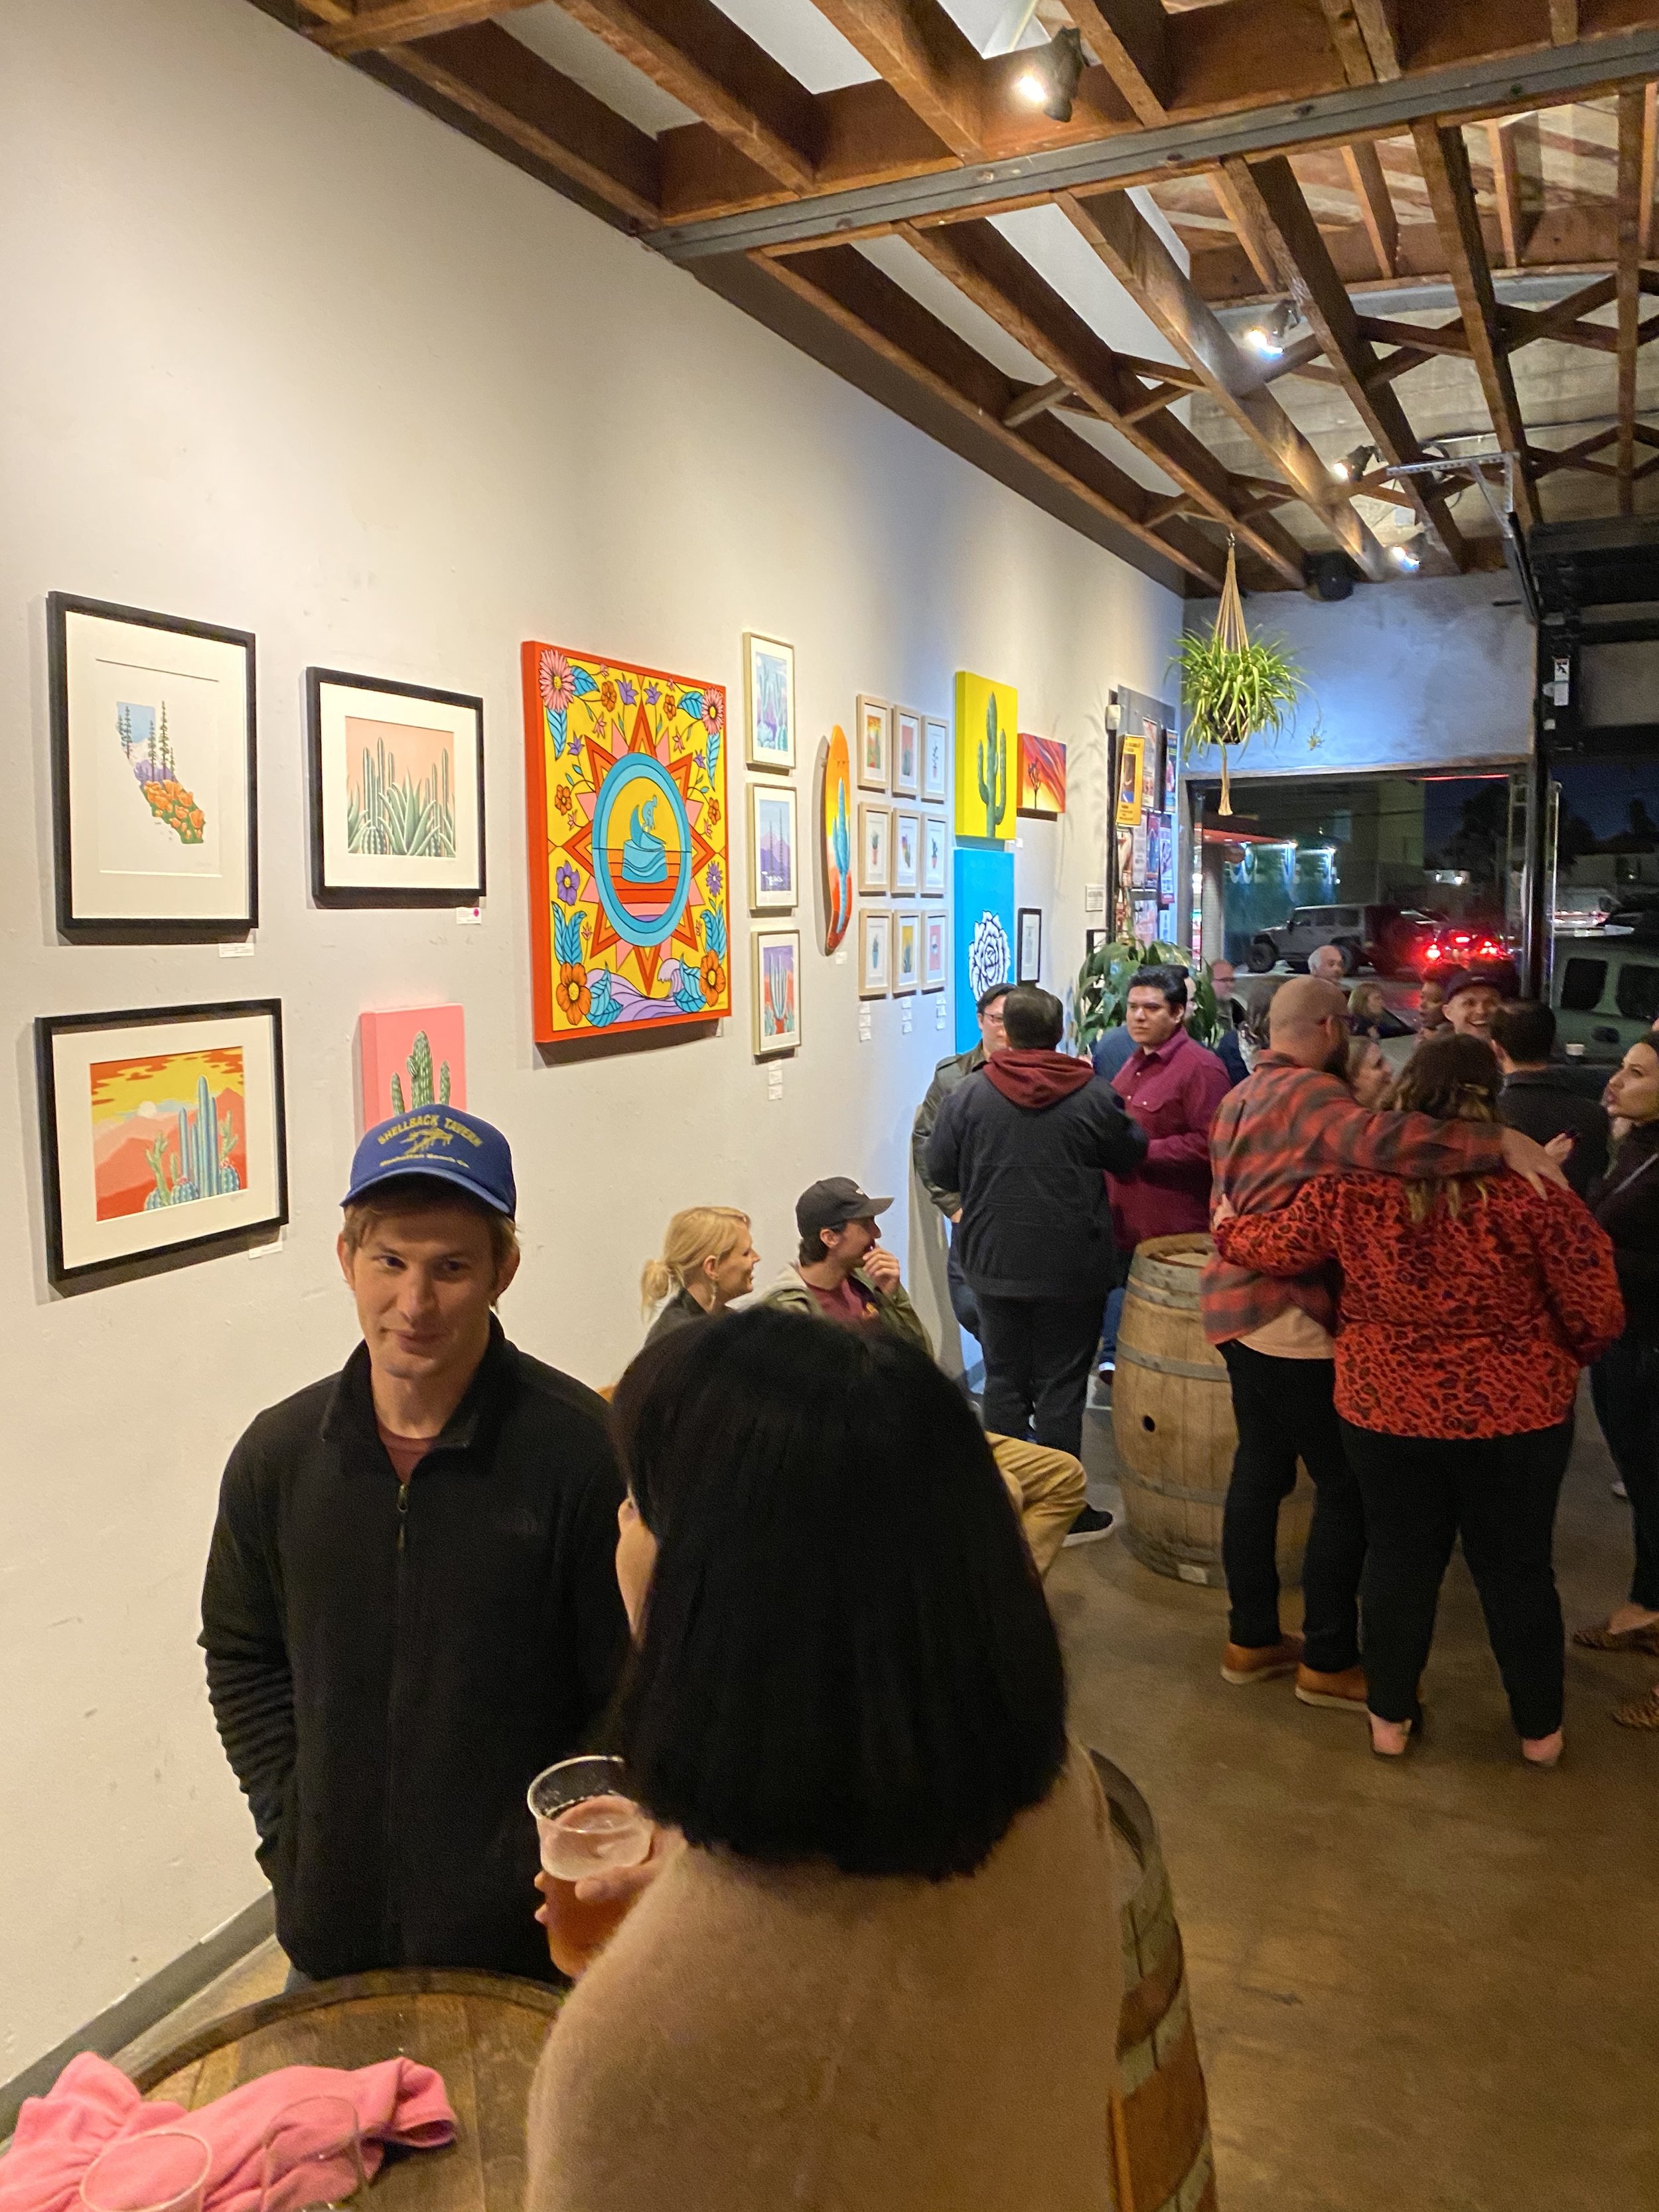
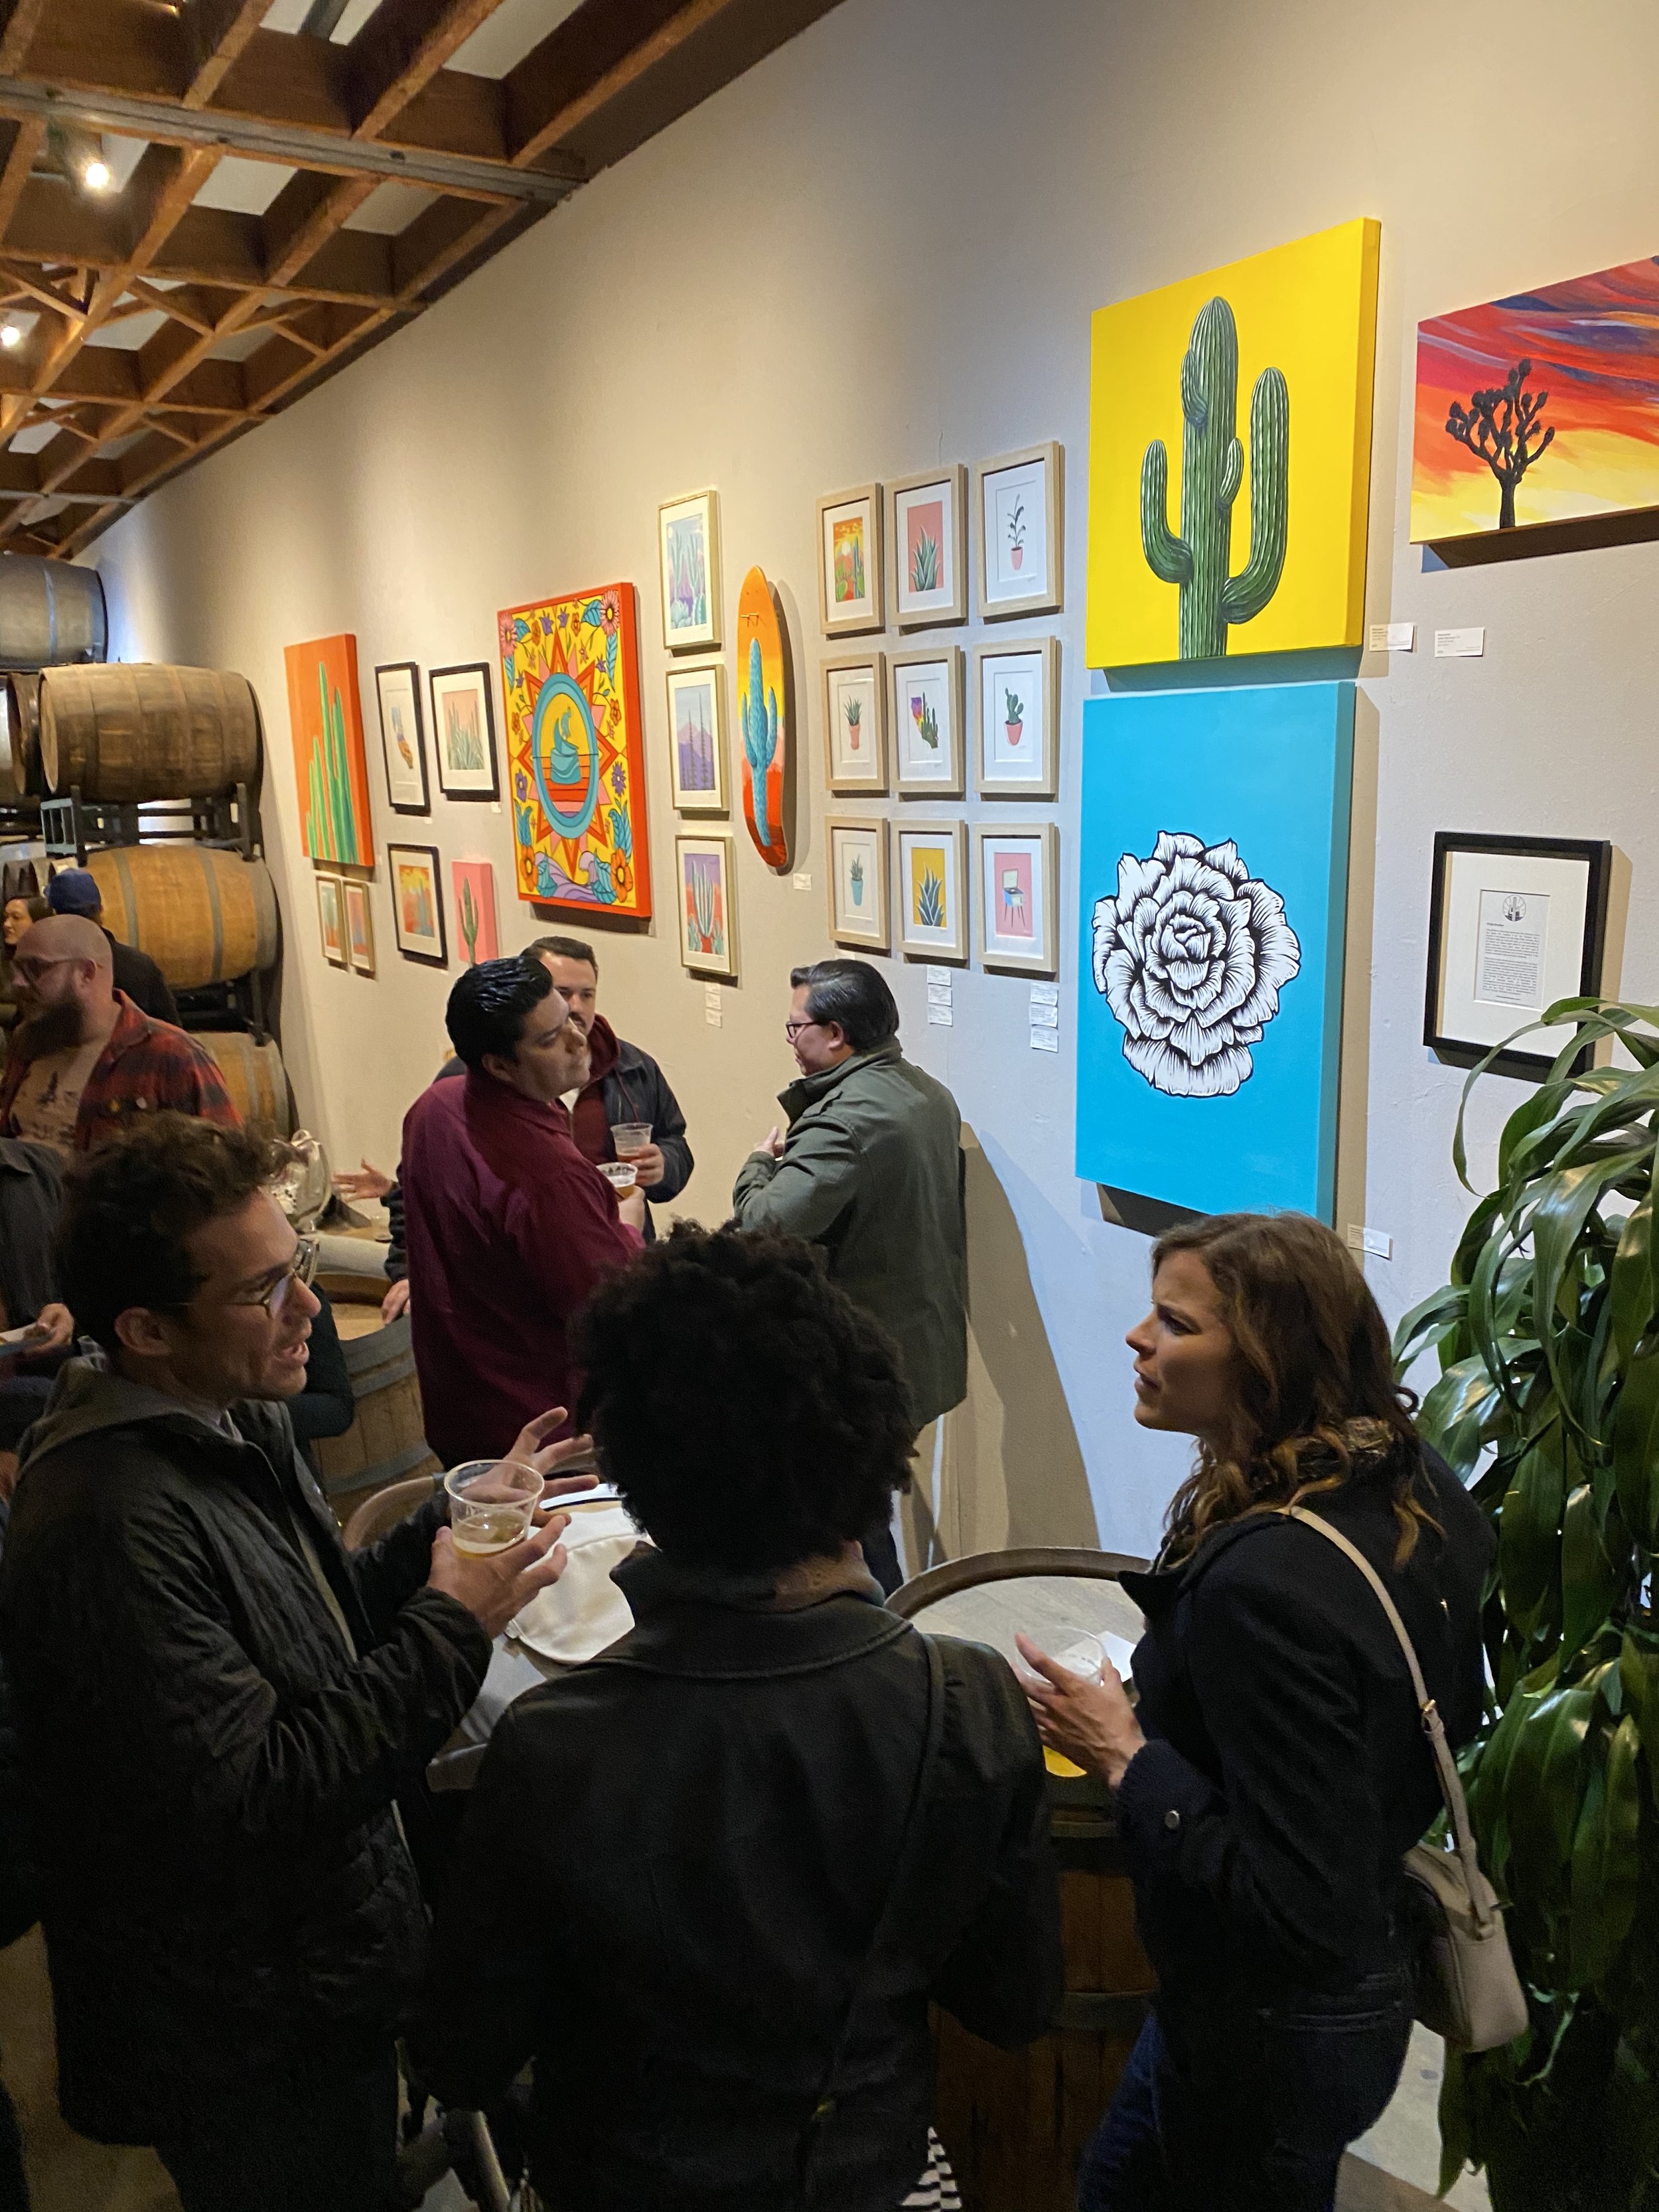
The past two years have been a blur. It’s crazy how time can fly by, especially during a pandemic. I’ve done a lot over the last two years — like having a baby girl and creating an online course — but one thing that I forgot to keep up with is my blog writing. I kept staring at my blog post from Winter 2019, thinking wow, that was a long time ago. Why haven’t I blogged? I don’t really know why, but I think it’s related to Covid. I also think time got the best of me. I didn’t really know what to post. I felt like I kept waiting for the next show or event to happen. Then, I remembered that I had two events that happened right before March 2020, so I thought I’d share some photos from one of those nights. Hopefully, sharing these photos gets me back into my blog sharing.
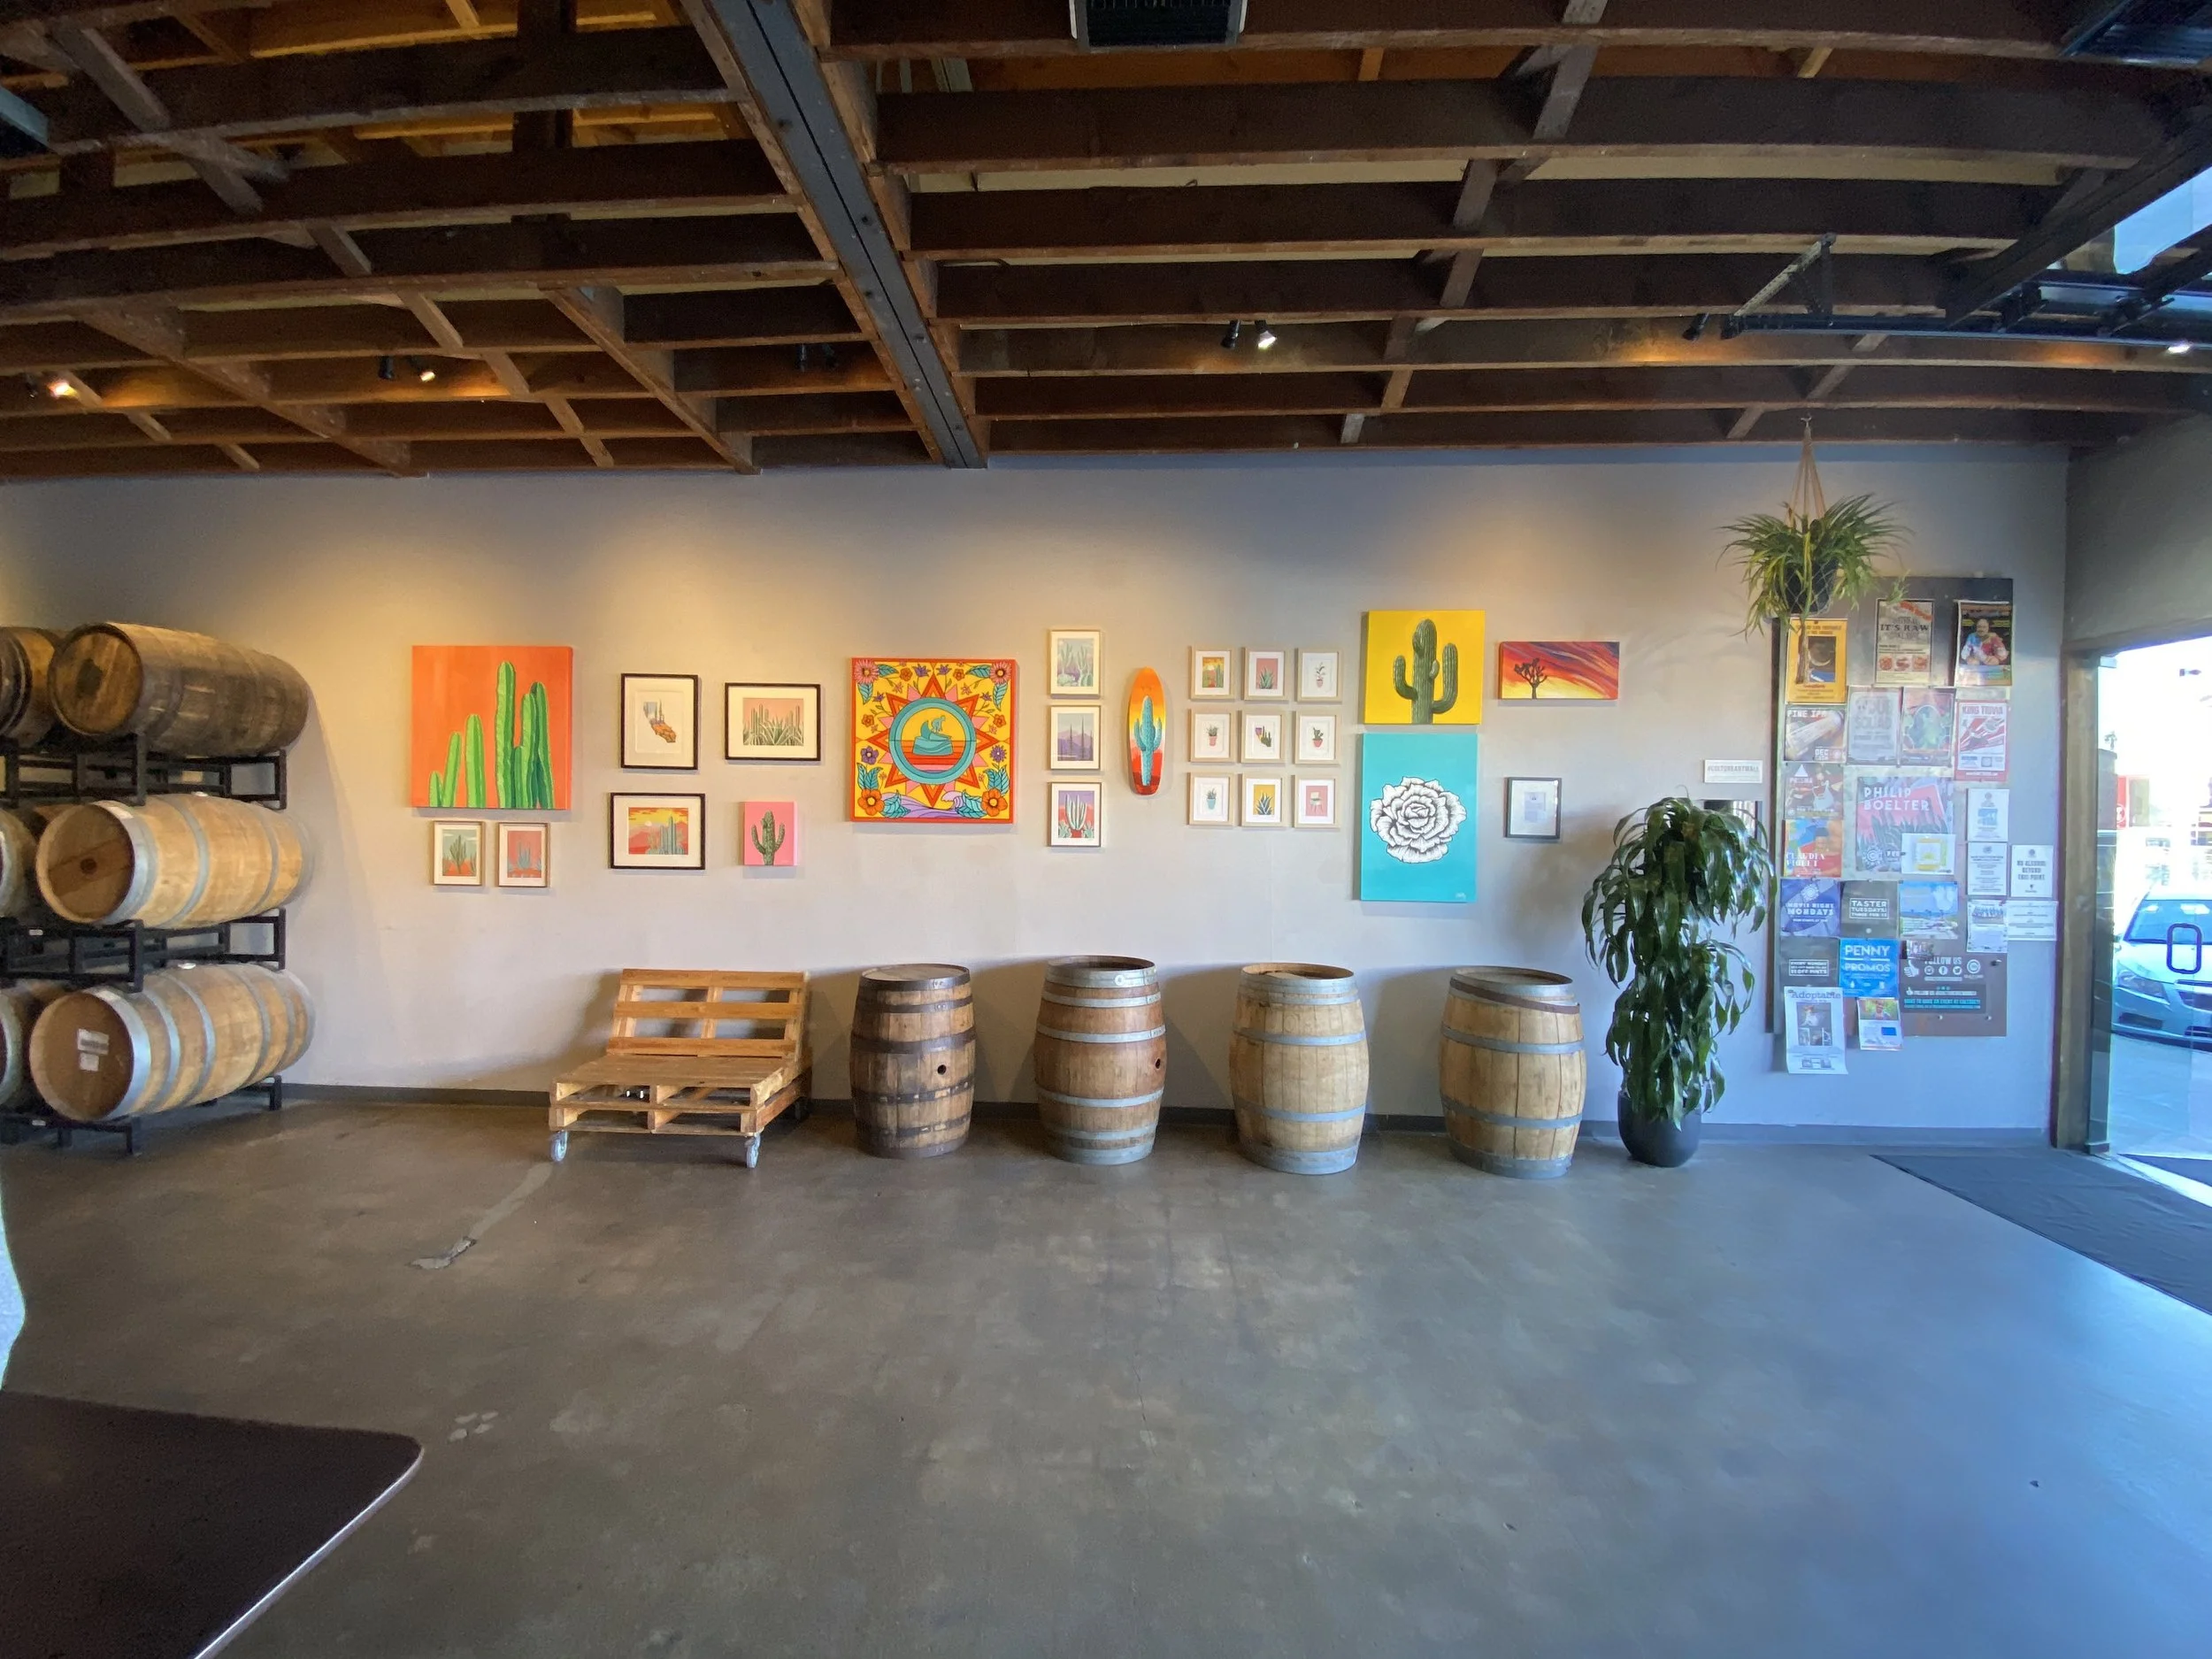
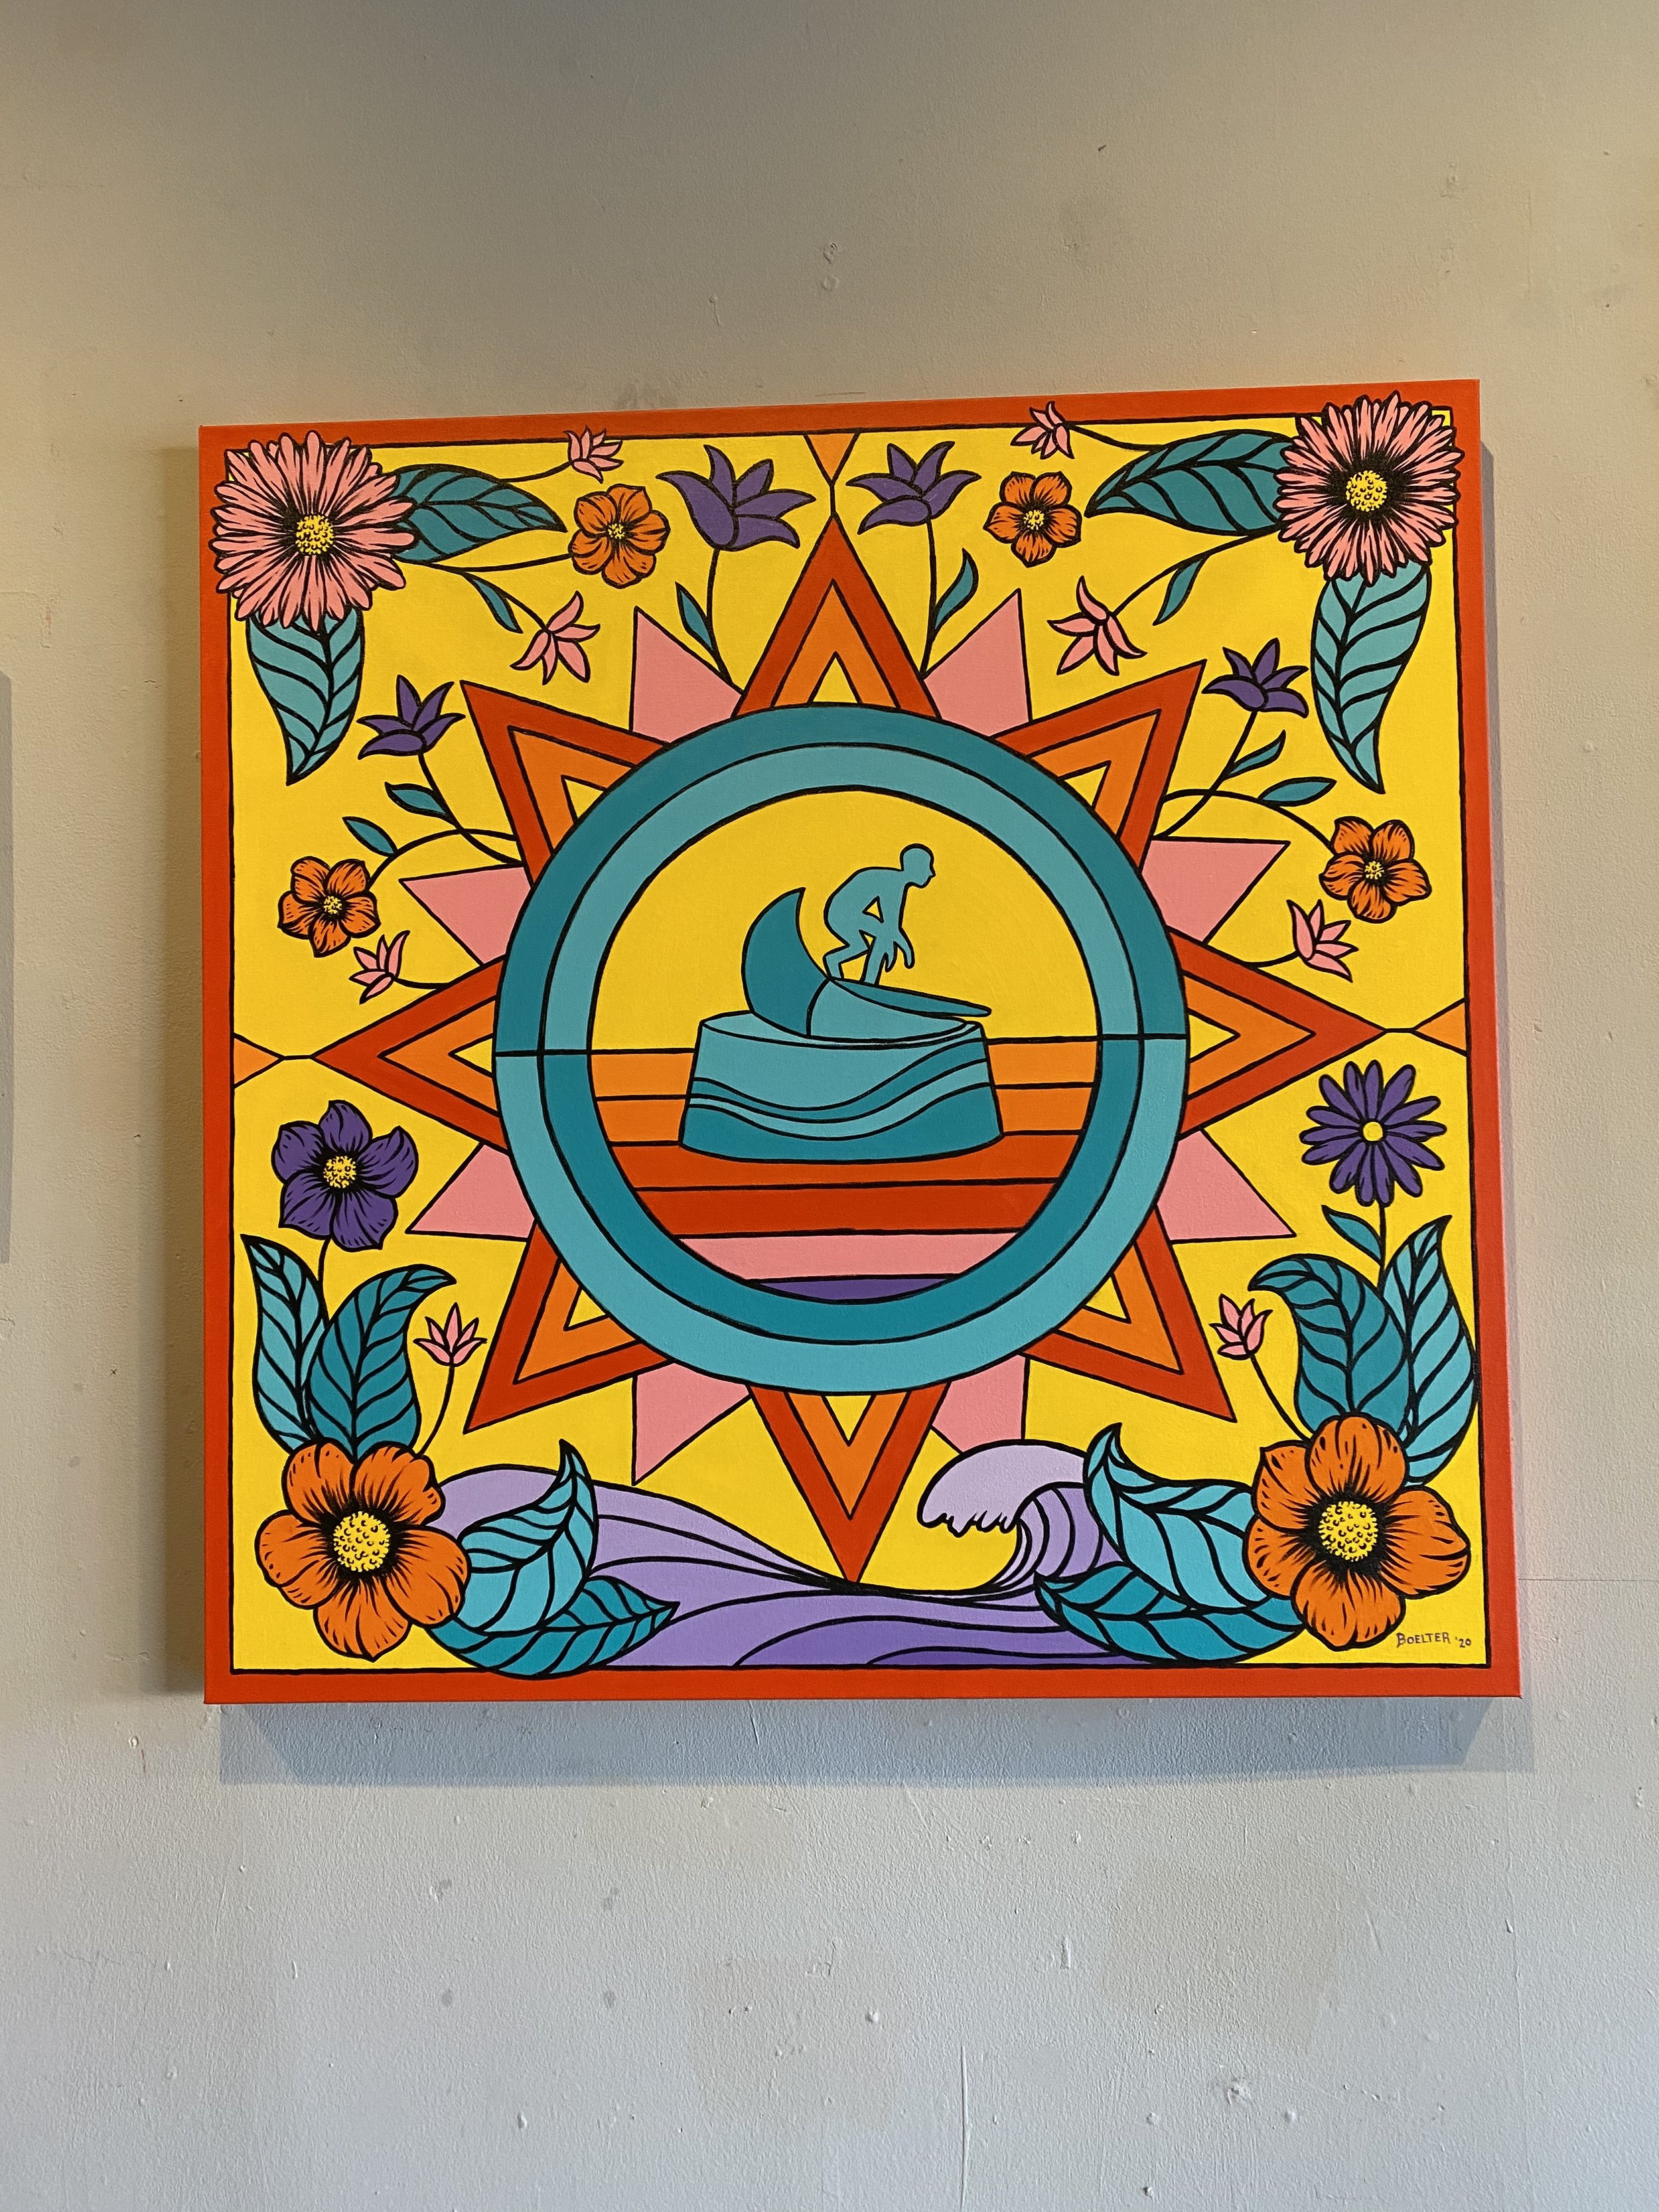
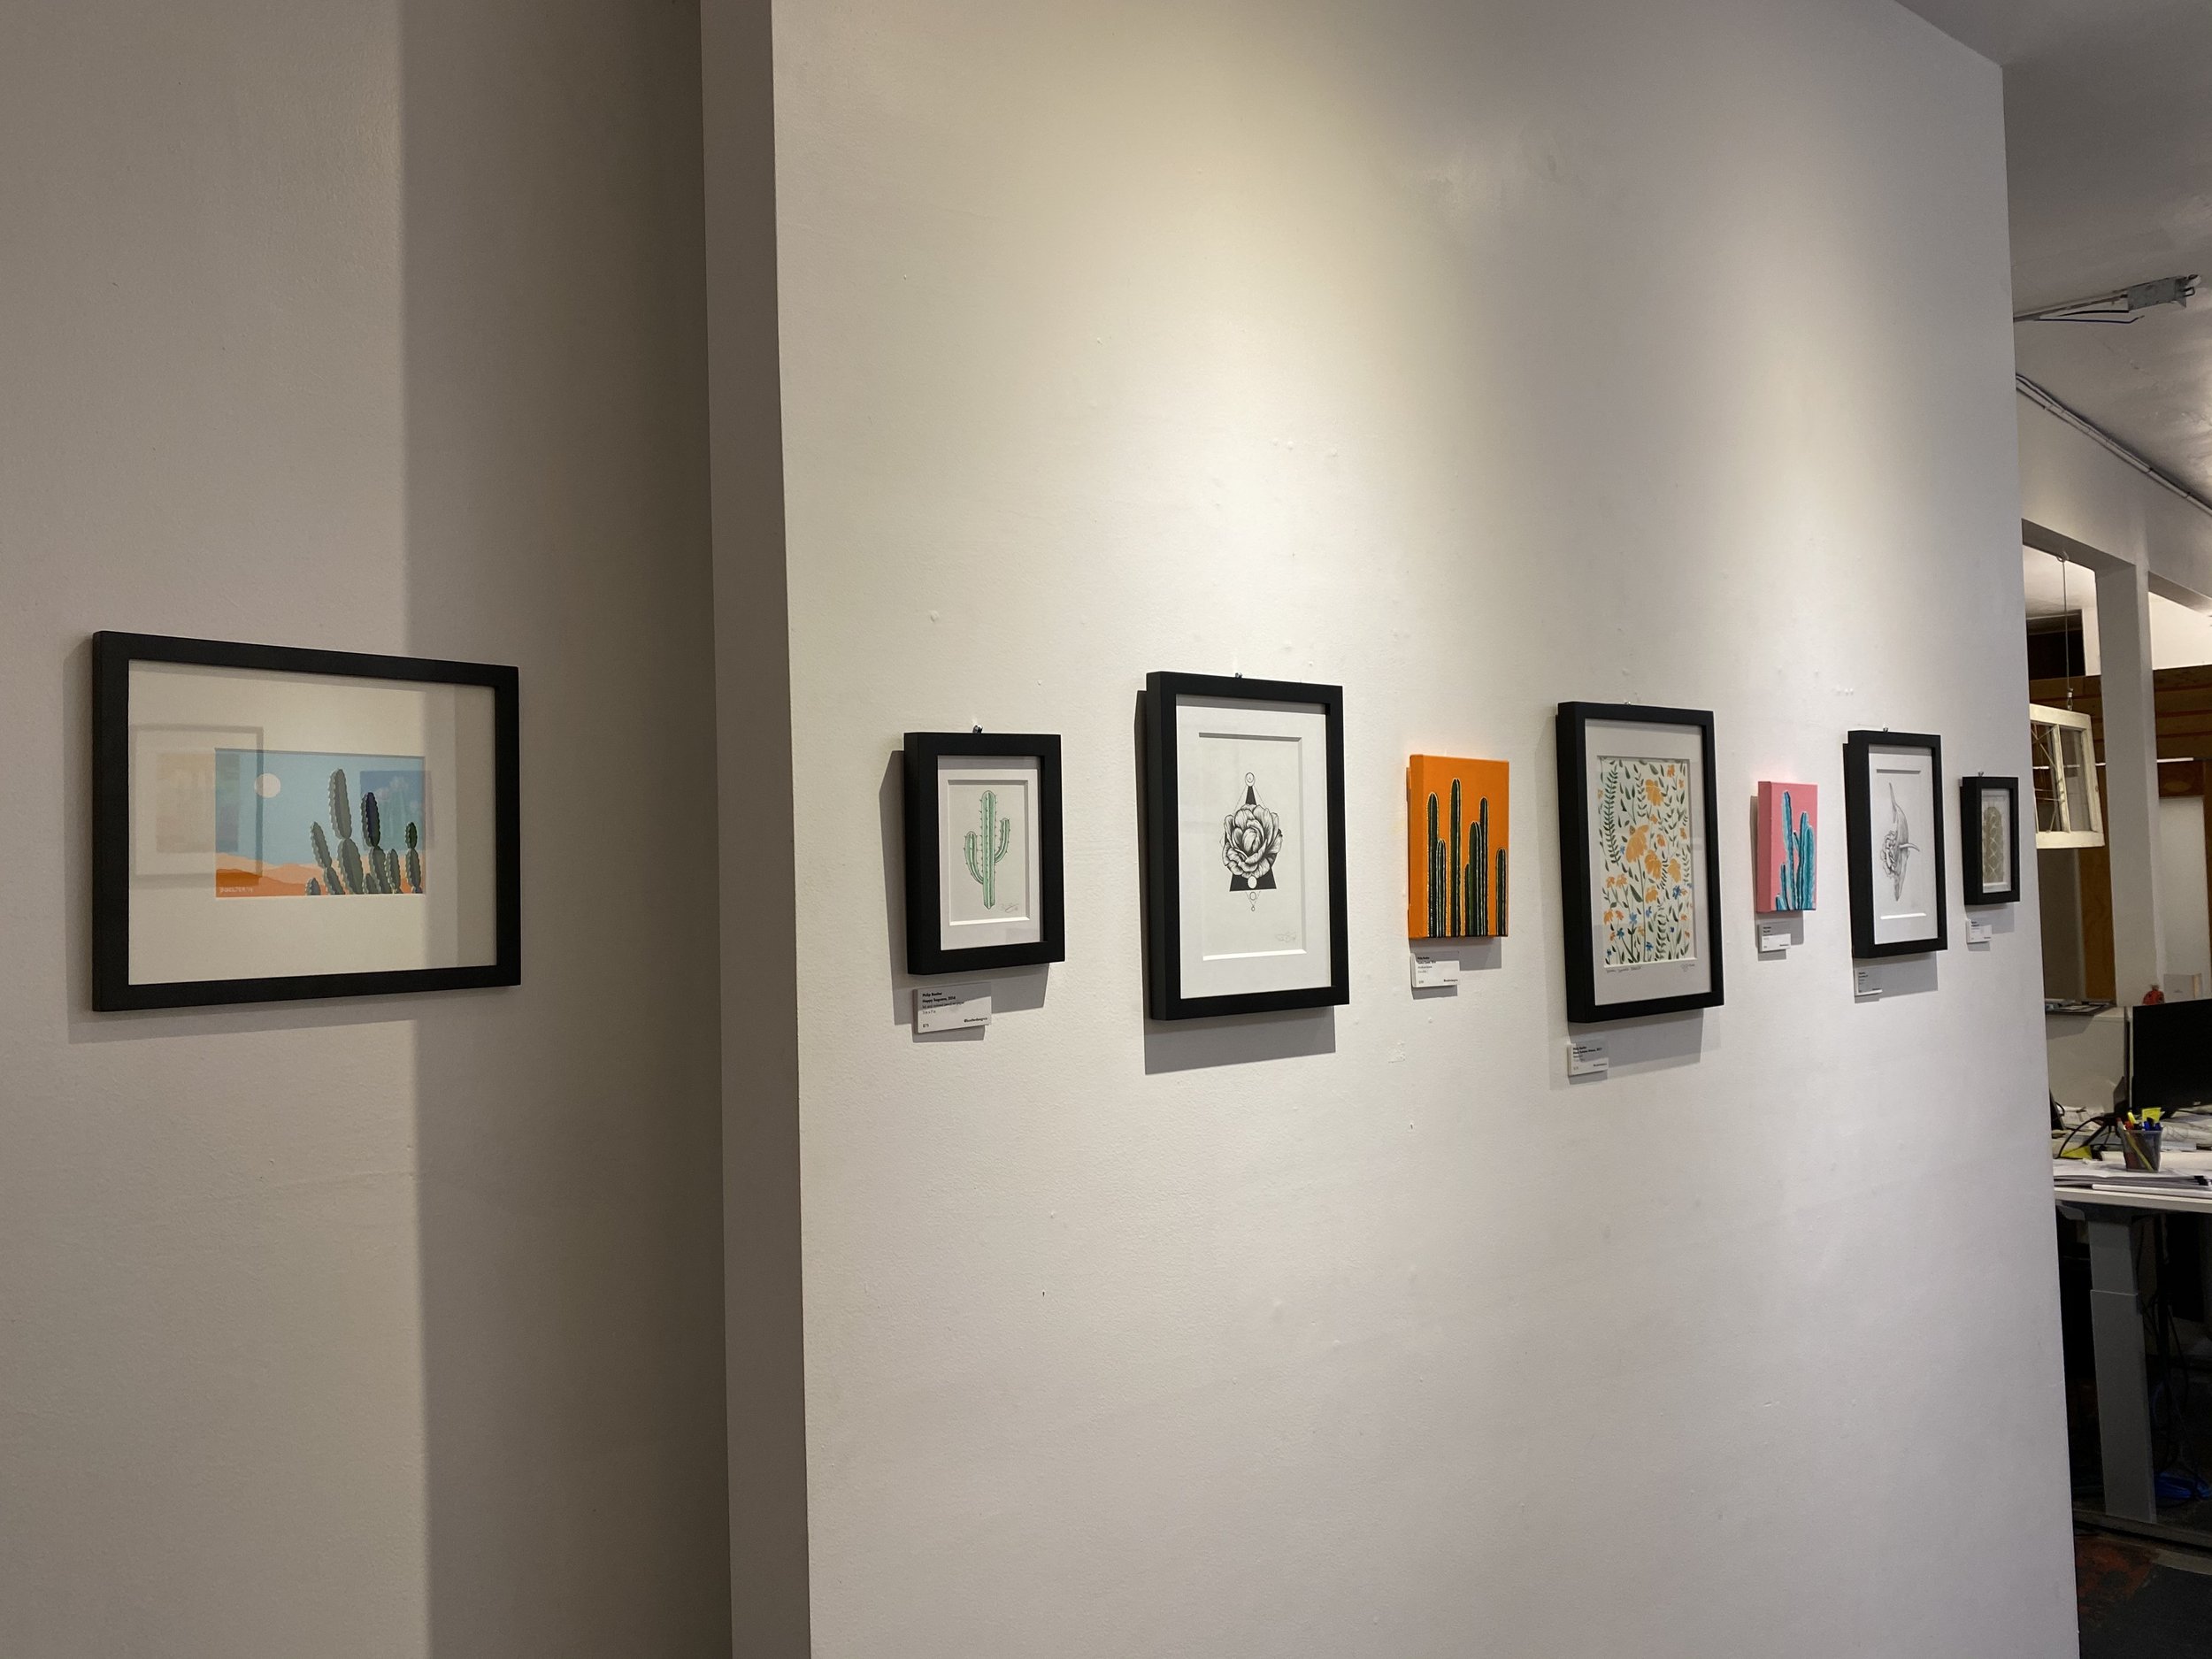
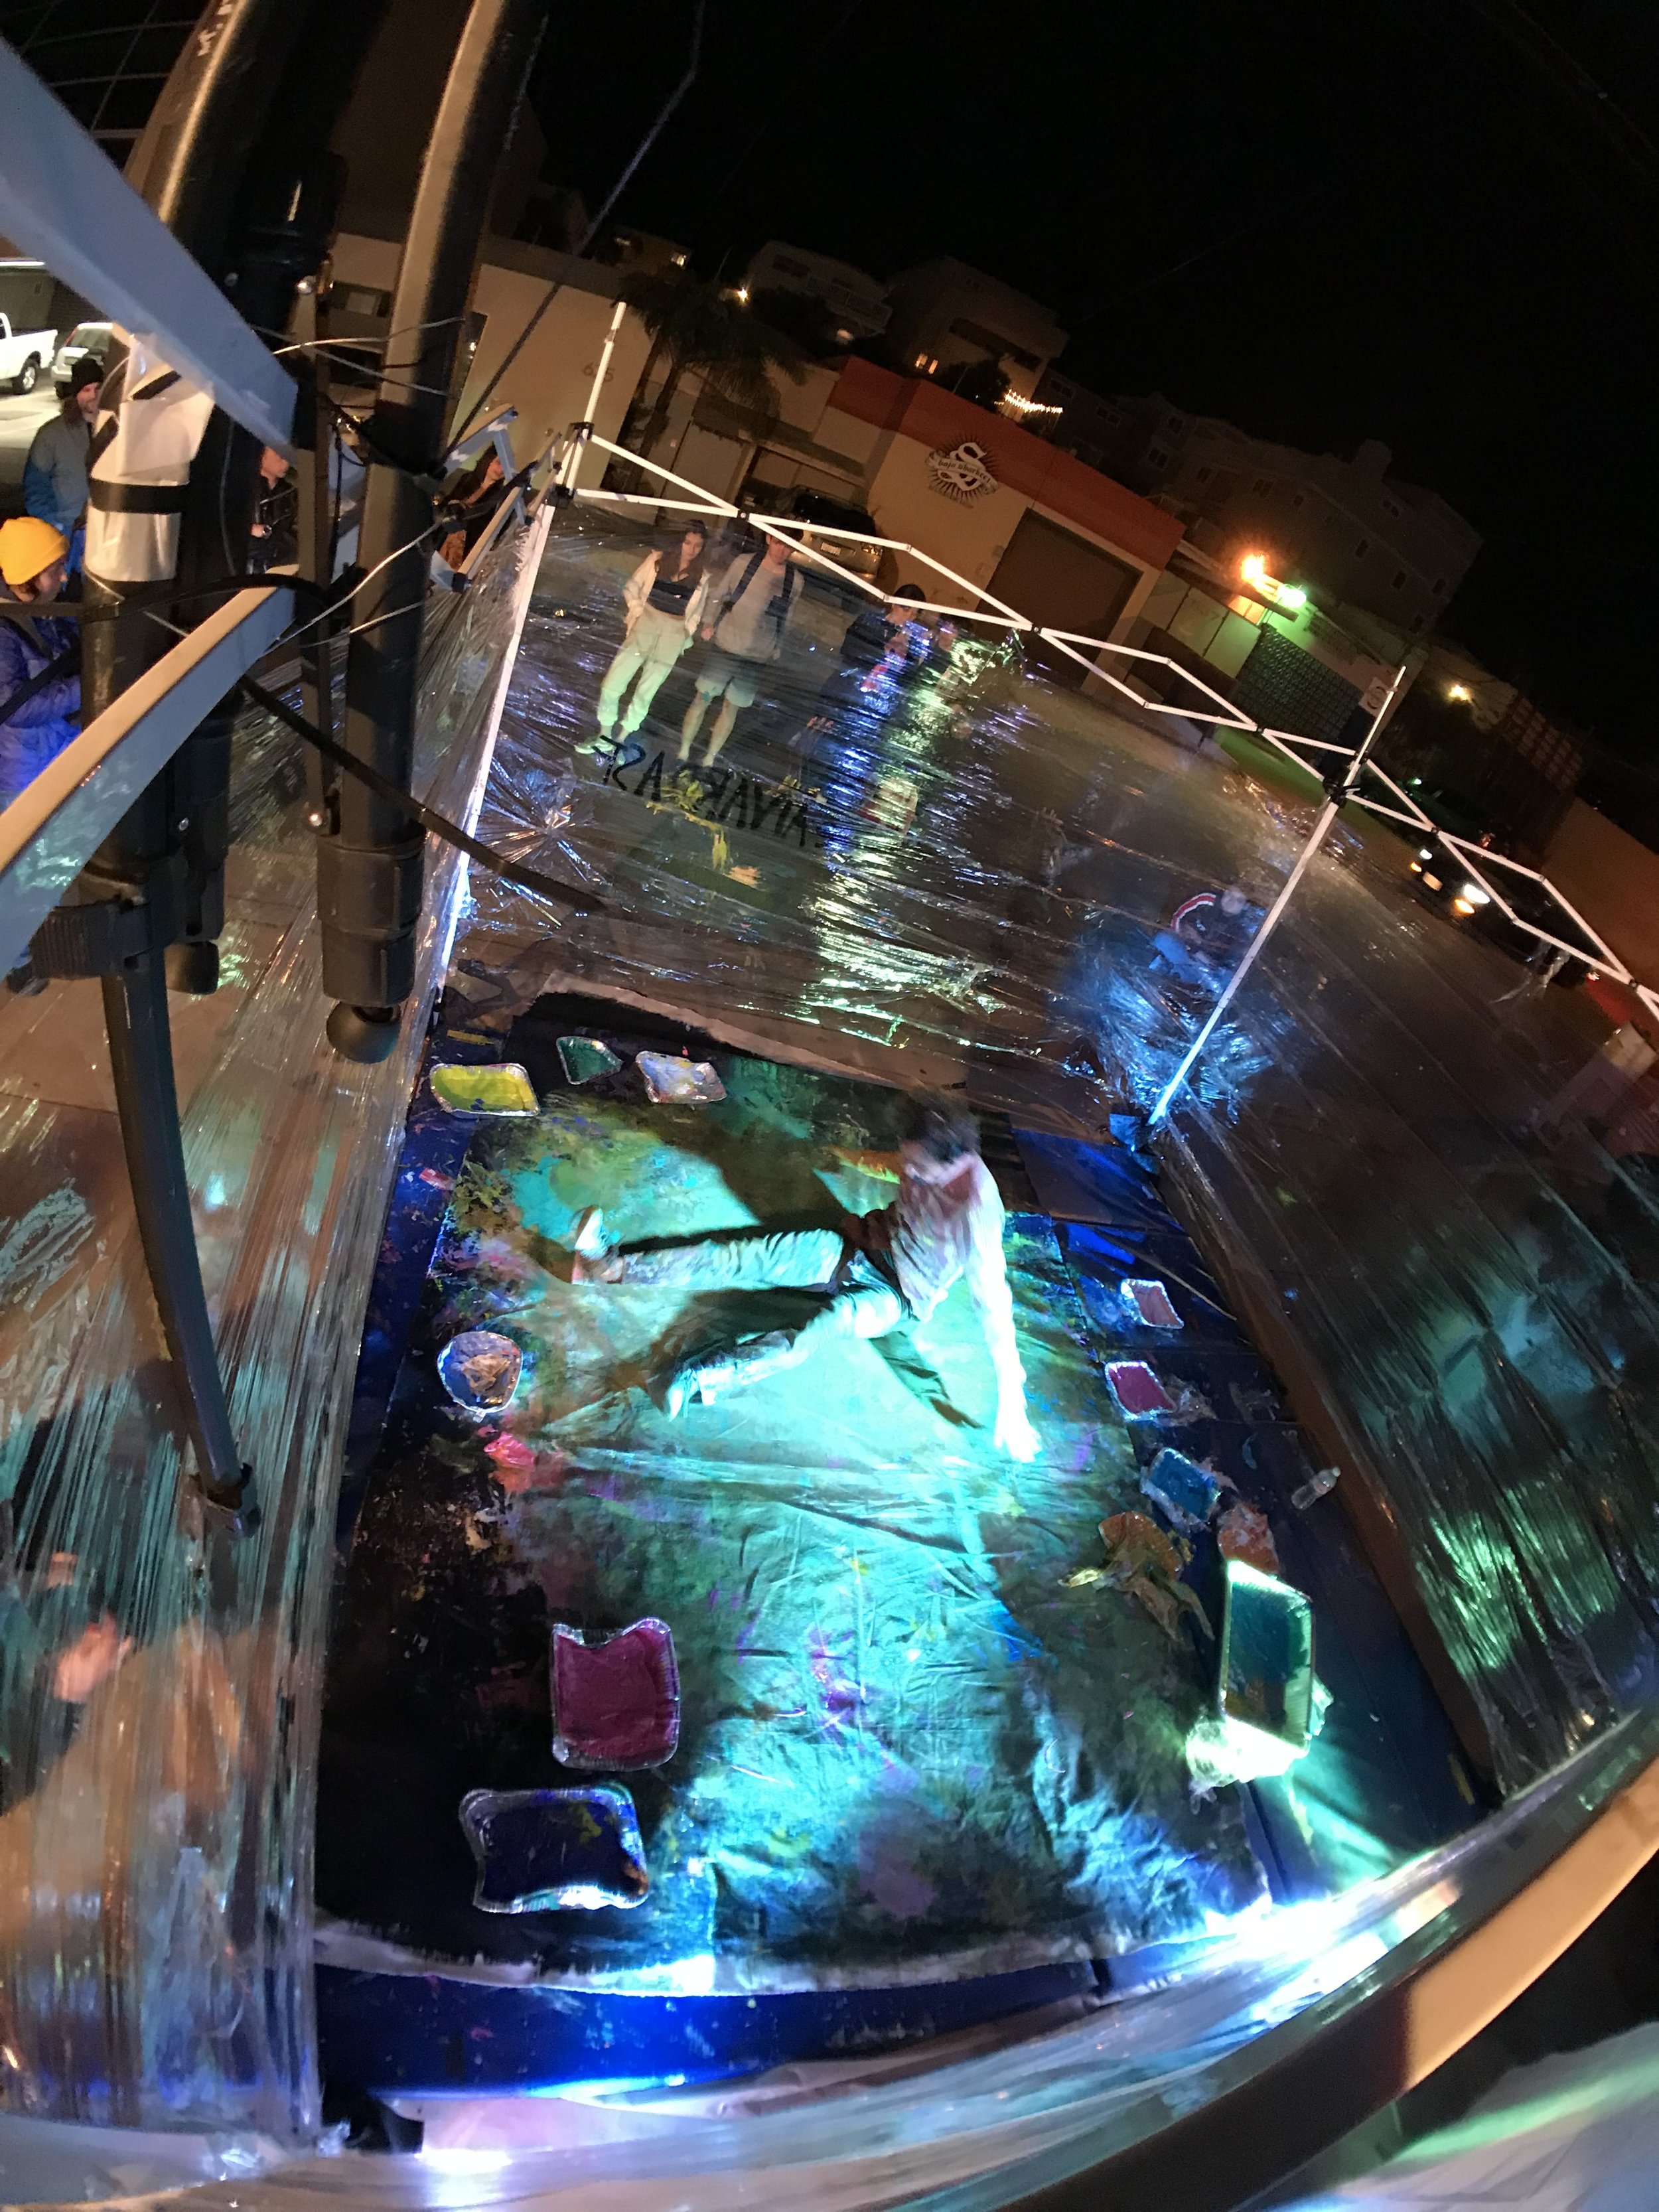
These photos are from my solo show at Culture Brewing Co. in San Diego, CA in February 2020.
I look forward to having some shows in the future… and maybe blog a bit more.
-Philip


The Difference Between Acryla and Traditional Gouache Paint
First, what is gouache? Gouache is that highly-pigmented, fluid-like medium you see in all my videos. I’ve grown to love gouache due to its vibrant colors like acrylics and its similarities to watercolor. If you love watercolor but want it as pigmented as acrylic, then you’ll love gouache. If you shop around for gouache, you’ll see tons of brands, but you’ll notice some say Acryla Gouache, Artists Gouache, Designers Gouache, or Traditional Gouache. I think this can get really confusing to anyone that is simply interested in getting started with gouache. You might even have the thoughts like — What type do I get? What is the best for me? What’s the difference between these? Simply, traditional gouache is also considered designers and artists gouache. Acryla is completely different than traditional. When you shop for gouache, the two styles of gouache you need to consider are acryla and traditional.
What is the difference between acryla and traditional gouache? Both still have characteristics that I mentioned before — They are highly pigmented, opaque, and fluid-like. These paints are typically packed full of pigment to give vibrant results similarly to acrylic paint but are applied with a mixture of water similar to watercolor. Unlike many watercolors, once you paint with a traditional gouache, you can reactivate the gouache with water. This can help with any mistakes that might be made because you can reactivate an area, but also it also can be more difficult as you begin to add layers. The best part about gouache is that you can layer white paint. If you’re not into the thought of reactivating your gouache paint, then you might want to use acryla gouache. Acryla gouache has an acrylic binder which makes the paint dry like acrylic paint. You won’t be able to reactive the paint, which can make adding layers much easier. The great characteristic about acryla gouache is that it doesn’t leave the shine as acrylics do. Acryla gouache retains its matte look just like traditional gouache.
Which one is best for you — Acryla or Traditional? Need more information, watch my video below to learn more and see the difference in action.
You can shop my personal art supply list and picks on Amazon. *As an Amazon Associate I earn from qualifying purchases.
10 Things to Buy an Artist for the Holidays

1. Winsor & Newton Series 7 Brushes

2. Hot Pressed Watercolor Paper
3. Holbein Gouache Paint

4. Staedtler Pigment Liner Pens

5. Posca Paint Pens

6. Art Bins

7. Watercolor by Daniel Smith

8. Pencil and Pen Wrap

9. Golden Acrylics

10. Art Prints from Boelter Design Co.

For more ideas, check out my curated amazon art supplies list.
As an Amazon Associate I earn from qualifying purchases.
5 Ways to Overcome and Use Creative Block Effectively

What Is Creative Block?
Creative block is when you feel like you are in a rut with your art. You can be outputting art regularly and one day just feels like you’re stuck. It’s like you forgot how to create art and feel bored with what you’re creating. It’s a feeling of total loss while everyone else around you is excited about creating wonderful works of art. You feel like you lost an ability. A sense of dissatisfaction with what you create or what you think you can create. These feelings are okay as an artist. It’s okay because it happens to us all. Picasso, Matisse, Pollack. — All of these artists have most likely gone through a creative block which impacted the work they created. You can tell because their work changed over their span of life. Picasso went from having a blue period to cubism. Matisse went from colorful still life and Fauvism to modern pieces that only used one color. Pollock went from abstract expressionism to the more infamous contemporary drip paintings he is now known for. We tend to think the creative block is a negative, but maybe we need to shine a positive light and begin thinking it’s a way our art is about to evolve.
Helpful Ways To Overcome & Use Creative Block Effectively
1. Start sketching and doodling in a personal sketchbook
Keeping a personal sketchbook by your side is a great way to keep your pencil active while your brain or heart isn’t. The first thing I pick up when I have creative block is my sketchbook. I don’t have to show my work to anyone but myself, and I don’t have to worry about what I put down on that paper. It can be a doodle, a quick sketch, a still life. It’s freedom from critique, and I can be free to go back to basics with just drawing shapes. I’m also able to pick up other mediums like different colored pens, inks, pencils, pastels, charcoal, or even lay down some collage. Not only do you leave the criticism aside, but a sketchbook is the best way to get your creativity sparked because you forget about the cost of paper. A sketchbook is a cheaper source to free your mind from using an expensive piece of canvas or paper. I can’t tell you how many times I’ve looked at a blank canvas and felt lost on what to create. Sometimes a new canvas or expensive piece of watercolor paper can create my creative block because I worry about the cost too much. When this happens, find your sketchbook. It might lead to your next great painting.

Desert Botanical Garden, 1201 N Galvin Pkwy, Phoenix, AZ 85008
2. Visit museums and gardens for inspiration
Creative block can be a great excuse to get yourself outdoors and explore. Removing yourself from your creative space and studio can help ease your mind from thinking about the need to create. A great place to visit is the museum. I like to visit a museum to find inspiration and educate myself on other artists, color, imagery, mediums, and more. It’s a good way to keep your brain actively thinking about your art without the stress of creating at the moment. Being outdoors is a good way to find inspiration. Everywhere you look is color and shape. You can look at a building or landscape and think about what you're looking at to see if anything sparks your creativity. Switch it up and visit a botanical garden. Botanical gardens are therapeutic and relaxing while being very inspiring with loads of color, landscape, and shapes. While in Phoenix, Arizona, I visited the Desert Botanical Garden and left with loads of pictures and inspiration. I went home and painted tons of cacti and landscapes. Whenever I feel like I get a bit of creative block coming, I look back in my photo album from that trip and it gets me excited to paint.
3. Take a trip to the art store and seek out new mediums/materials
Not only will visiting the art store spark some creativity but coming home with a bunch of new supplies will get you excited to create. If you’re still feeling lost while in the art store, you can always pick up a new medium or paper product. As artists, we have so many different mediums at our disposal. Last year, I went through a creative block while I was painting with watercolors. I had seen some artists using gouache as a medium and I really wanted to give it a try. I was a bit torn about spending more money on a new medium but I’m so happy I did. I have found a new medium that I’m in love with, and if I never gave it a shot I think I could be going through more cycles of creative block. If you’re unsure what type of medium to switch to, a good source of inspiration can be found on Instagram and Pinterest. You can always look at an artists social page to see what products they tag or click on their website to see if they have a section that lists the products they use. Don’t be shy to ask the artist. I’ve had many people ask me what type of paint I use, and I always tell them. I also have a list of products I use and recommend that you can find here.
Inside my sketchbook. Playing with Line and Colors.
4. Play with line, shape and color
Another good way to battle the creative block is taking a step back and playing with line, shape, and color. It can be fun and less stressful when you allow yourself to play around. Often, even when I don’t have a creative block, I like to sit down and paint different colors on paper. This not only helps me see what my paint will look like when it’s dry but also gives me a sense of what colors look great next to each other. This might set you up with a future palette that you’ll want to try out with an old drawing or painting. Drawing senseless shapes and lines are also a good way to let your mind be at ease. Try drawing shapes and lines on a piece of paper while allowing your mind to be stress-free. Don’t think about the lines and shapes you create. After it dries, go back and use colors to fill the spaces. Another way to ease your mind on creating but staying active is by creating a color wheel. You can create a variety of color wheels using different colors you might have. Try creating a color wheel with colored pencils, gouache paints, acrylics, oils, or watercolors. All of these color wheels will help you in the future when you find that boost back into creating.
5. Take a break
Sometimes, you just need to take a break altogether. It’s okay to take a break. Especially if it will help you forget that you even have creators block. You’re mind and heart will let you know when it’s time to create again. I once took a year or more off while I was in college, but there was always something within myself that made me have an urge to create a piece of art. Whether it was creating a large collage on canvas or a simple sketch — the urge of creating has never left my mind. While taking a break, spend some time cleaning out your art supplies, organizing your art bins, and archiving old artwork into archival storage boxes. You might come across a pen, a tube of paint, or a piece of paper that will excite you to create something. During your break, take a class such as a cooking class, learn how to give a massage, or try a new workout studio to keep your mind active. I’ve taken mixology classes that are very interactive and you can be creative while creating a drink. These can be fun and less stressful while being creative. While you’re at it, you can invite a friend or have a fun date night.
It’s good to organize and go through art supplies when you have creative block.
Conclusion
I hope these tips on overcoming and using creative block effectively are useful. I know it’s never easy battling creative block, but if you can find any positivity through it, then you might just find a new artistic style or hobby. Whether it’s taking a new class, playing with colors, taking a trip to the art store, or visiting the museum; I hope that you keep your mind actively seeking creativity.
My personal feeling: Recently, I’ve been battling with my own creative block. I have spent time painting different shades of gouache in several shapes to see what palettes I love, I picked up new art supplies (oil paint sticks) at the art store, and started a passion project creating different patterns of color and geometric shapes to create different styles of packaging. These have helped me tremendously and I have felt a new spark of creativity.

"How To Draw & Paint Botanicals + Flowers" The Book!
It’s been a month since I self-published my latest book “How To Draw & Paint Botanicals + Flowers”. I am so grateful with the support from you all and love seeing all your illustrations and paintings that you are creating from the book. It really makes me so happy to see some of you coming into your own as you’ve learned some great techniques.
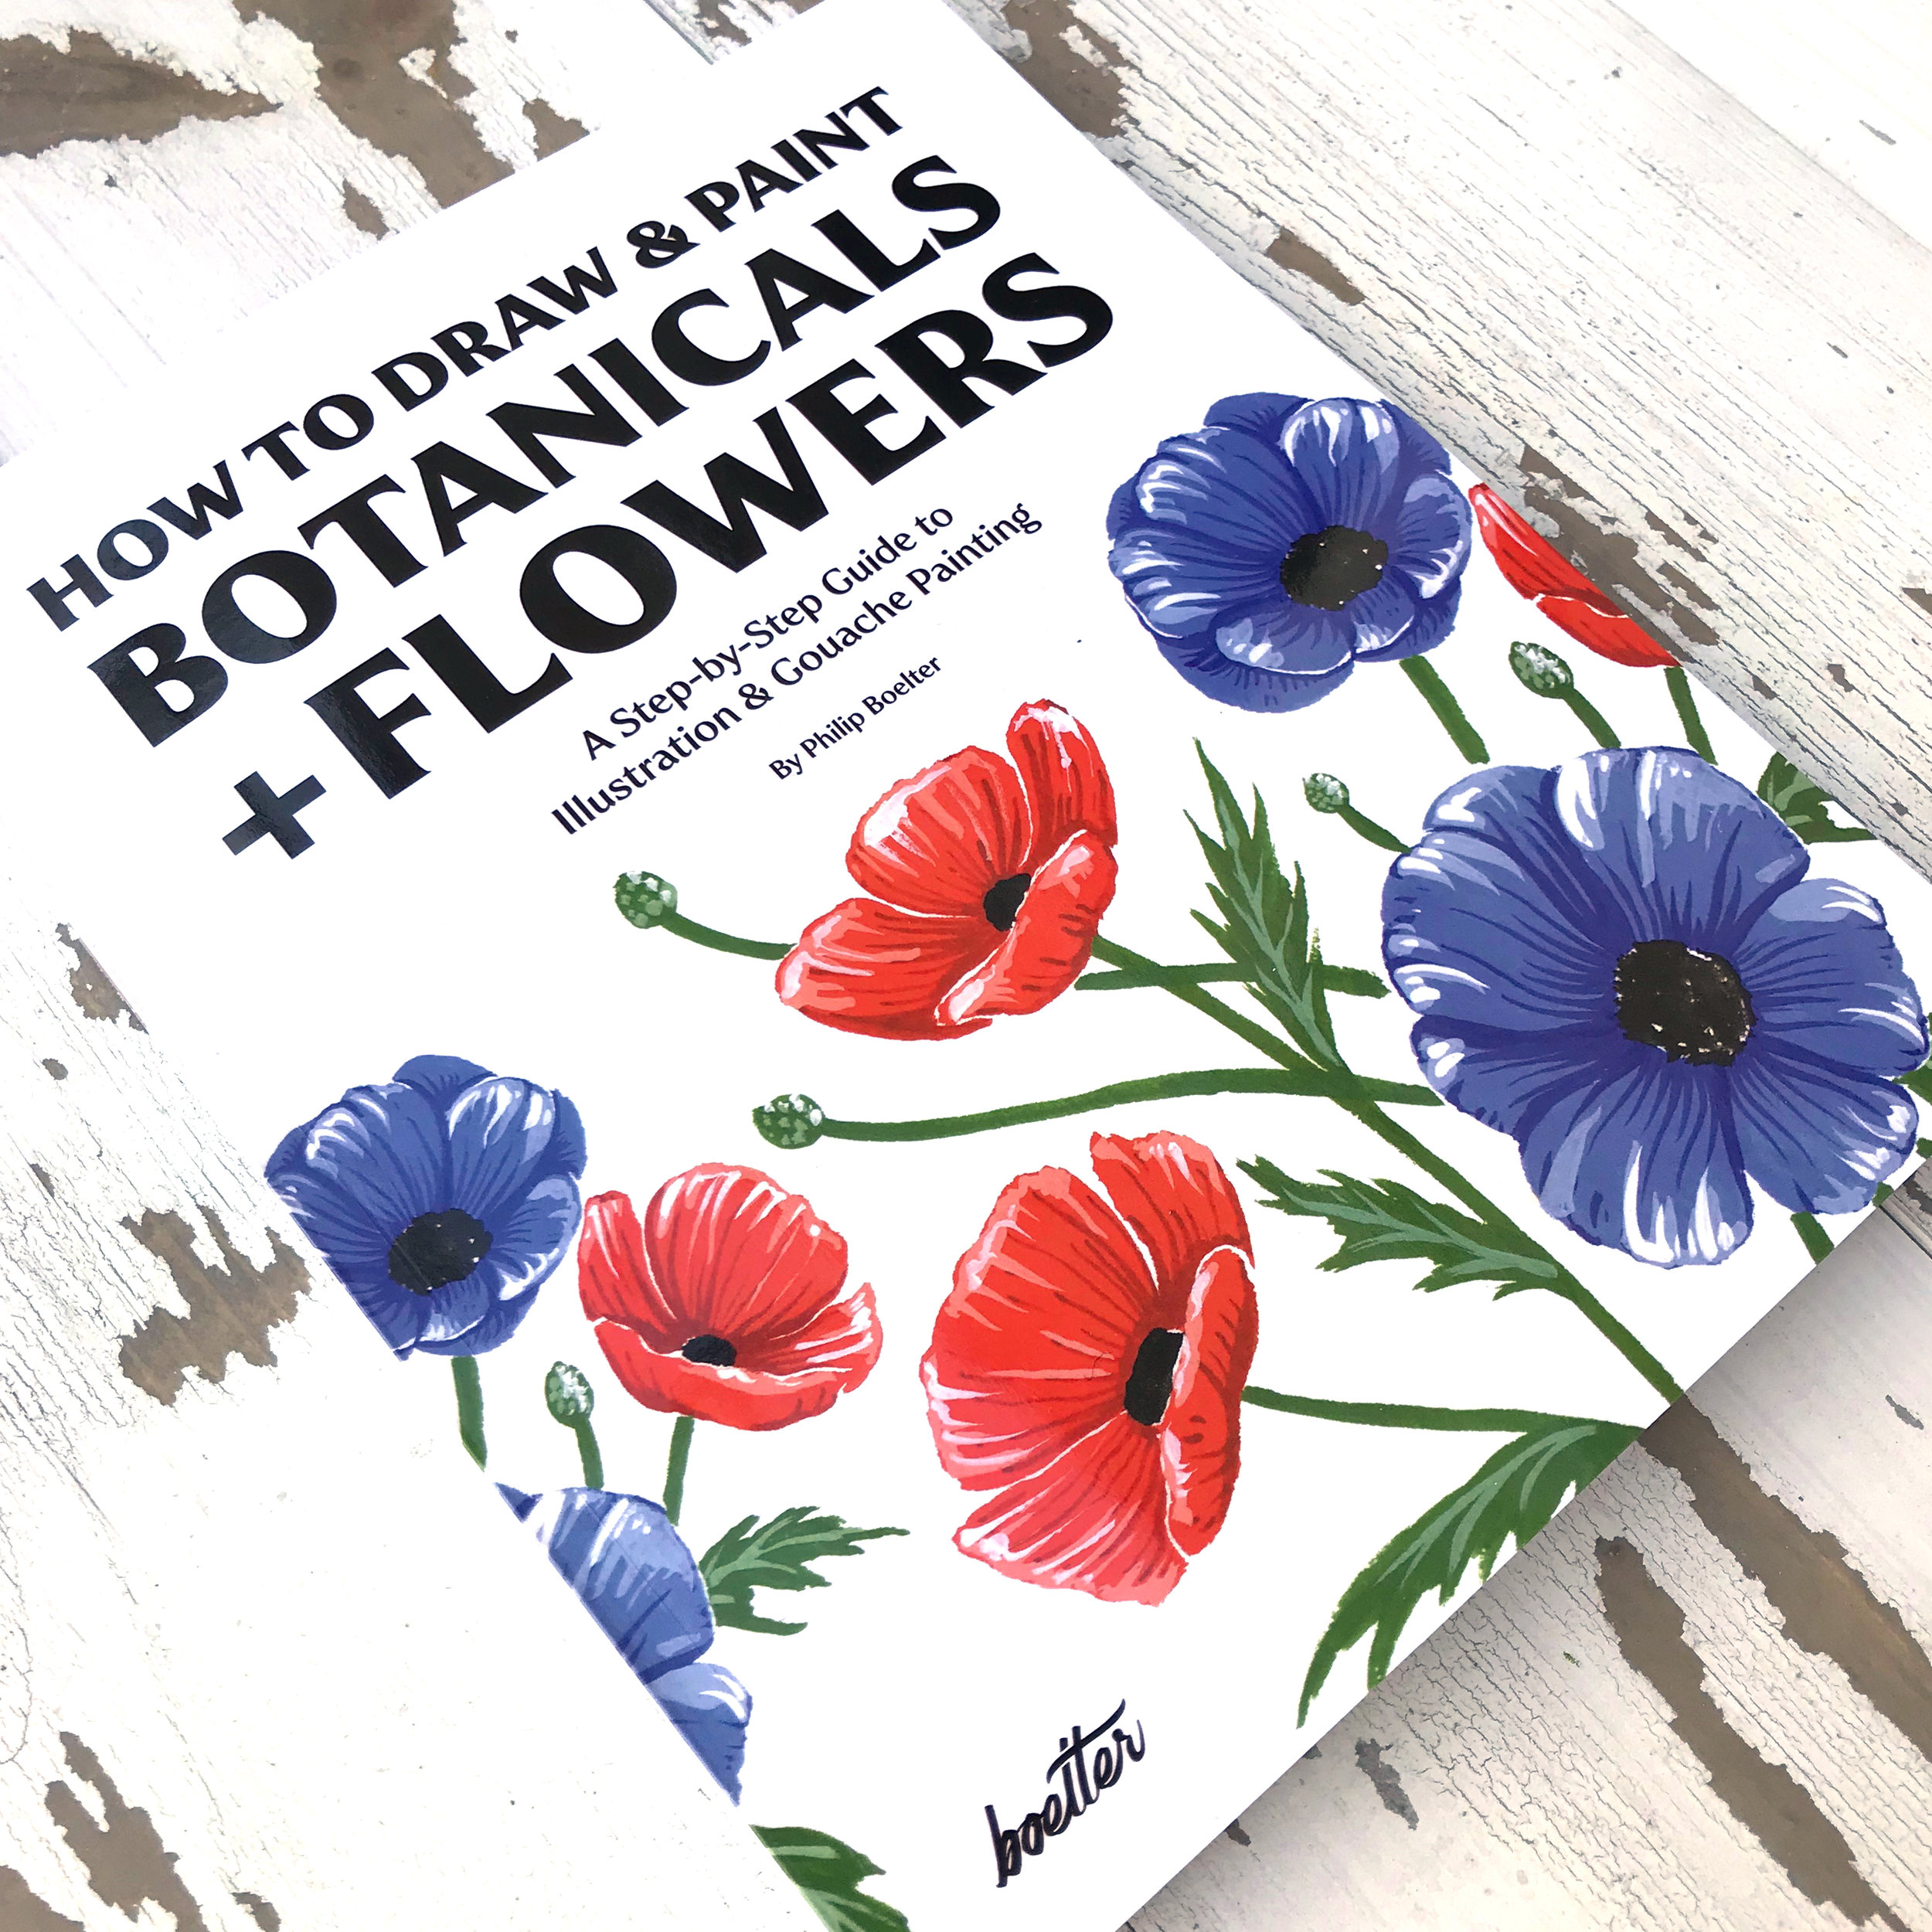
If you haven’t checked out my book, here is a bit more information:
Illustrating and painting come together for all flower and botanical enthusiasts. From whimsical flowers to more detailed botanicals, learn how to draw and paint your favorite florals using gouache and various paint and brush techniques. From illustration to painting, this book helps you understand the full process of creating a floral piece of art. Each floral tutorial begins with a step-by-step guide to illustrating some of your favorite flowers, followed by the step-by-step process of how to paint that same flower. The book has helpful information on how to use gouache as an art medium and information for what type of brushes and paper to use. It is also filled with descriptions on what Philip did to paint the flowers along with some tips to help you on an artistic journey. As you practice drawing and painting through the floral tutorials, you'll begin to understand the process of creating a beautiful piece of floral art.

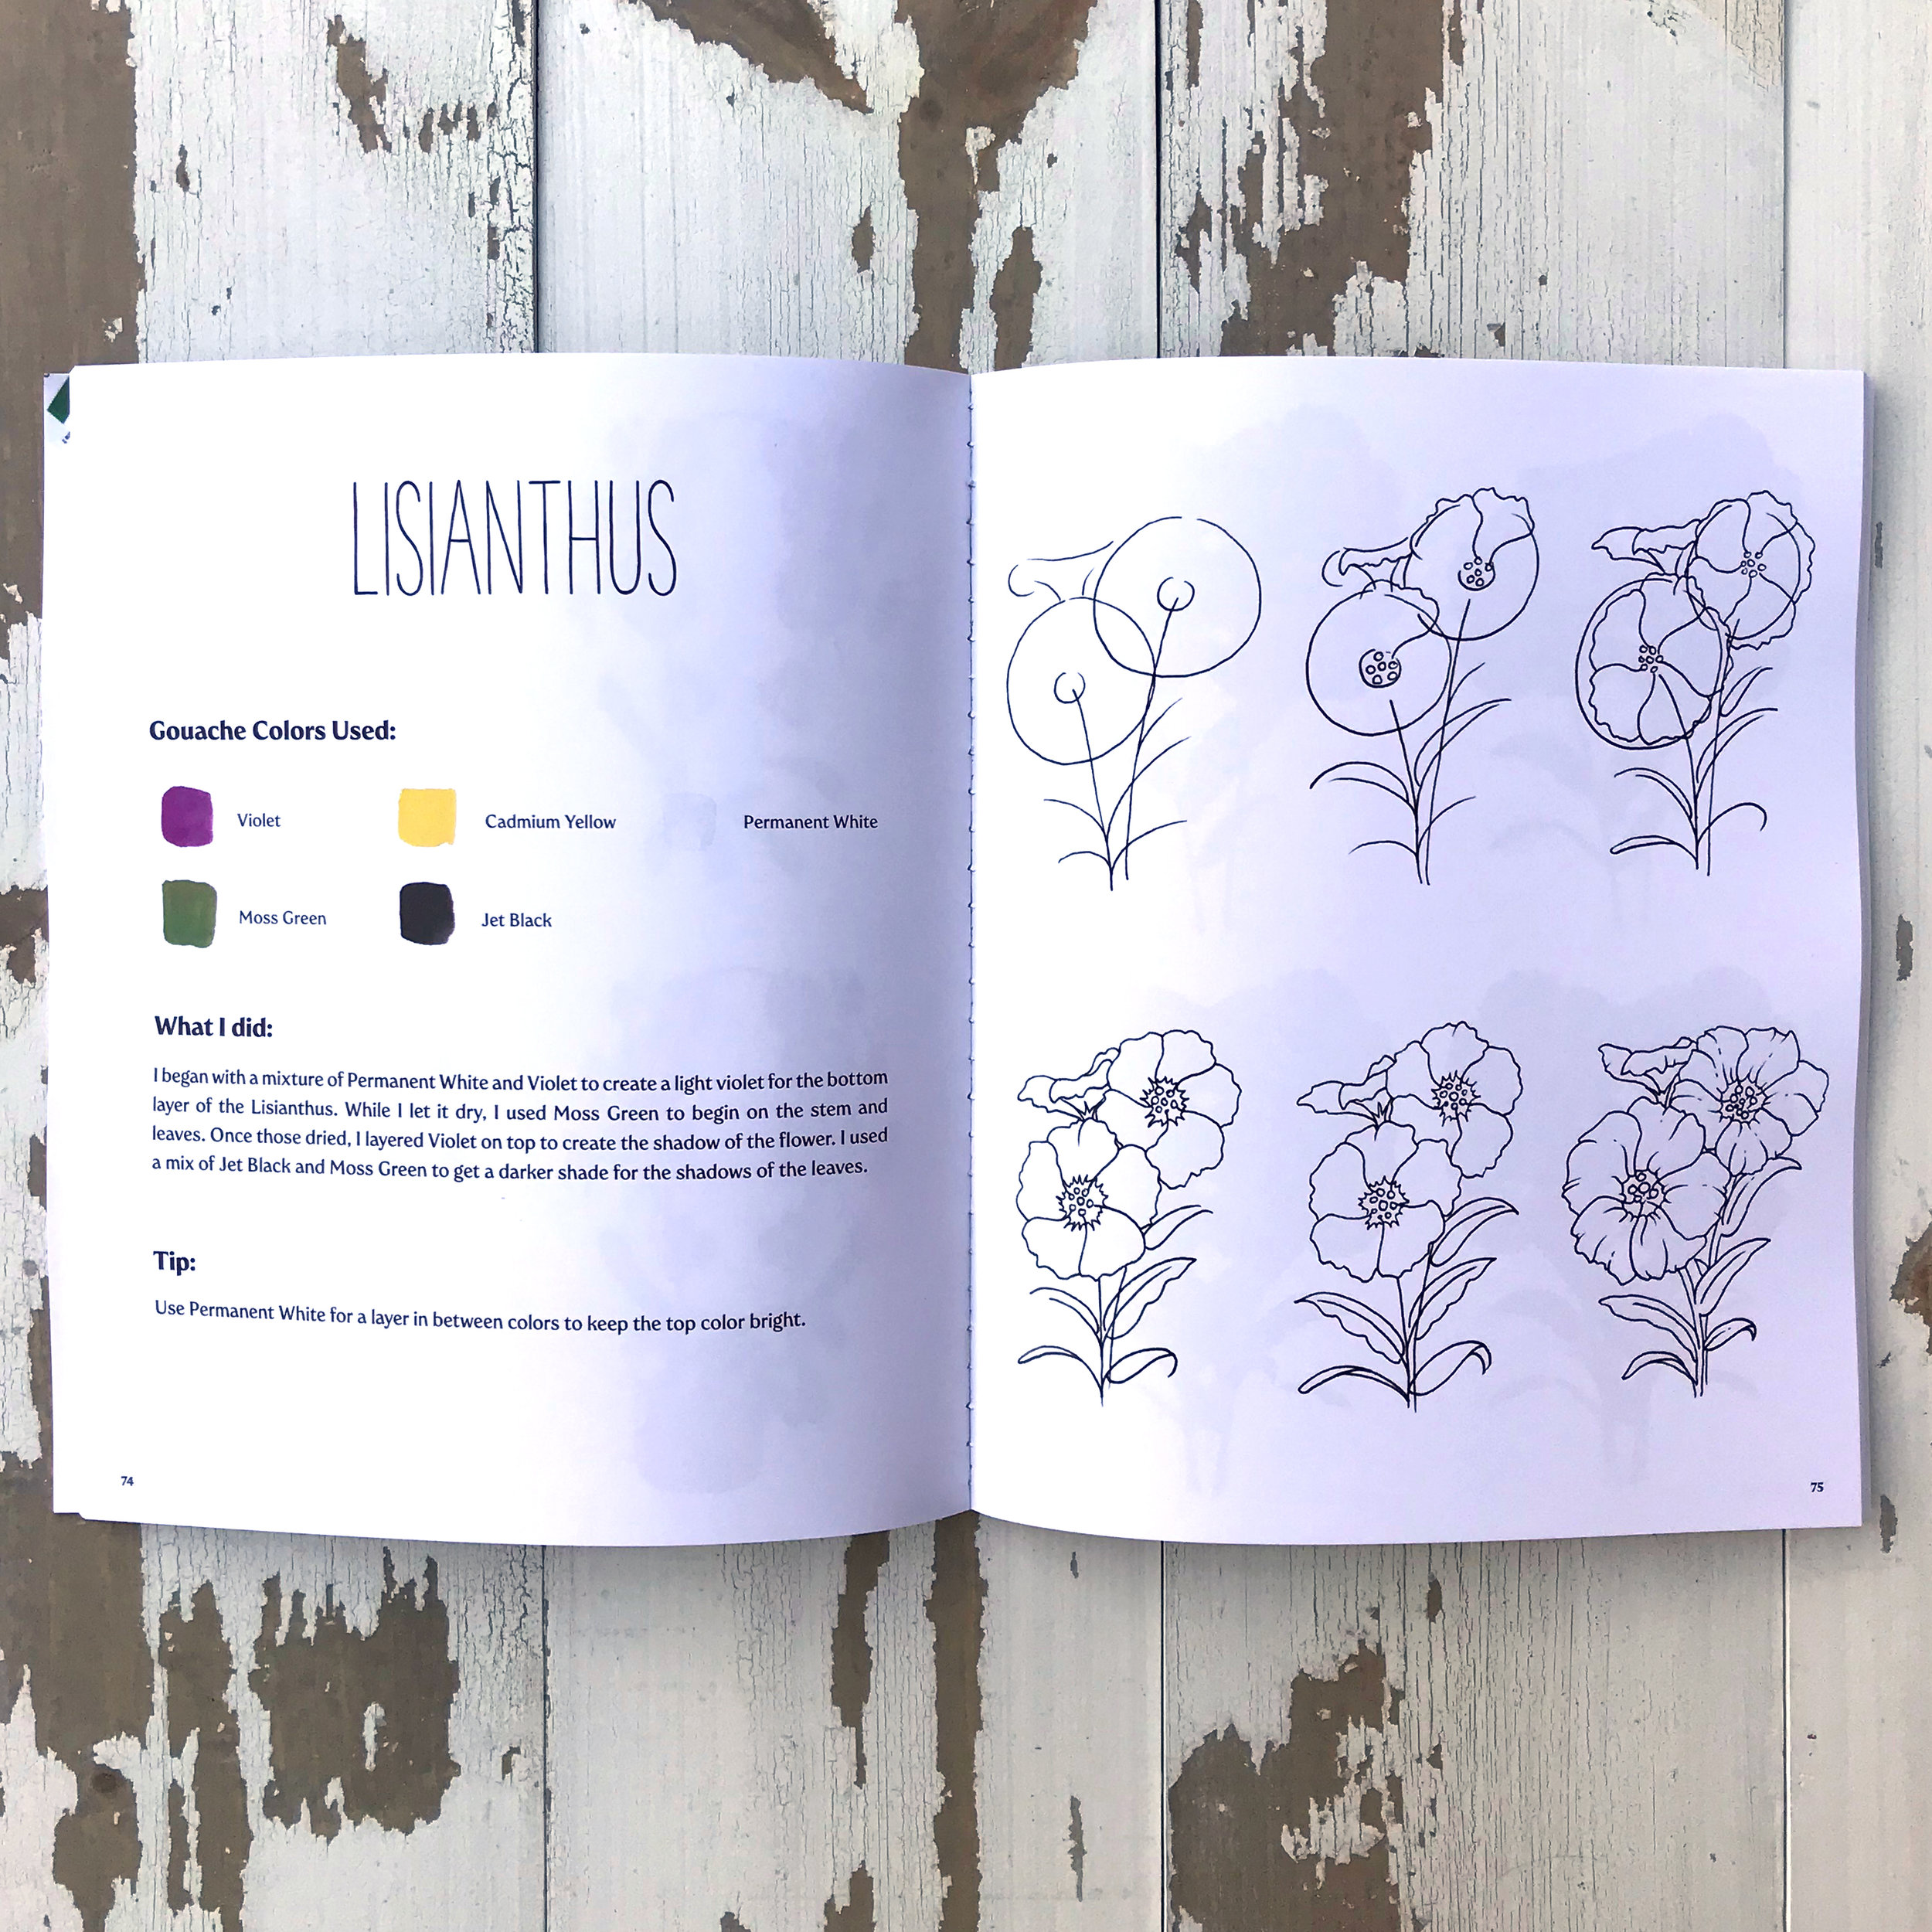

It’s available in paperback and Kindle worldwide on Amazon.com
5 Easy Tips to Help Your Social Media Grow (Instagram)
Here are my five easy everyday tips for success in helping your social media (Instagram) grow.
Follow Similar Accounts: Find other accounts that are similar to your own and follow them. I like to follow highly followed accounts along with accounts similar to mine. For instance, I like to follow huge accounts like Taylor Swift, Tasty, and Magnolia along with all the artist accounts that I like. Be sure to engage with these accounts. Like their posts, comment with them, and try to become their insta-friend. Sometimes, you might just make a buddy out of it. Follow many accounts like your own, but don’t follow too many. You don’t want to follow 5000 accounts just to unfollow 4000 later on. Plus, this looks way too over eager and you can’t possibly keep up with 5000 accounts. I like to follow 500-800. I also look through them every now and then to make sure they are active. If I notice I follow someone that hasn’t posted in almost a year, I’ll unfollow them and look for a new artist that I enjoy to follow.
Engage with Your Audience: Try responding to every comment. The followers that take the time writing comments are the ones that are truly inspired or invested in your account. So, you’ll want to reach out to them and make it known that you appreciate their comment. Be sincere with your response. Fake or weird responses can detract followers. A simple “Thank you very much” can go a long way. Respond to all your emails and direct messages. When a person takes the effort writing an email or direct message, it’s good to respond to all of these messages quickly. Just watch out for the weird ones.
Post Relevant Content Often: Try posting content every 1-3 days. It’s good to create content and keep it spaced out enough that you aren’t sharing too much at once. You don’t want to over share posts. For example, don’t share 5-10 photos in a day. This can turn off followers and you’ll find your numbers falling. Don’t post random photos that aren’t typical in your feed. If you’re an artist and post images of you art daily but one day post a random photo of an alligator in a pond, your followers with find themselves scratching their heads as to why they might be following you. If you plan on going on vacation, it’s always a good idea to create content beforehand so you’re continually active while you are on vacation.
Use Hashtags: Seek out relevant hashtags for your posts. If you’re an artist, you’ll find hashtags that work well in the category of art. I like to use hashtags like, #art, #artist, #artwork, #sketch, #drawing, #painting, etc. Don’t go overboard but you’ll want 10-20 hashtags that can hopefully be seen. Today, people can follow hashtags and your posts might have a good chance popping up in someones feed. Don’t use random hashtags that are irrelevant to what you’re posting. If you post a picture of an acrylic painting, don’t use a hashtag like #workout. This wastes a chance to be seen in a art relevant hashtag like #painting, and you won’t likely see any likes come from the people that are actually following #workout.
Use / Create a Separate Account: It’s good to make a business account for the IG that you wish to grow. You can link it to your facebook business page and Instagram will give you analytics that will help you along the way. This allows you to also retain a personal account where you can keep your random and personal photos to your personal account. I like posting pictures of my dog, beer, and family on my personal account. This keeps my business account on point with all my artistic pictures, so it won’t detract any followers with random pics.
I hope these tips help you. Good Luck on your Social Media journey!
How To Create A Watercolor Palette For 12 Colors
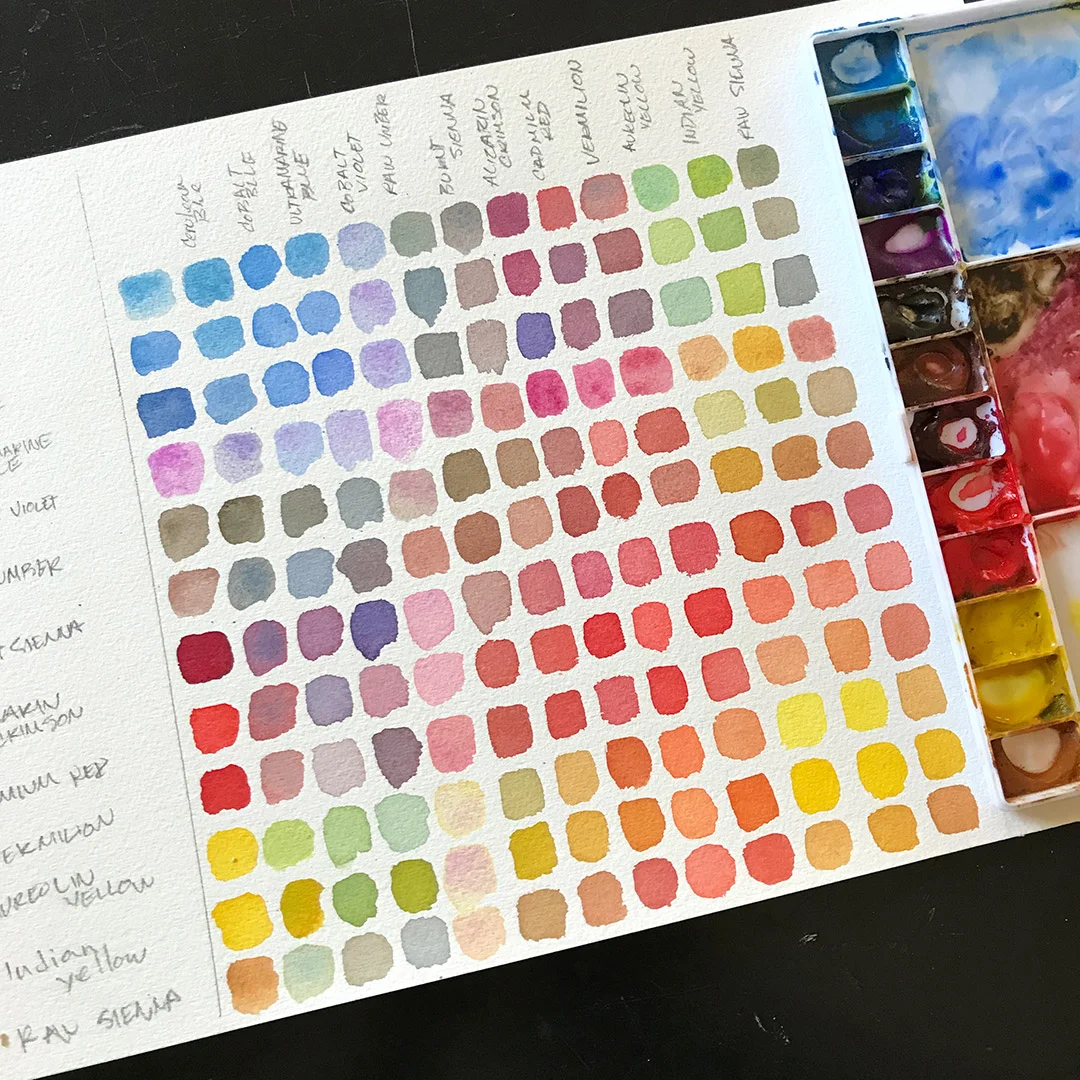
My Watercolor Palette and 12x12 Mixing Chart
Creating a palette seems easy as you begin with a limited amount of colors, but it becomes a lot more difficult as you compile a wide selection of watercolors. I remember creating my first palette was based on the first 12 colors I purchased. I also purchased the colors I thought were the most beautiful and didn't really give myself a reason as to why I was purchasing those colors. I quickly learned that I limited my palette with too many greens, only one yellow, a duochrome, and an Iridescent Gold. As you can tell, I didn't really grasp the concept of creating a palette that could be really practical. I couldn't take this palette with me and paint plein air. So, I set out to figure out the best palette for myself. I had to refer back to the color wheel and create something that could really get the best results and wide selection of colors from only 12 trays.
Here's what I learned to place into my limited palette with 12 trays, and what I've grown to love.
1. Earth (Yellow) - Raw Siena
2. Warm Yellow - Indian Yellow
3. Cool Yellow - Aureloin Yellow
4. Warm Red - Vermilion
5. Red - Cadmium Red
6. Cool Red - Alizarin Crimson
7. Warm Earth (Orange) - Burnt Siena
8. Cool Earth (Brown) - Raw Umber
9. Warm Blue (Purple) - Cobalt Blue Violet
10. Warm Blue - Ultramarine Blue
11. Warm Blue - Cobalt Blue
12. Cool Blue - Cerulean
What about green? – The beauty of this palette is you can mix the 3 blues and the 3 yellows to create 9 different shades of green. It's actually perfect for watercolor and gives you the type of results you'd want. As you mix and paint, the color never stays the same and they all begin to create a beautiful contrast to each other on the paper.
See All The Amazing Color Combos In Your Tray.
Creating a palette like this is very beneficial. All the different hues of primary and secondary colors will help in creating a wide selection of colors to use while you paint. To know exactly what colors you can create from the 12, it's helpful to make a 12x12 mixing chart.
What Is The 12x12 Mixing Chart? First off, it's very useful. I highly recommend you complete a mixing chart for any palette you create. Second, a mixing chart is a display of all your colors that are mixed with each other. You can create a mixing chart by creating 12x12 squares (144 total). Put your 12 colors listed on top and on the left side. You're basically creating a graph. Then begin mixing each color with the other color i.e., The first top color (Cerulean) with the first Left Side color (Cerulean) will give you (Cerulean); Then mix the second top color (Cobalt Blue) with the first Left Side color (Cerulean) and you'll get a mixed color of the two. Continue the first top row, mixing these colors and continue this process until you finish. Make you sure you clean your brush and tray between every mixture. You don't want a third color being combined while you mix. I know... It's very tedious, but the finished mixing chart will help you with every painting afterwards. *note: I created an extra column in the front that displays the single color, but you'll get same result as a diagonal.
The great part about learning and creating these palettes teach yourself to set boundaries when purchasing colors and witnessing how your colors collaborate with each other. It's very easy to fall victim to using only one color or mixing without knowing what the outcome will be. Also, the 12x12 is a helpful tool in preserving your watercolors beacause it allows you to check the chart to find the right mixture of paint for the particular color you seek.
From here, you can begin to create multiple palettes. You may find which colors you actually prefer as you paint. I've recently decided that I am going to change one of my 12 colors with a Paynes Gray.
What type of palette do you like? Is there a color palette I should try? Share an image or list of your palette with me!
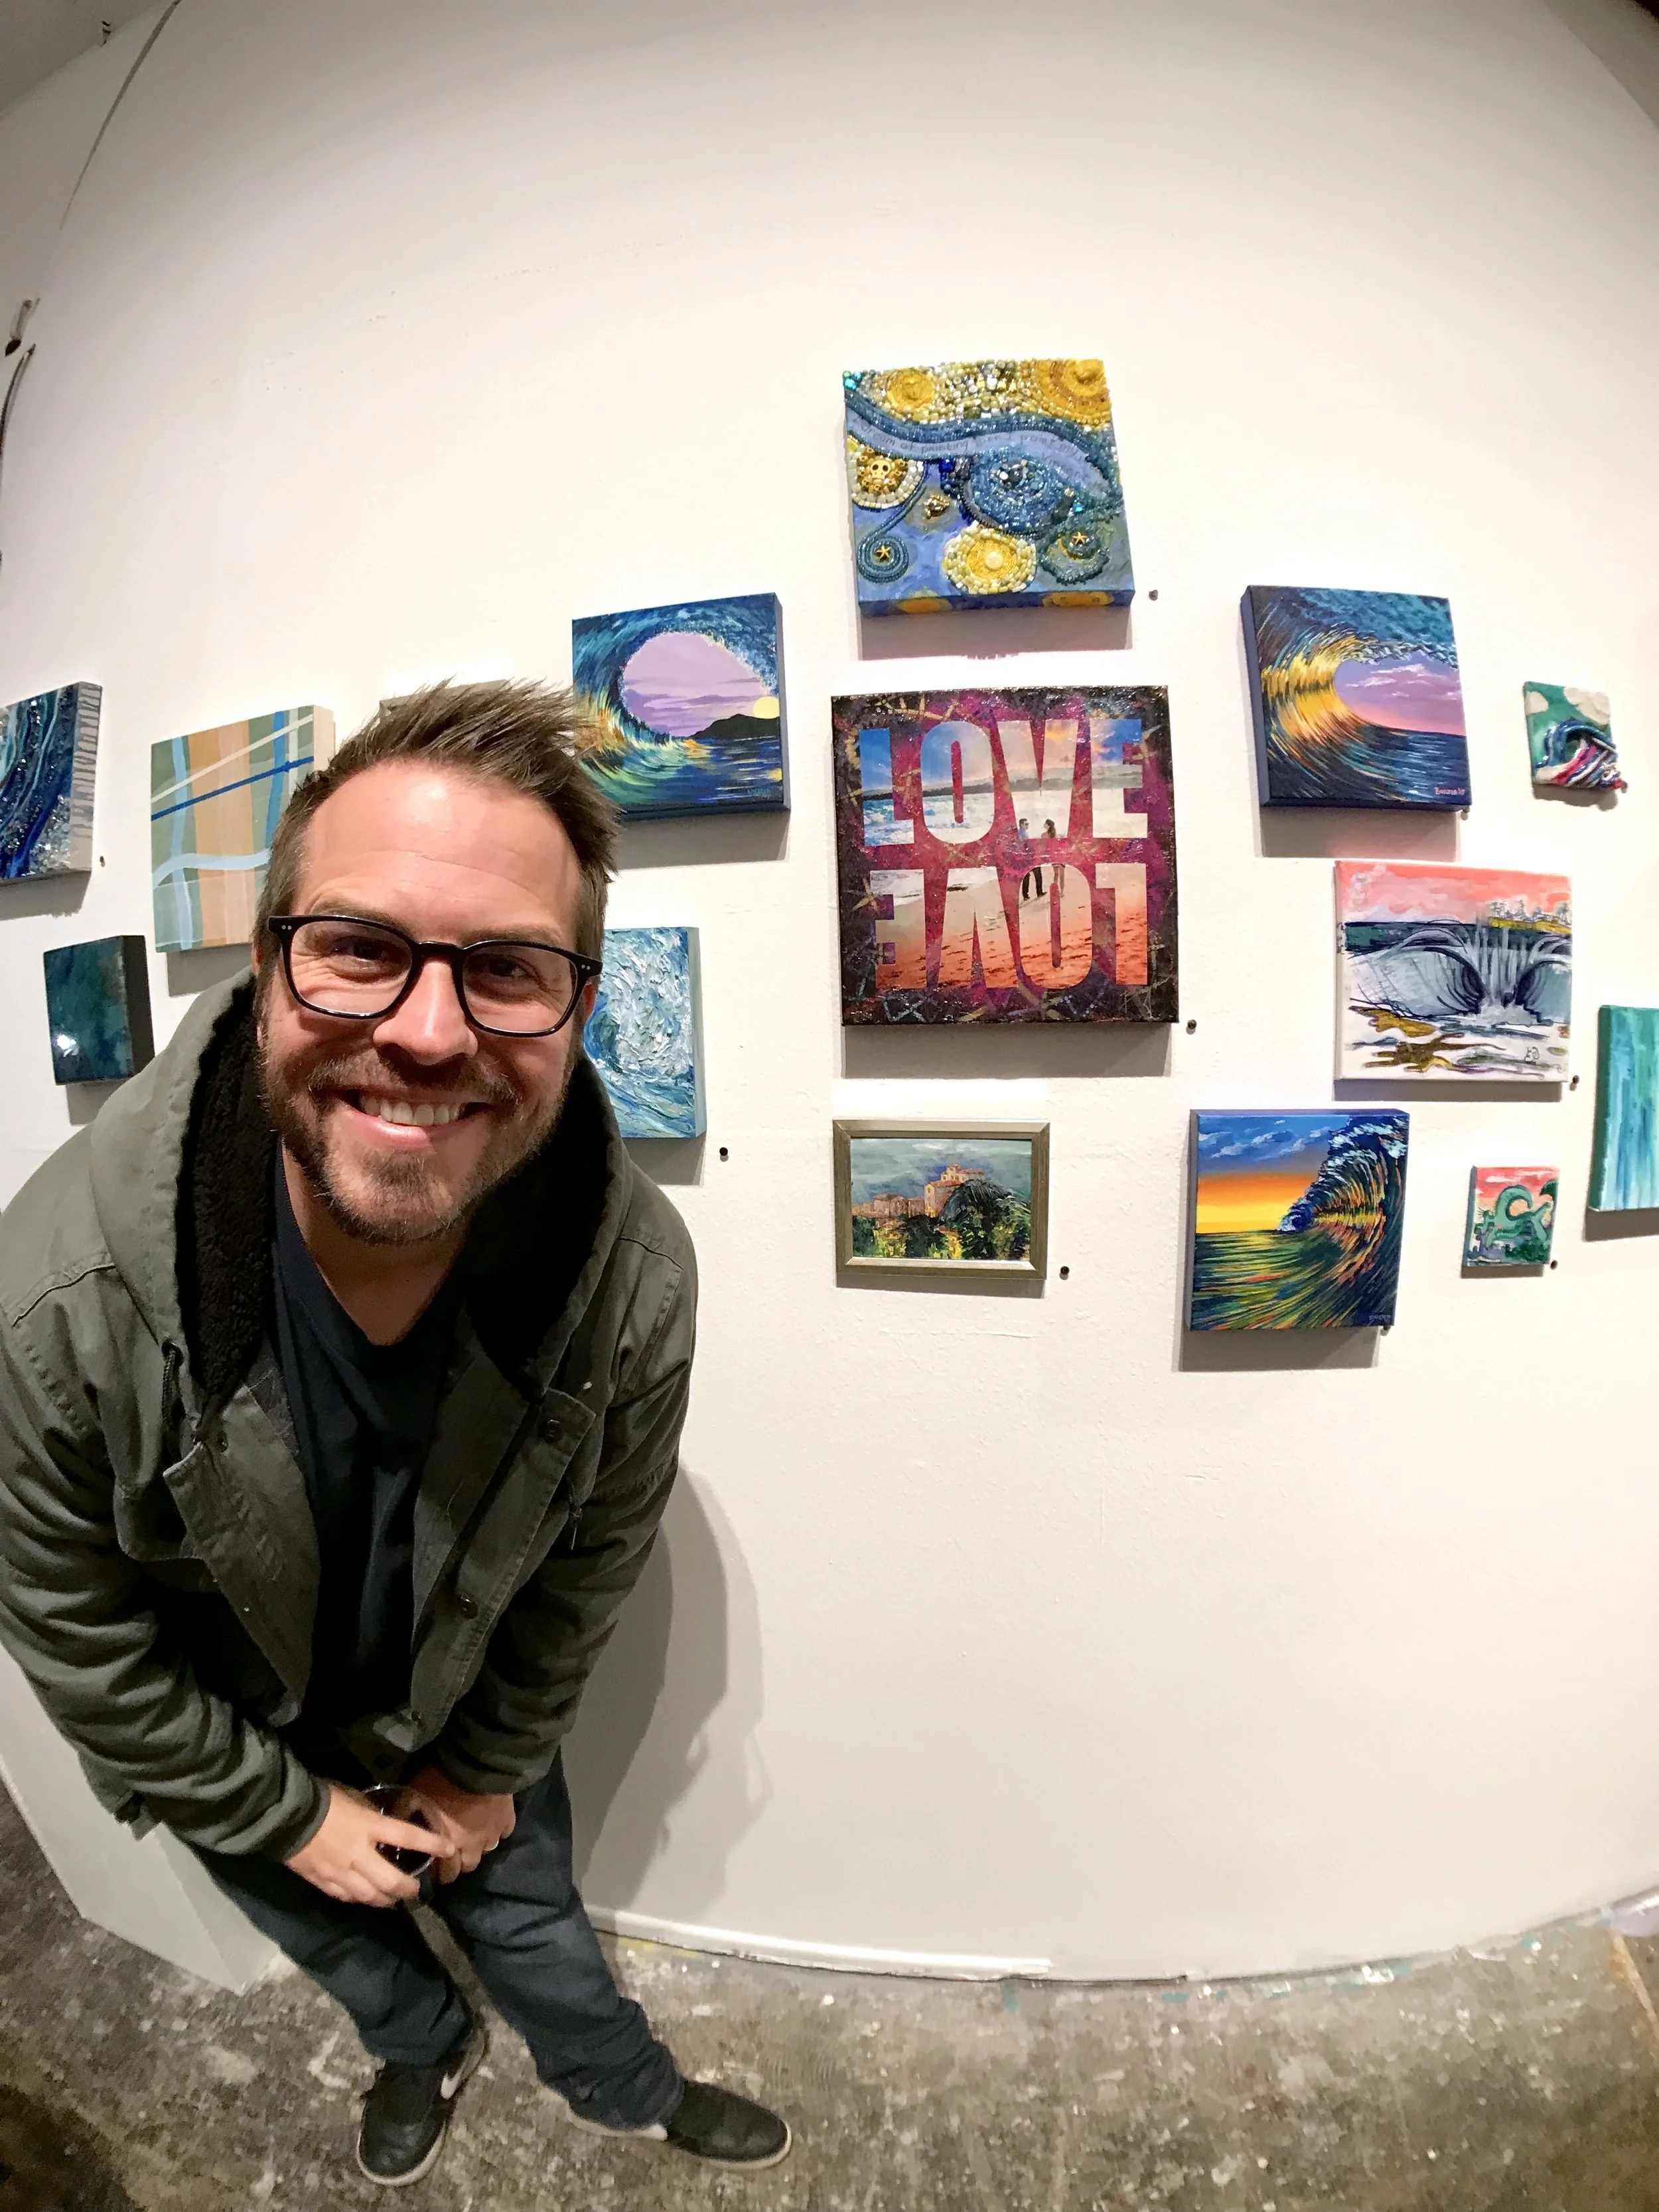
Miniature Art Show at Shockboxx
On February 24, 2018, I had my second show of the year with "The Miniature Art Show" at The Shockboxx Gallery in Hermosa Beach, CA. The event was a hit! There were over 250+ works of art that were no bigger than 10 inches. It featured a wide range of work including Computer Art, Drawing, Mixed Media, Assemblage, Painting, Printmaking, Photography, and Sculpture.
The Shockboxx is a smaller gallery which made a Miniature Art Show perfect. When we arrived, there was a delicious taco stand, free drinks available, and a live artist about to let loose with some performance art. It was packed with a lively crowd which made it a little difficult to see all the tiny works of art, but it also made you feel like you were in the place to be for the night.

How To Illustrate & Watercolor A Potted Cactus
Grab your art supplies and follow along with this quick and easy tutorial on how to illustrate and watercolour a potted cactus. Lately, I've been creating a bunch of these little 5 x 7 inch watercolour cactus pieces of art. They are perfect to create for yourself or as a present. I've shown a few quick time-lapses on Instagram but decided to create a detailed version for anyone that is down to watercolor one of these. You don't have to create the same potted cactus, but try following these steps, use these tips, and be creative! It's all about learning and having fun while creating some fun art.
Materials Used:
Daniel Smith Watercolors: http://danielsmith.com/watercolor/
Princeton Heritage Series Brushes: http://bit.ly/2BgOdaI
Arches 140lb Cold Press Watercolor Block Paper: http://amzn.to/2nS7TcL
MUSIC BY RYAN MCKENDALL:
Website: https://www.ryanmckendall.com/
Instagram: https://www.instagram.com/ryan_mckendall
"Life In Full Bloom" a Solo Art Exhibition at Suite6

Hey Friends!
I'm here to share amazing news to start 2018. I'll be having my first solo art exhibition at the fresh and beautiful gallery Suite6 in Manhattan Beach, CA. "Life In Full Bloom", named after my inspired floral artworks, this show will feature my cacti, flowers, and botanical artworks. Among the artwork on display, you can get a close up view of some of my illustrations, watercolours, and acrylic paintings. All works will be available for public viewing and purchase from January 11th thru February 3rd, with an opening reception on Thursday, January 11th, 6pm - 9pm. Please join me!
If you're not too familiar with the name Suite6, you might recognize it's shared space, Two Guns - one of my favourite coffee shops. Suite6 is a new boutique and gallery space in the South Bay. It has had a few art exhibitions before mine and is quickly becoming a welcoming space for people to hang out.
Suite6 has also become the first retailer to carry my art prints! Now, you can swing by anytime to check out all the products and pick up an art print for your wall.
Peace + Kindness -Philip
Suite6 is located at 350 N Sepulveda Blvd, Manhattan Beach, CA 90266

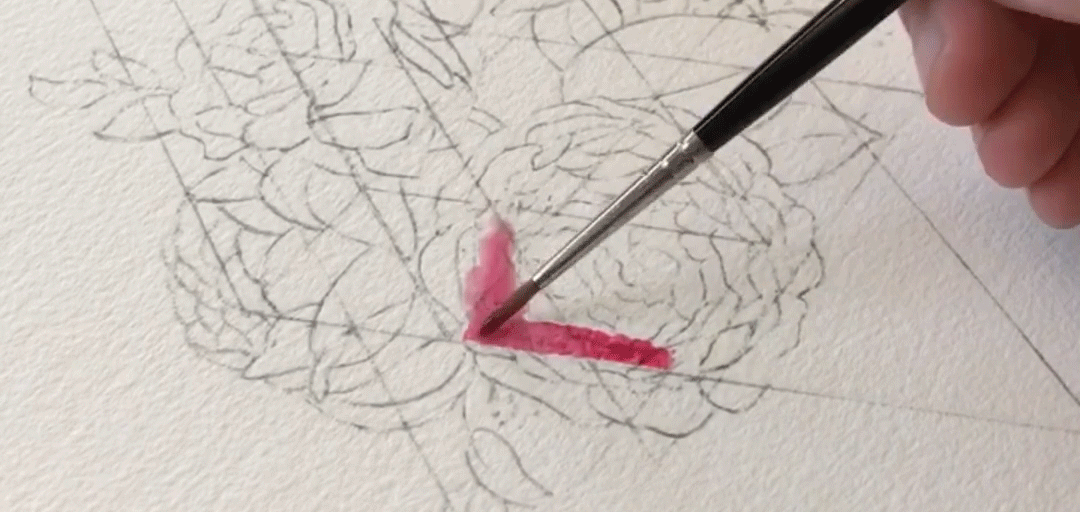
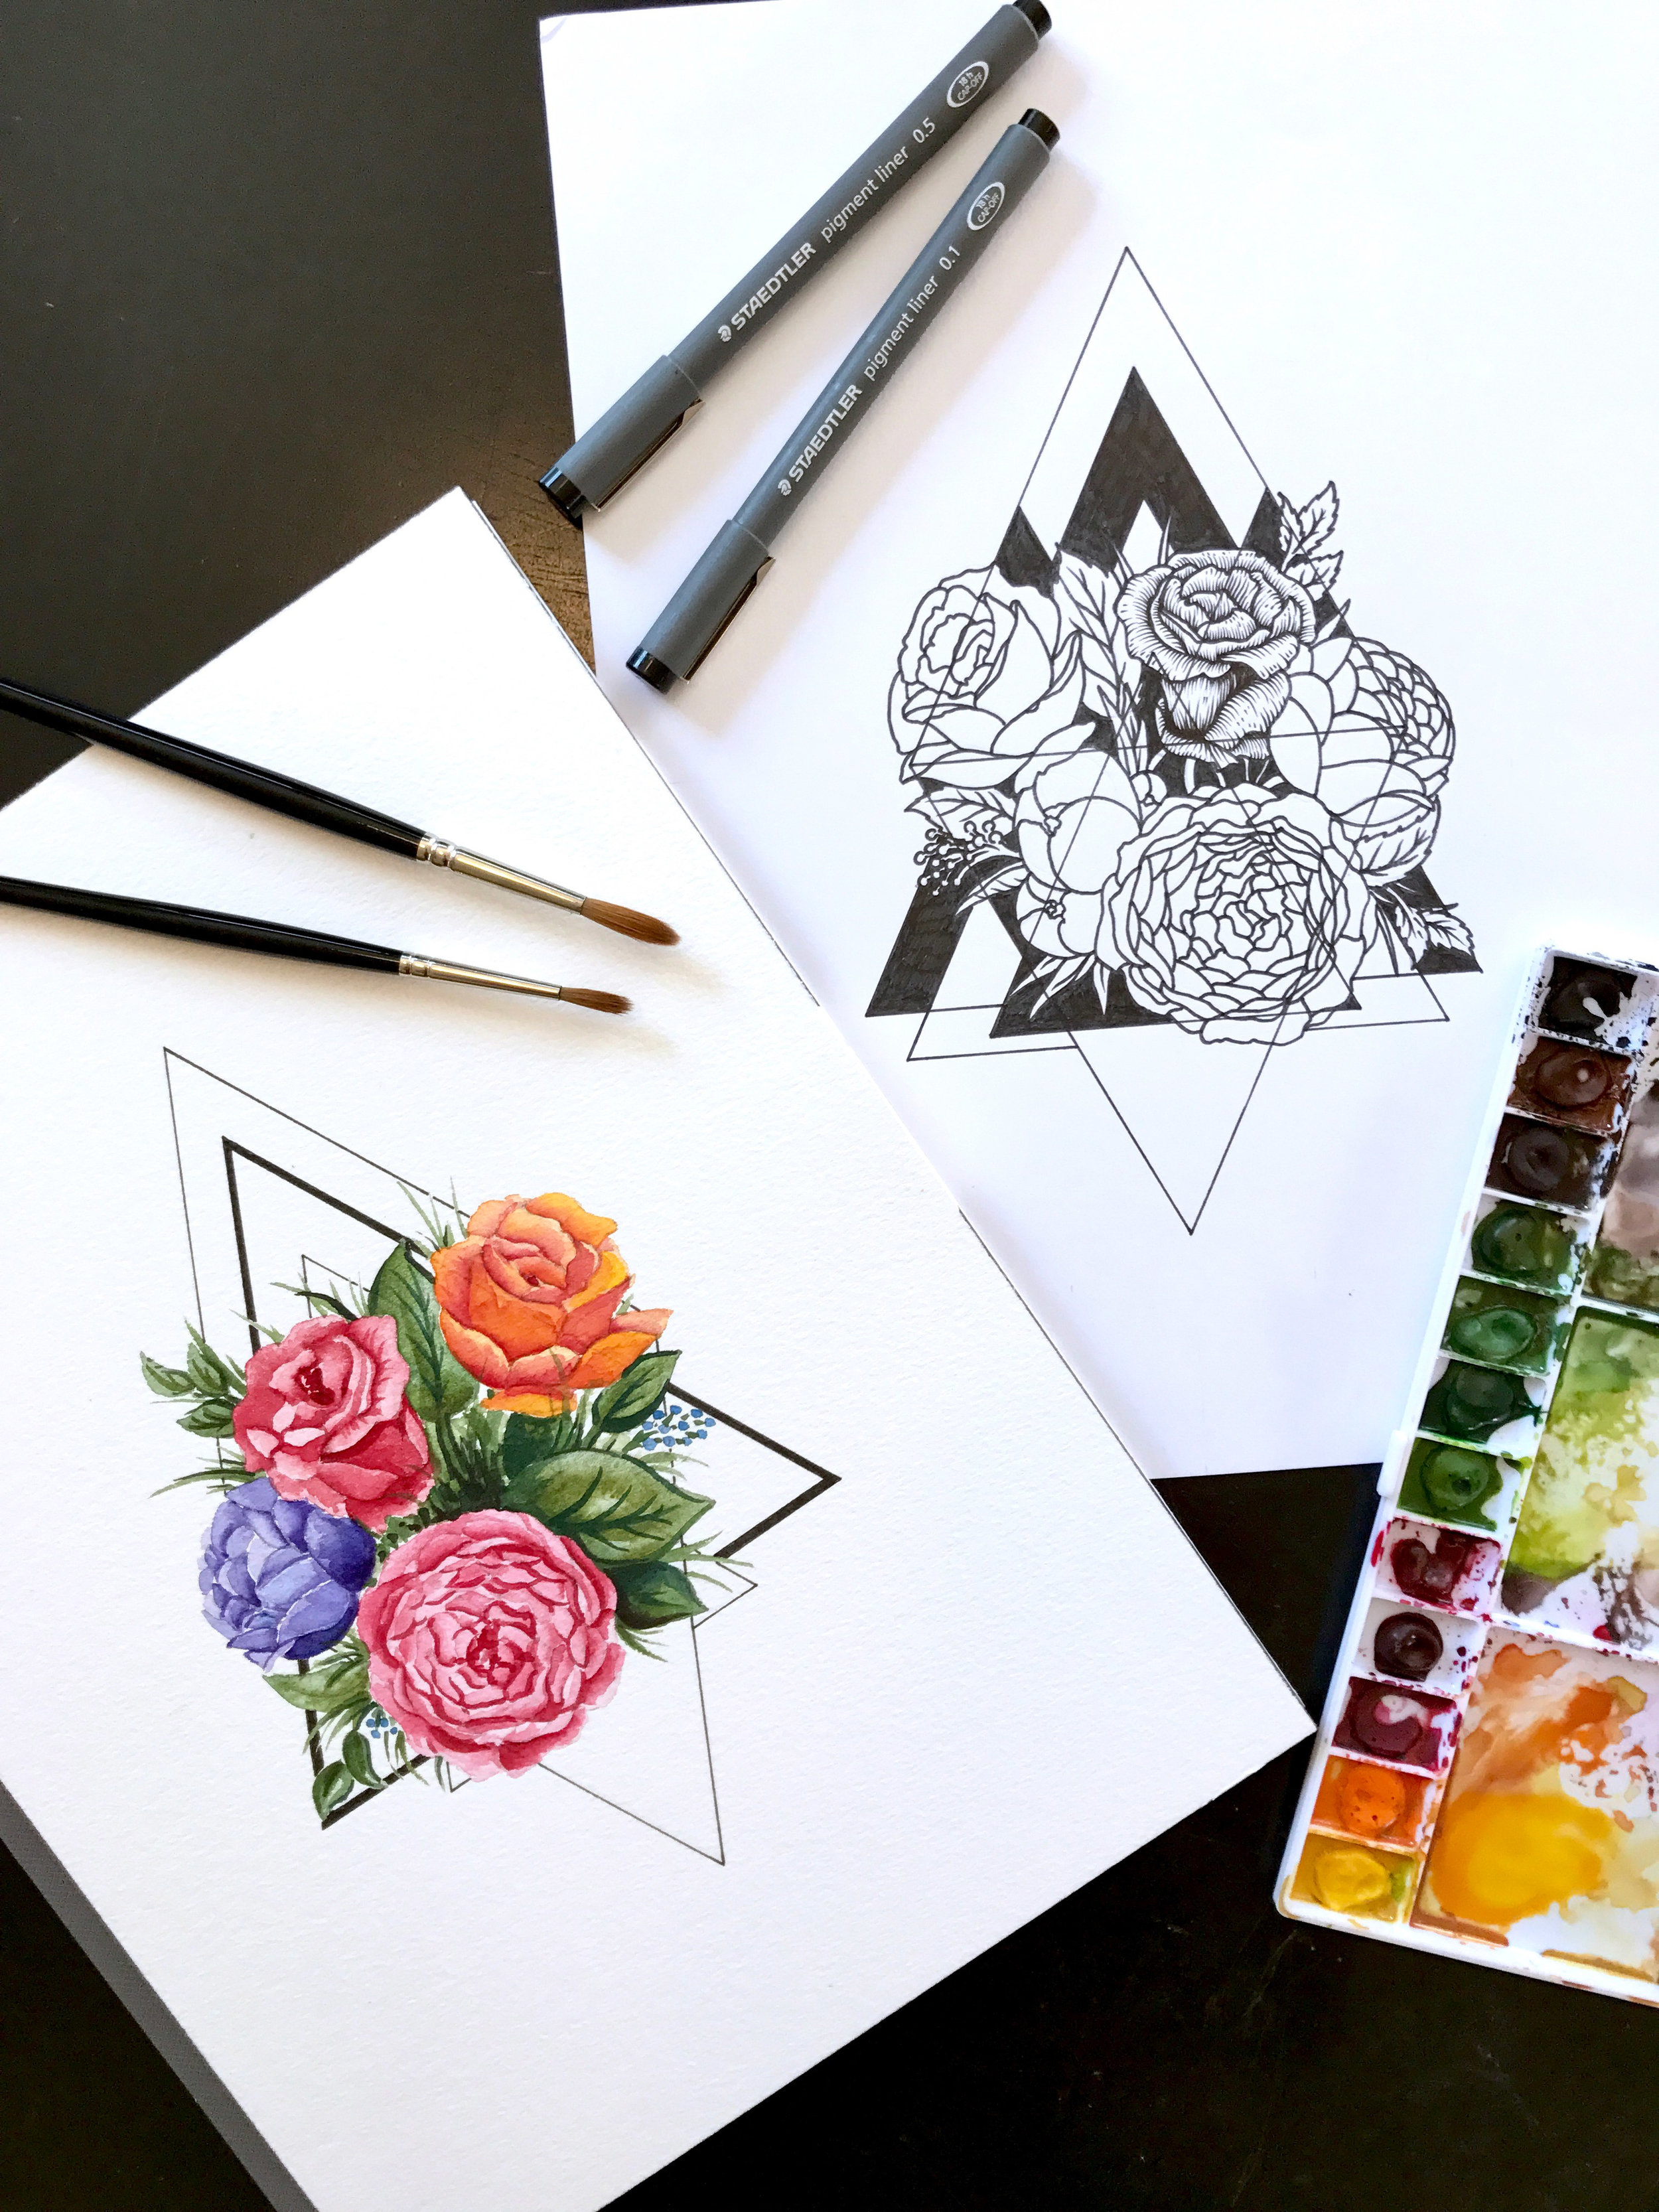
How to Use Tracing Paper to Transfer an Inked Illustration to Watercolor Paper
I thought I'd share a technique I like to use sometimes when I plan a new watercolor. After I illustrate a new piece, I like to use tracing paper to transfer the art from the illustration over to the watercolor block. To begin, all you'll need is an illustration, tracing paper, masking tape, pencil 2b or higher, watercolor paper or block.
Step 1: Tape the tracing paper on top of the illustration and trace the illustration with a darker lead pencil.
I use a darker pencil to trace over the illustration because the transfer will slightly be lighter. With a darker shade of pencil, it will help ensure the pencil marks will transfer over to the watercolor block.
Step 2: Flip the tracing paper over, tape it onto the watercolor paper or block, and begin drawing on top of the pencil lines you created in step 1.
This will transfer the pencil lines you created in step 1 onto the watercolor paper. *Note: This will be a reversed image of the illustration, but you could go a step further and retrace the lines once again.
Step 3: Have fun watercoloring
The transfer process is now complete and you can begin watercoloring. Have Fun!
Check out below what I completed from using this transfer method. I kept my original illustration and began to shade in all my florals. It's going to be a great piece to frame once I finish it. Also, you can see my watercolored piece that I achieved from transferring the original illustration. I love this transferring process because you can get multiple art pieces once you're done, and if at any point you make a mistake on your watercolor, you can start over and transfer your illustration again.
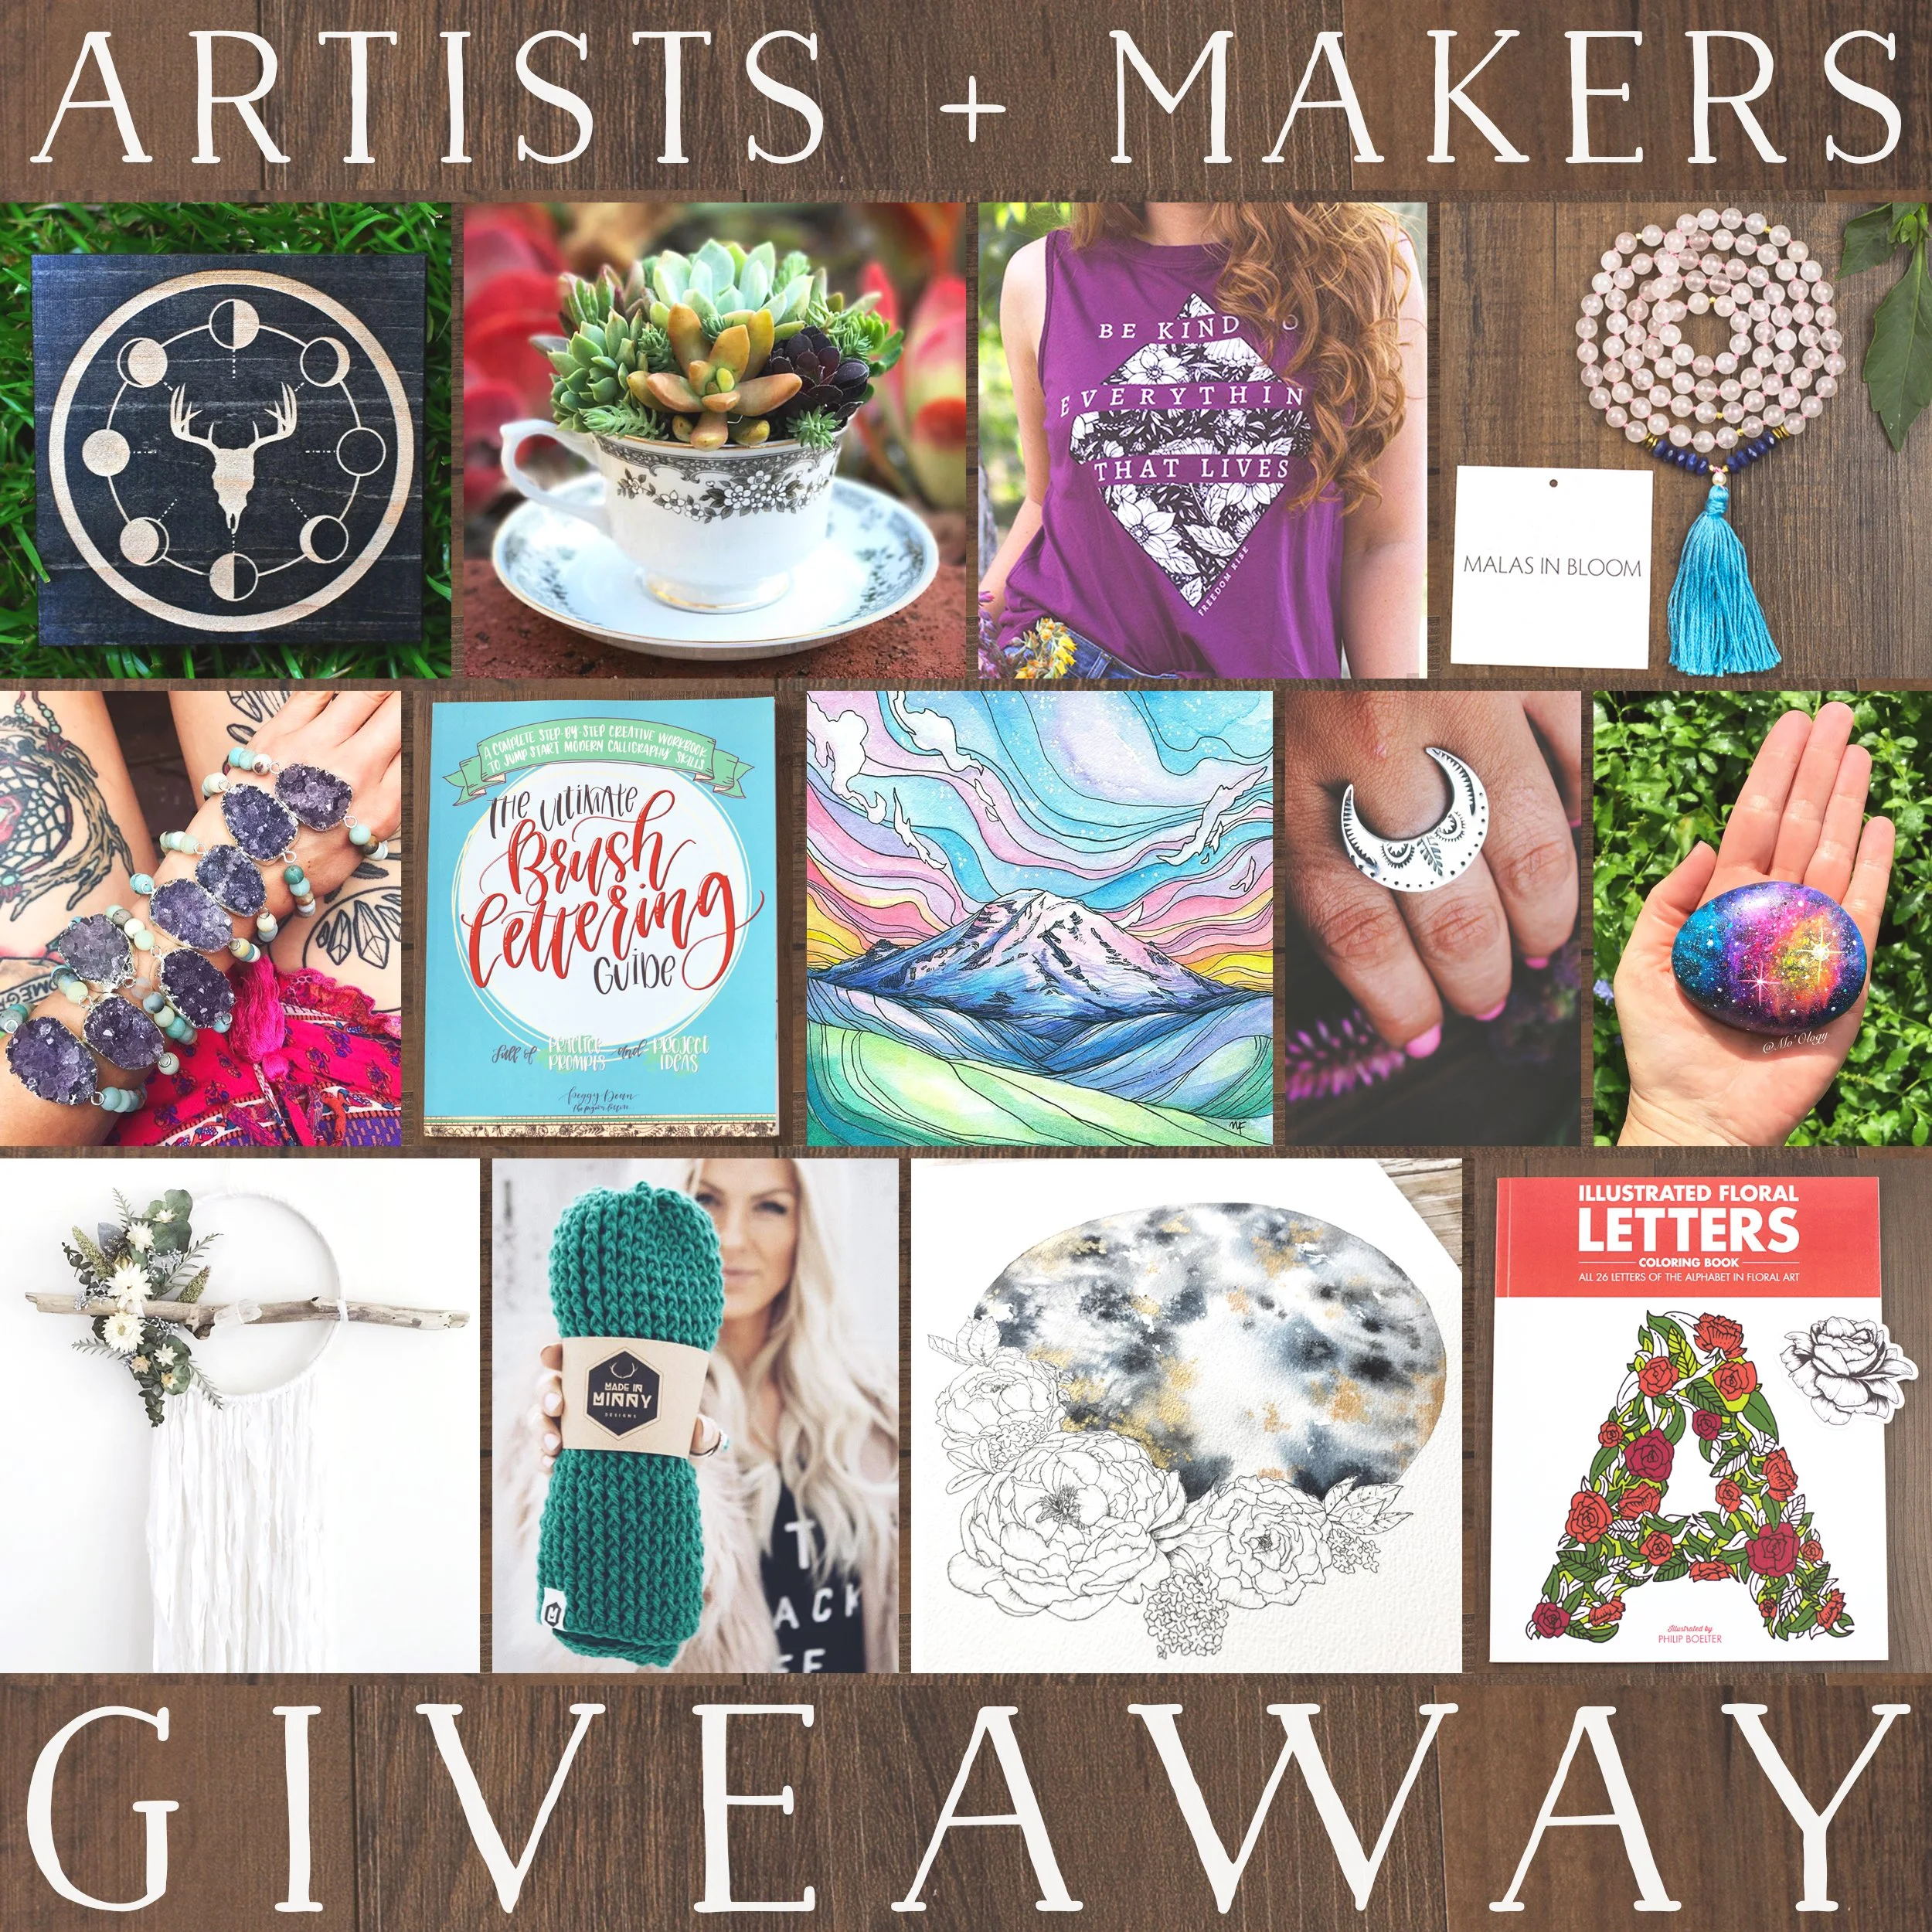
Artist + Makers Giveaway (8/20 - 8/26)

Time for a massive giveaway! I'm thrilled to be a part of this exciting giveaway featuring 13 artists and makers. Follow all Artists, tag friends, US+Canada Only. See below for more information on how to enter and rules. #artistsandmakers
------------------------------
Rules:
1. Follow ALL listed below
@boelterdesignco
@drawntohighplaces
@freedomrise
@goodmorningcactus
@jdrewsilvers
@jeshypark
@made_in_minny
@mal_wingostarrjewelry
@malas_in_bloom
@meadowandmoss
@mo.ology
@thepigeonletters
@theturquoiseforest
2. Like this post and tag your friends! Each friend tagged = an entry!
3. US + Canada Only for this round
Giveaway will run from Sunday 8/20 to Saturday 8/26. Winner will be announced on Sunday 8/27. Winner will be chosen randomly from all entries on posts from all participating Artists + Makers. Good luck!
Per Instagram rules, we must mention that this is no way sponsored, administered or associated with Instagram, Inc. By entering, entrants confirm they are 13+ year of age, release Instagram of responsibility, and agree to Instagram's terms of use.
Giveaway Items Include: Floral Illustrated Coloring Book from @boelterdesignco, Mount Rainier Alpenglow Art Print & Stickers from @drawntohighplaces, 100% Organic Cotton Be Kind Tee from @freedomrise, Made-to-Order Vintage Teacup Arrangement with Custom Metal Hand stamped Tag from @goodmorningcactus, Engraved Moon Phases Grid from @jdrewsilvers, Original Watercolor & Ink Artwork from @jeshypark, Basic Beanie & Multiwrap Headband of choice from @made_in_minny, Amethyst Stretch Bracelet from @mal_wingostarrjewelry, 108 Bead Gemstone Mala from @malas_in_bloom, Dried Flower and Silk Chiffon Wall Hanging from @meadowandmoss, Hand painted Galaxy Stone from @mo.ology, The Ultimate Brush Lettering Guide & Art Print from @thepigeonletters, Sterling Naja Ring or Necklace from @theturquoiseforest
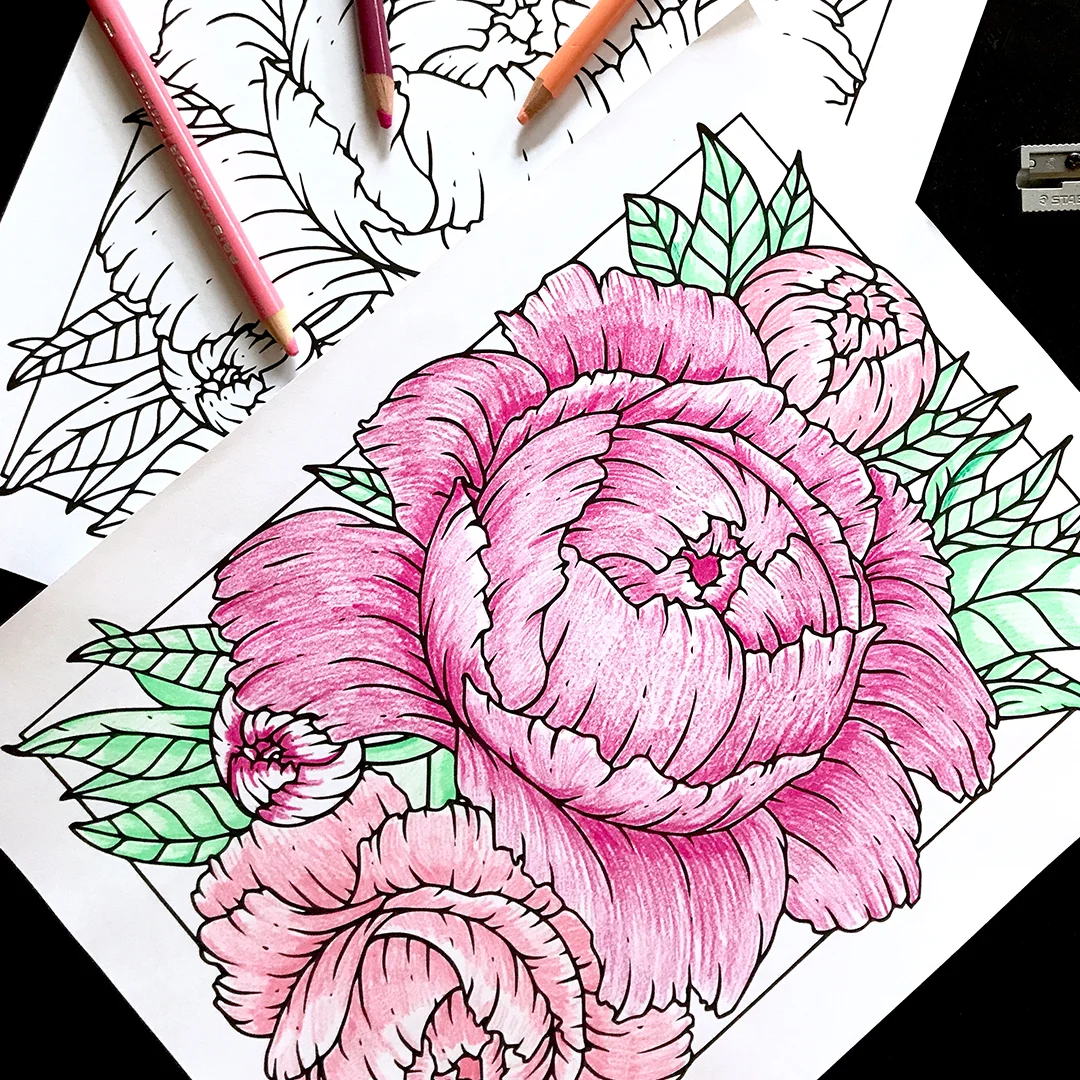
Free Downloadable Coloring Page of Illustrated Peonies

Free Coloring Page | Peonies
Hand Illustrated by Philip Boelter
I've decided to create a free downloadable coloring page of some hand illustrated peonies because I'm beyond excited to tease an exciting giveaway which includes my Illustrated Floral Letters Coloring Book. Not only will my coloring book be one of the prizes, but I'm sharing this giveaway with nine other Artists and Makers which will include their amazing products. A few of my favorite artists included in the giveaway are Freedom Rise, The Pigeon Letters, Jeshy Park, and more.
So, be on the lookout for the official drop and information on how to enter! The giveaway will be announced and run Sunday, August 20, 2017, and end Monday, August 27, 2017. The winner will be chosen randomly from all entries on posts from all participating Artists and Makers.
About My Illustrated Floral Letters Coloring Book
My Illustrated Floral Letters Coloring Book was published in 2016 and was my first self publication. I illustrated every letter with florals, cacti, leaves and so much more. This coloring book was a hit with my friends and family and I'm eager to give it a 2017 bump to all my new friends and followers which may not have known about this wonderful coloring book! It's a perfect gift for yourself, a family member, or young child. It's something that anyone can enjoy and zen out with some crayons or colored pencils.
If you're interested in purchasing a copy of my Illustrated Floral Letters Coloring Book, see the links below. You can purchase a signed copy from my website, or you can easily purchase a copy from Amazon.
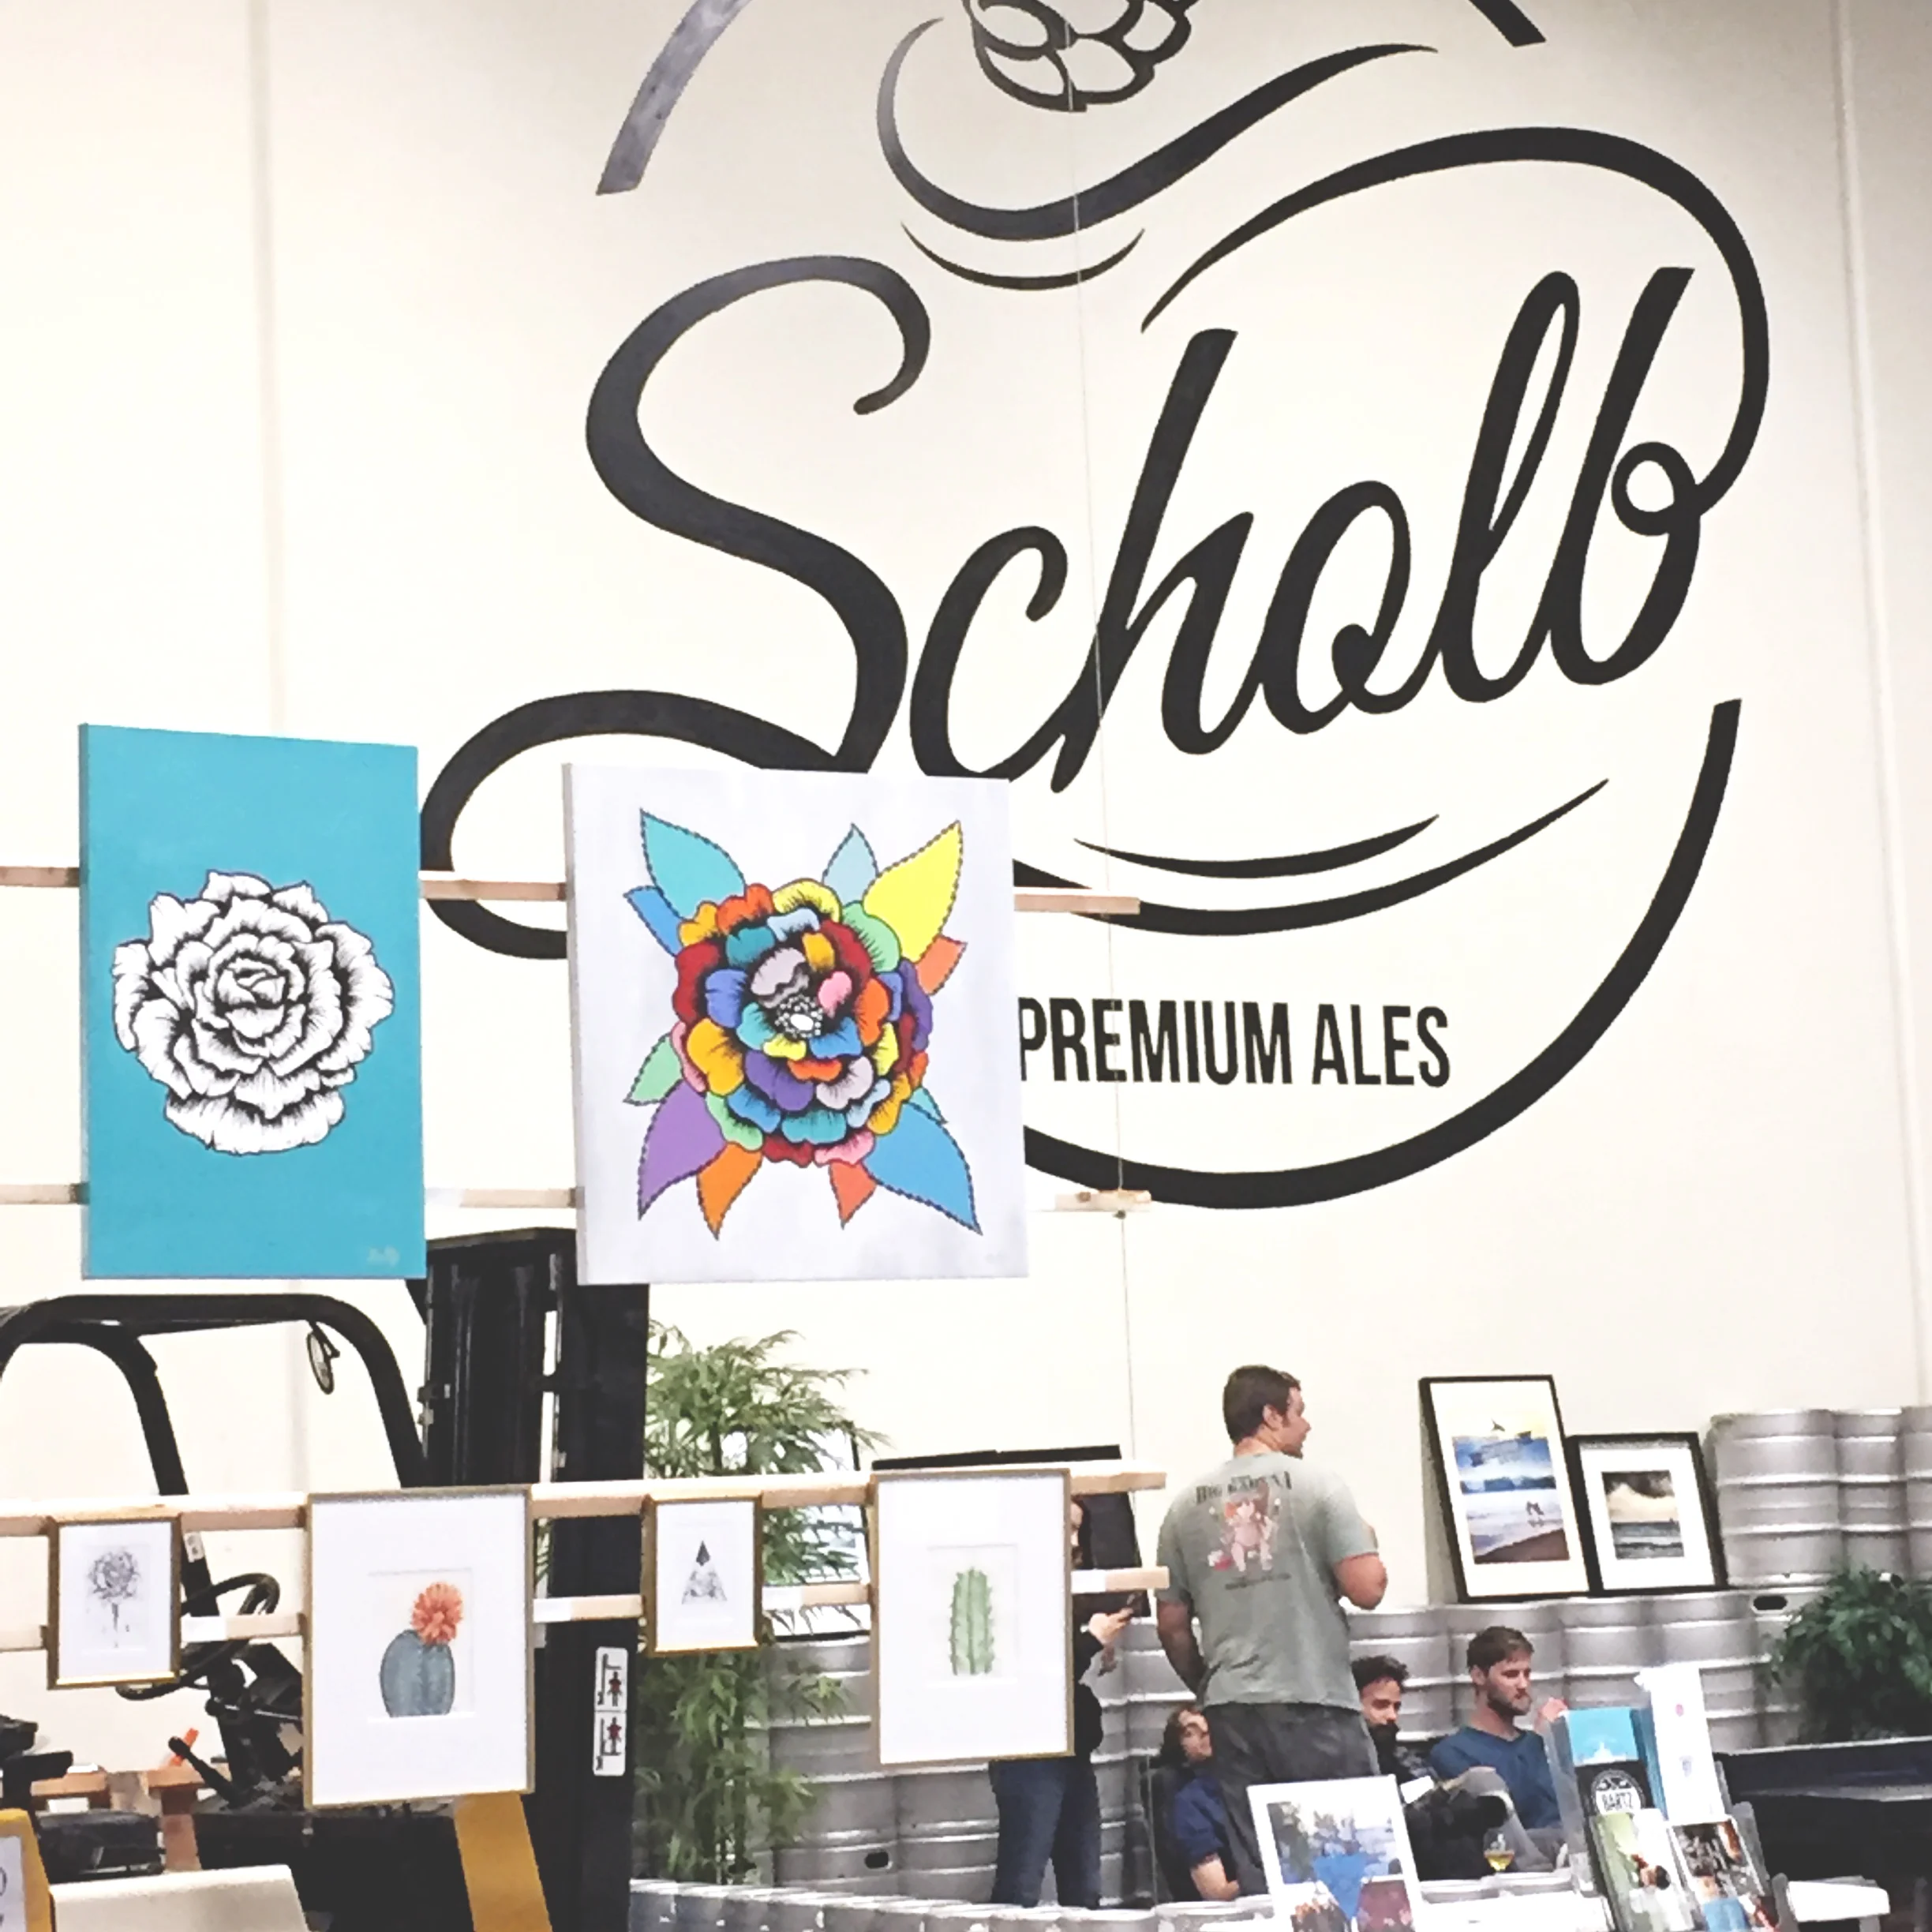
LA Local Flavor: A Night At Scholb With Art + Beer

I love craft beer as much as I love art. Sometimes, I even treat myself to an occasional craft beer while I paint or draw. The two go so well together. So for me, having an art show at a local craft brewery is as fitting as peas and carrots. I never thought of the possibility to have an art show at a brewery until Matt Hazelton reached out to me to be a part of an art show at Scholb Craft Beer. Uhm, Yass! Needless to say, I was thrilled. What can I say? I love craft beer + art.

The South Bay is amazing. I’m lucky to live in an area with an exploding scene of craft beer alongside a growing community of artists. It’s quickly becoming home to LA’s largest selection of craft beer, including breweries like Scholb, Monkish, LA Ale Works, The Dude’s, King Harbor and so many more. From Inglewood to Torrance, you can find a unique brewery that can satisfy your taste buds. The coolest part about the expanding brewery scene, is the events they put on to attract more beer lovers. Scholb is definitely making its mark on the South Bay by bringing the community together and hosting art shows in their brewery.

It’s an incredible time to be in the South Bay with new breweries and galleries starting to populate the area. While the beach will remain the main attraction, more art shows and gallery events are beginning to take place. There is no doubt, as more craft breweries pop up, more events like this art show will continue into the future. So, we’ll see you at the next one.
Thank you, Matt and Scholb Craft Beers for including Boelter Design Co in such a fun night of art + beer. I had a blast sharing my art, selling prints, hanging with friends, and drinking some great award winning beer.
’til the next, Cheers!
While on your next LA Beer Hop or passing thru South Bay, be sure to stop by:
2964 Columbia St, Torrance, CA 90503
Making Shutterstock's List of "50 Inspirational Designers to Follow in 2017"
I've been recently honored to be included in Shutterstock's "50 Inspirational Designers to Follow in 2017". I have used Shutterstock most of my design career, so to have been included in their list is incredible. I have so much respect for all these designers on this list and can not believe I am included in the mix. There is no doubt you'll find a designer you love or already follow. Check out all the other 49 designers now!
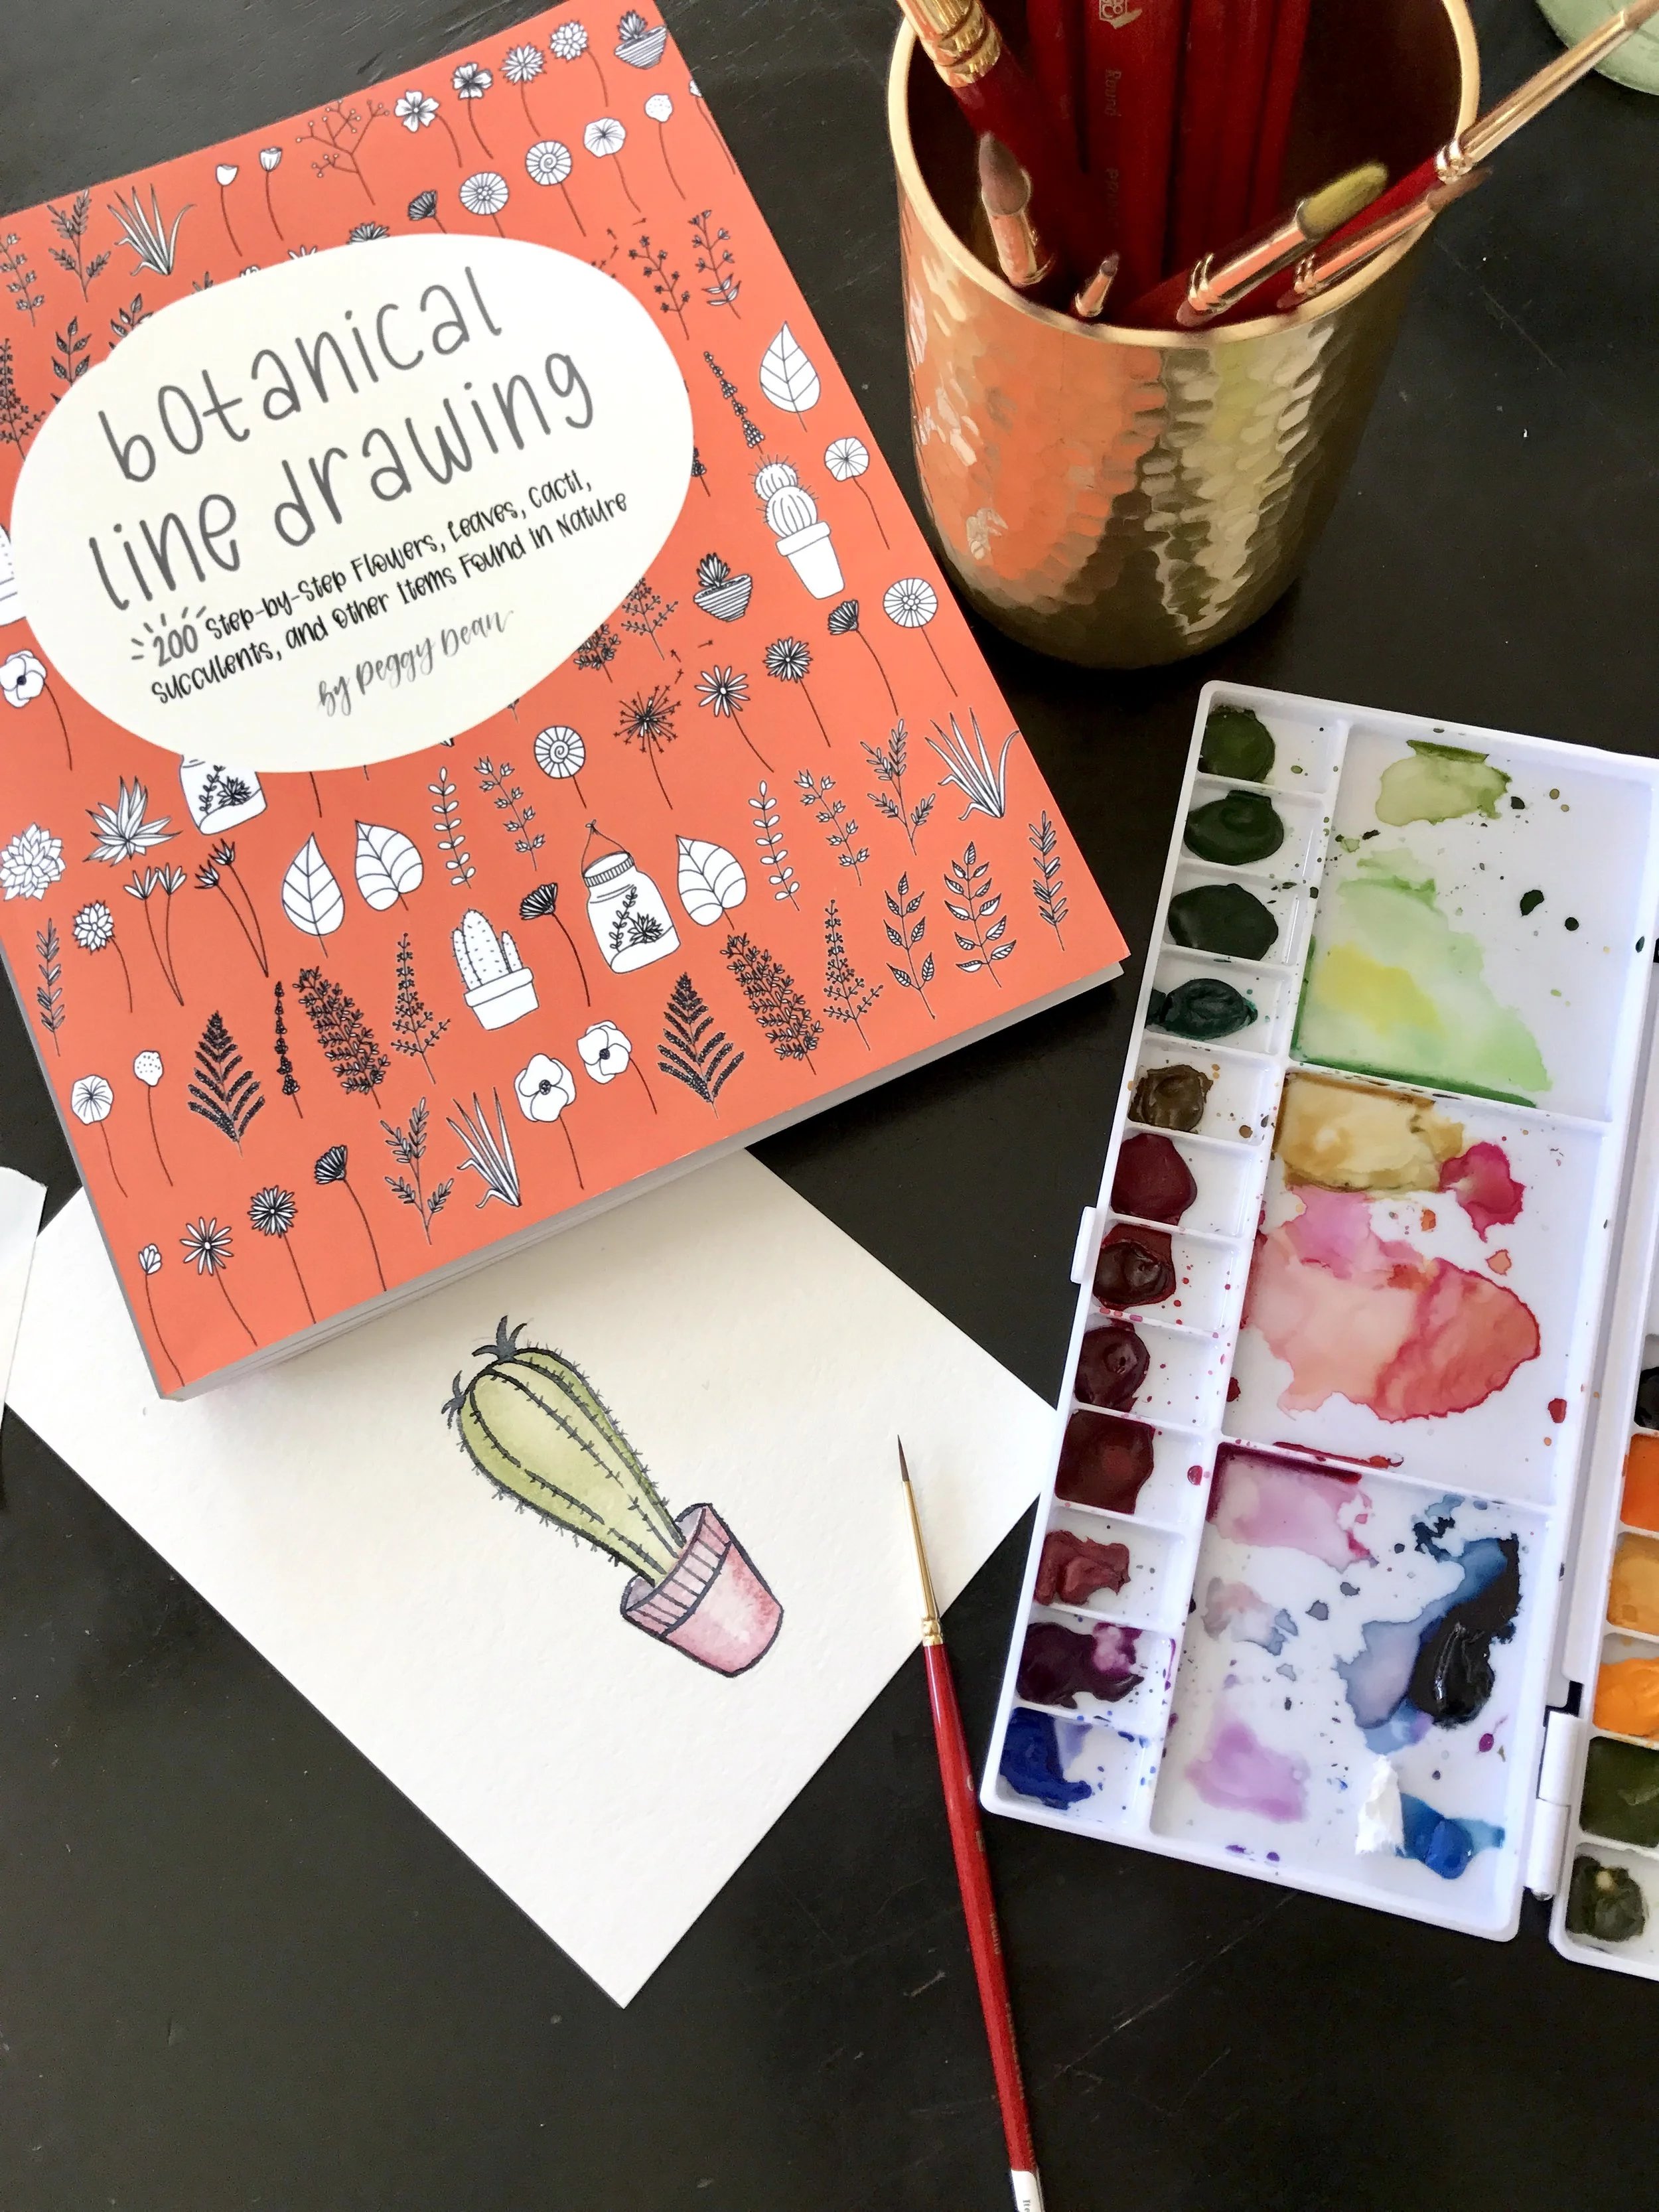
"Botanical Line Drawing" with Peggy Dean and The Pigeon Letters

I was really honored when my insta-buddy Peggy Dean of The Pigeon Letters asked me if I would review her new book that is set to release May 1st on Amazon. She sent me a copy of her new how-to book called "Botanical Line Drawing" which contains 200 step-by-step illustrations of flowers, leaves, cacti, succulents, and other items found in nature. This book was a pleasure to go thru. Especially as a botanical and floral artist.
When I first received the book, I glanced thru it and noticed all the easy step-by-step illustrations. Dean used about 5 to 6 simple illustrations that would help anyone learn how to draw these nature elements. Then, I noticed how many different items she actually provided. Two hundred things to draw is amazing for anyone looking to learn to illustrate.
Dean also broke down the nature elements into four categories for easy browsing. When I sat down to watercolor one of her step-by-step illustrations, I took a look at the contents and found one of my favorites sections – the "Cacti & Succulents". I skipped right to that section and browsed through all the fun doodles and whimsical illustrations. I was pleasantly surprised that most of the cacti illustrations were all playfully potted. Her step-by-step was easy and fast. There is also a helpful area to practice your drawing, so you don't have to worry about extra drawing paper.
If anyone is interested in learning how to draw botanicals, I recommend investing in this helpful book. Also, for anyone that is a bit more advanced, this book is very nice to have for inspiration and it's nice to keep in your library for reference. I will most definitely be looking through this book when I feel the need for a bit of botanical inspiration, feel like doodling along with Peggy, or let anyone draw thru it while it hangs out on our coffee table. Thank you, Peggy for such a fun book.
For more on Peggy and The Pigeon Letters, check her out on Instagram at @thepigeonletters
Botanical Line Drawing can be found here!
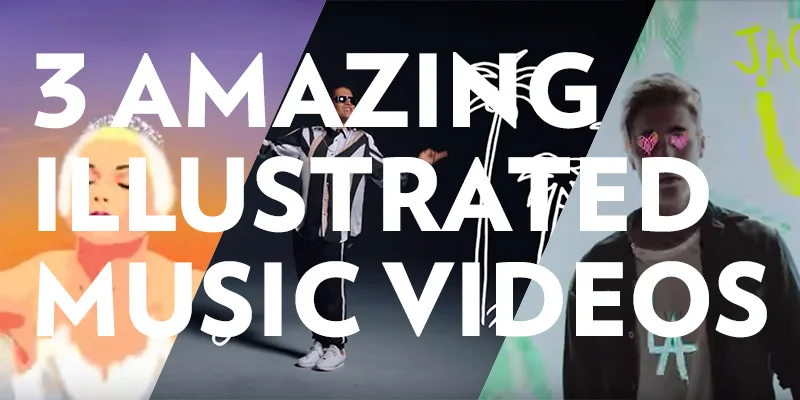
3 Amazing Illustrated Music Videos

I love music. I also really enjoy watching Vevo music videos, probably because I grew up on MTV when they actually played music videos. Every music video is artistic in its own way, but I especially love when a music video incorporates art and illustration. I'll always remember falling in love with A-ha's "Take On Me". I think it's the first time I saw live action with illustrations, and to this day still enjoy watching that music video. Here are a few of my favorite music videos that have incorporated smart and beautifully executed illustrations in their music video.
1. Bruno Mars - That’s What I Like
Bruno Mars is already a brilliant dancer, but these minimalistic animations create an atmosphere around him and play around his fun dance moves. My favorite parts of this music video are where you see Bruno pour out champs, get pulled by a donkey, and drive a car.
2. Skrillex and Diplo - "Where Are Ü Now" with Justin Bieber
This video has a similar take
3. Taylor Swift - "Shake It Off"
Taylor Swift is one of my favorite musical artists. Though this illustrated music video isn't her official music video for "Shake It Off", it certainly could've been with it's brilliant and imaginative take from the students at the University of Newcastle in Australia. From the transformation of Taylor into a goat (because she is the GOAT) to the twerking hamburger butt buns, this is a music video that I can watch over and over for its illustrative art and creativeness. I especially love the cameo of Scorpion and Sub-Zero from Mortal Kombat.
How To Design Save The Date Cards Using Downloadable Assets From Creative Market

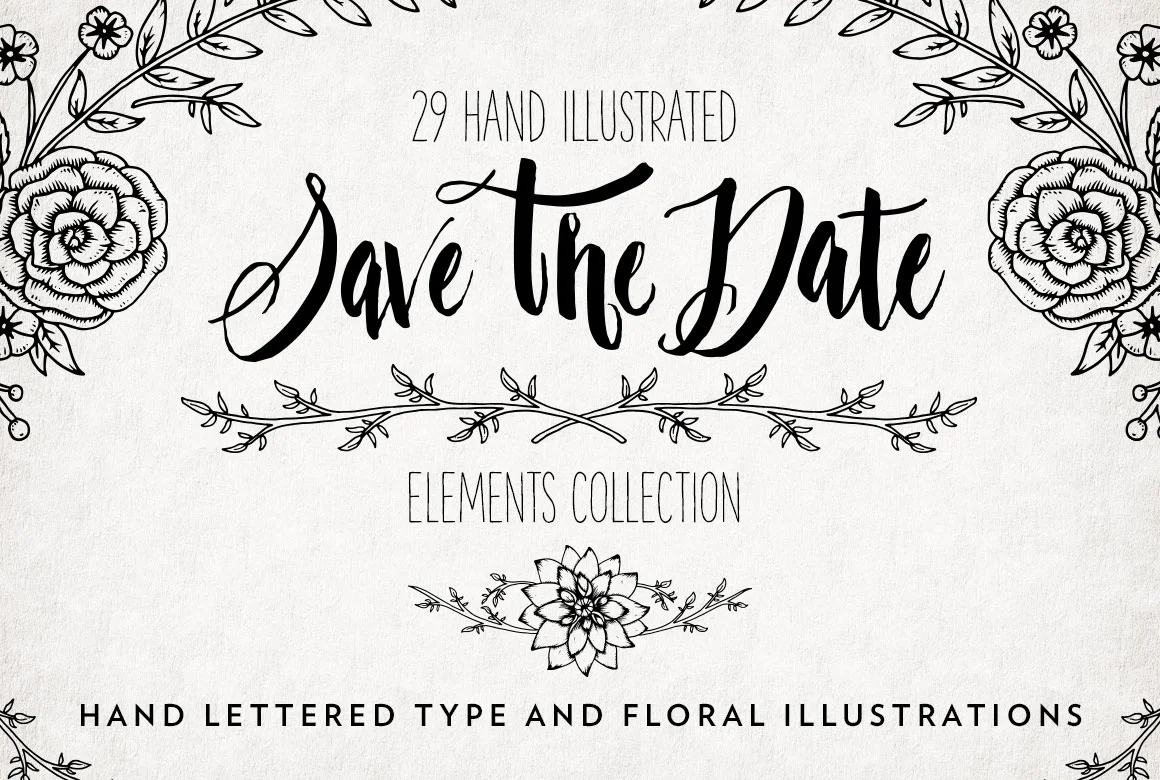
Learn how to design a Save The Date using downloadable assets from creative market featuring my product "Hand Illustrated Save The Date Overlays".
I decided to put together this helpful demo guide for anyone that purchases my downloadable product. Thanks for supporting my art and incorporating it into your special day.
After you receive the download and open the folder, Open Photoshop and let's begin.
Step 1 - Create A New Project: Create a New project and enter the dimensions depending on the size you'd like your Save The Dates printed. I decided to use 5x7" for this demo.
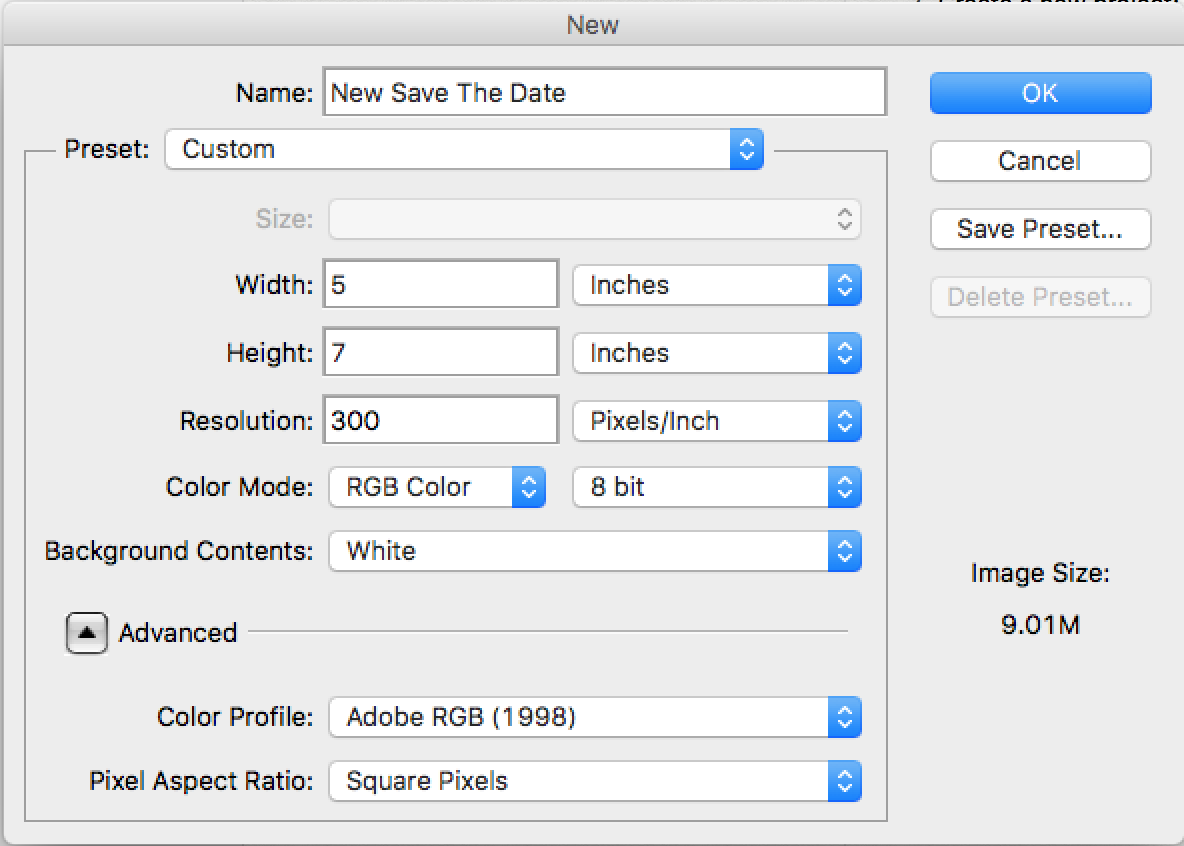
- Quick Note: Typically, you'll need to add a bleed to your size. Usually the bleed adds .25" to the width and length, but check with the print shop you'll be printing these at. Ask or check online to see what bleed size the file will need. Sometimes, the online print shops supply files for you that have bleeds already to go. I like to use JakPrints & MPix.
Step 2 - Adding Your Picture To The New Project: Open your photo. This might be the hardest part – Selecting the right picture for the "Save The Date". Yup, the picture that will reside on your friends and families refrigerators for months. Choose wisely. - Just kidding - Have fun, select your favorite, but make sure it's big enough, and open the picture in photoshop. Then, Drag the image over onto the 5x7 file.
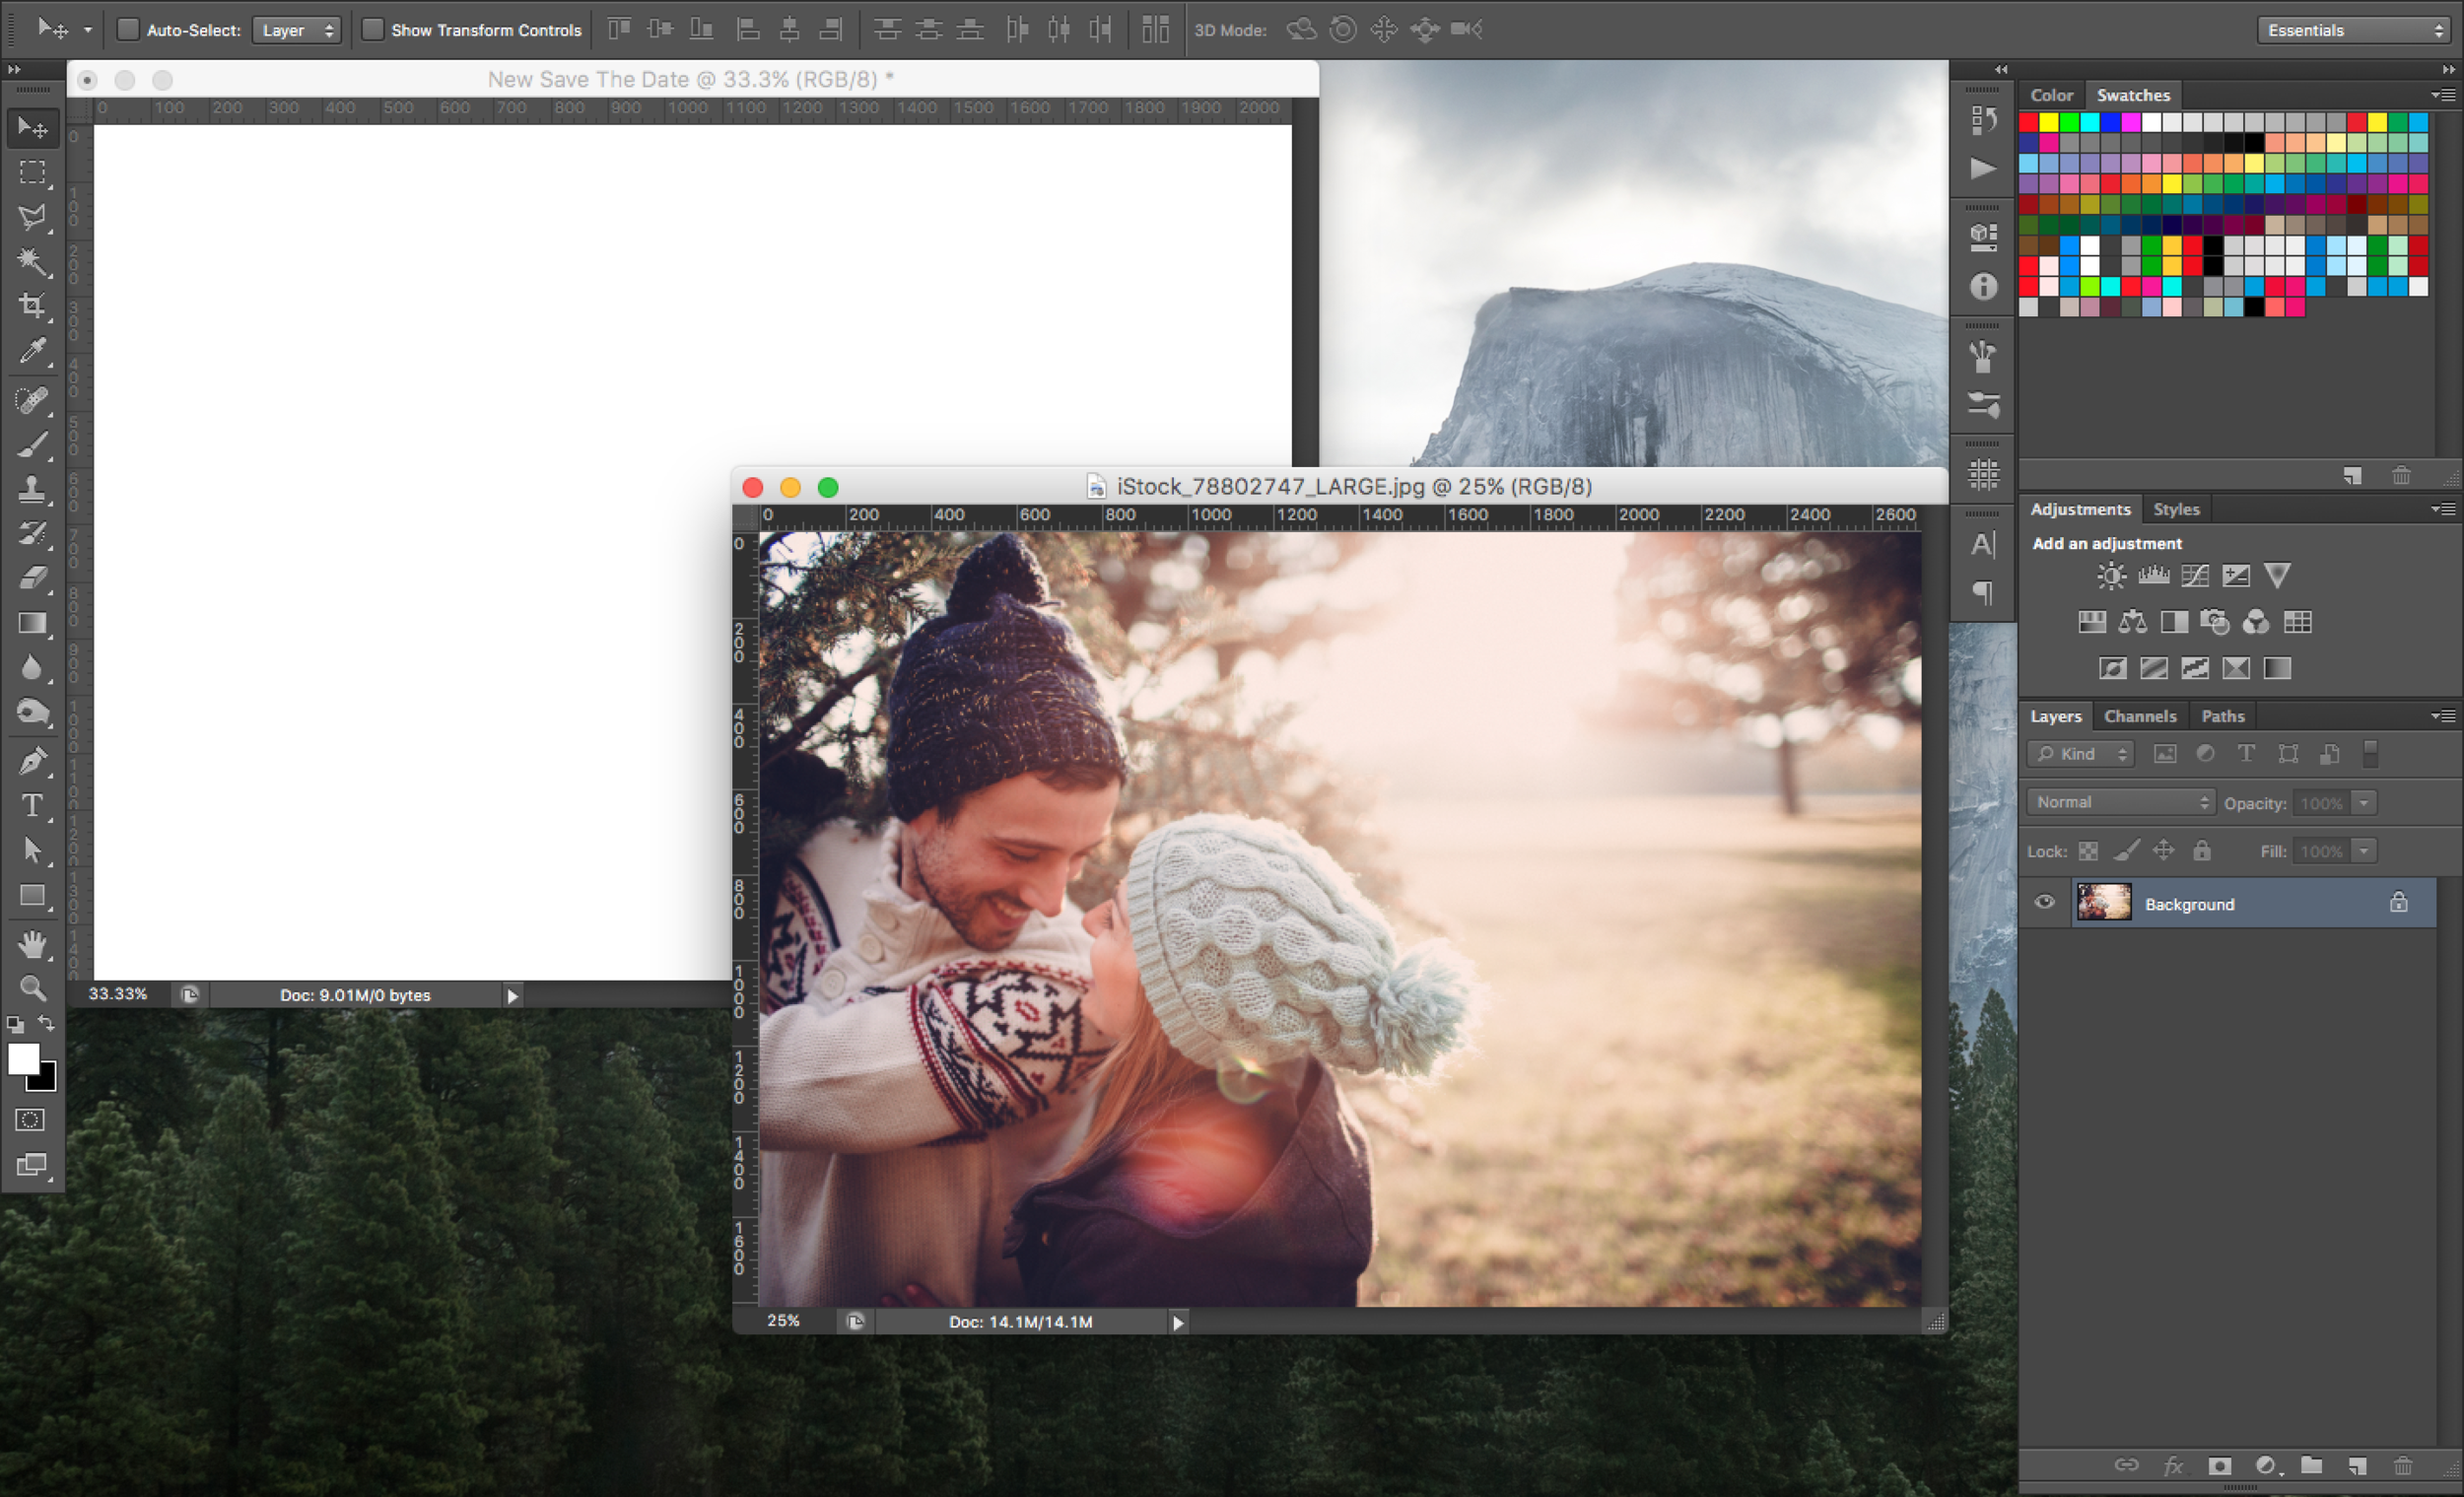
Step 3 - Adding The Hand Lettered Type: Open the "Hand Illustrated Save The Date Overlays" folder and take a peek inside the PNG folder. Open the "Hand Lettered Type" folder and select one of the "Save The Date" images. Open the file in Photoshop and drag the hand-lettered type onto the 5x7. Adjust the placement of the picture and the type until you're in love with the layout.

Step 4 (optional) Changing the Color Of The Type: If you desire a different color of the "Save The Date" type, you can change it. To change the color of the "Save The Date" type, double-click on the layer and a dialog box will pop up. Select "Color Overlay" and choose the color by click on the color box. I decided to change the color of this type to white.


Step 5 - Adding A Hand Illustrated "Divider": Go back to the downloaded Hand Illustrated Save The Date Overlays folder and take a peek inside the "Dividers" folder. Once you found one you love, Open the file in Photoshop. Drag it over to the Save The Date. Once the Divider is on the new project, Transform the "Divider" to match the size of the "Save The Date" type, and place it beneath the type.

Let's also change the color to match the "Save The Date" type - Double click the layer and select "Color Overlay". I selected white to match.

Step 6 - Adding Your Names and Date: Using the text tool, adding a text layer and write in your names how you see fit. Create a second text layer for your date. This is all for your liking. Also, here's your chance to add a font that fits your style. I choose the typeface Sentinel - It's one of my favorites. Also, I like to have the names slightly bigger than the date.

Once you've written out your names and date, be sure to Center Align your "Save The Date", Divider, and text layers. See the below image to find the Center Align button - I'm hovering over the button.

Done! There ya have it. You're all done with your new Save The Date and ready for the print shop to do it's work. Save a .PSD and a .JPG for the print shop. Congratulations, you can now tell your friends and family you designed your own Save The Date.
For more information and to designer your own Save The Date cards, check out my 29 Hand Illustrated Save The Date Collection on Creative Market today!
Expand Your Business By Creating Products For CreativeMarket.com

What is Creative Market?
1. Another Platform To Sell Your Products, Designs, And Illustrations
CreativeMarket.com is a platform for handcrafted designs from independent creatives around the world. It’s a website where creative shop owners can sell beautiful designs. Most of these downloads are targeted to designers to help in creating their own products. For instance, I recently uploaded my first product, Hand Lettered Christmas Overlays, which is hand illustrated typography that includes 45 Christmas overlays intended to help designers create custom gifts, mugs, holiday cards, and more.
2. Expanding Your Business Across Platforms
Creative Market has become a marketplace for creatives to place products for sale in a network of 2 Million members. Although I also have my product available on my personal site, I decided to expand my business to Creative Market because they have such a wide range of customers. It’s best to make all your work available on as many platforms as possible.
The more exposure your products have, the better a chance it's purchased.
The marketplace is full of fonts, graphics, website themes, and more. It’s yet another reason why expanding your products to Creative Market is beneficial. Customers that are looking for fonts or other types of graphics, may stumble upon your products on a whim. The customer may not purchase your product then, but they could add it to a Pinterest board or remember it to purchase at a later date. I’ve used Creative Market for years now, and I’ve always returned mostly because I remember having seen a cool font or website theme beforehand, only to return to purchase it.
Becoming A Member and Opening Your Shop
1. Apply For Your Shop
Before you can open your shop, you must be accepted by Creative Market. You'll have to initiate an invitation to become a member. Just like filling out an application, Creative Market asks for your social networks, shop links, and any other websites you might sell on. I listed my personal website, portfolio site, society6 shop, Facebook and Instagram. They said they’ll respond within 2-3 days, but I heard back the next day which was great news!
2. Open Your New Shop
Once you are accepted into their marketplace, your next step is to update your personal shop profile. Like most profiles, you’re able to upload a profile pic, header image, and biography. Some profile attributes include adding a location, website, and social networks. What is really cool about opening up a shop on Creative Market is the tools at your fingertips. Under your profile, they provide a sales chart, number of views, and list how many likes your products have. This can be beneficial as you start placing more products for sale, and see the stats according to what products are selling best, or what imagery gets more attention.
Adding Your Product To Creative Market
1. Upload & Setting Up Your Product Descriptions
Once your shop is setup and you’re done creating a gorgeous new product, it's time to upload and share it with the world. Creative Market makes adding a product easy with being able to select attributes for describing what you’re going to sell. For example, when I added my Hand Lettered Christmas Overlays, I was able to select “Yes" for Vector. I was able to select the file names available for my download, like .PNG and .EPS, and I was able to select the software requirements, such as Illustrator CS1, for the products. These listed selections made for a quick upload, and ultimately help the consumer determine if this product is useful.
2. Creating Imagery to Catch Consumers Attention
After you’re done selecting your product attributes, one of the most important parts to your upload is creating stunning imagery for your product previews. Having gorgeous shots of the product in use will help with successful sales. Although finding great images can be a burden if you’re not looking to spend money on great photography, don’t settle for ugly photos or none at all. You most likely spent a long time creating your product, so it’s best to invest in yourself and spend money a few great photos from iStockPhoto.
Dress for success – This phrase should also apply to your products.
3. Setting Prices For Your Products
Creative Market lets you price your own work. I’ve always had a hard time pricing my own products, but I found a great article on their blog, which can help you find the best price for you and your customers. Once you’re done pricing your product and made it available, it’s time to earn 70% on each sale and have the flexibility to upload it to your personal store or elsewhere. It’s nice they don’t have exclusive rights to your product.
Time To Celebrate, Wait For Your First Sale, And Celebrate Again!
Good Luck on setting up shop and creating products to share with the world. It will be beneficial, and can only help increase your exposure across the web. Please, take a peek at my store and follow Boelter Design Co on Creative Market today! All your support means so much to me.
Items in this article.

Ready for your creativity, this holiday bundle includes 31 hand-lettered typography phrases/words and 14 ornamental elements to use as Christmas overlays. All holiday type and illustration overlays have been hand brushed and are one of a kind. Use these 45 Christmas Overlays for Christmas cards, holiday photo overlays, or personalized gifts. Also, use these fun elements for your social media content, website blog, facebook page, Pinterest, or Instagram. If you love these, please tag @BoelterDesignCo on social media so I enjoy the creativity you bring along with this bundle.
What's included: The download includes 90 total files (45 .EPS and 45 .PNG)
- 45 .EPS vector files (14 ornamental illustrations and 31 typography quotes/words).
- 45 .PNG files of authentic black type on a transparent background (14 ornamental illustrations and 31 typography quotes/words).
The .PNG files are authentic and have a wonderful texture when used in Photoshop with a blend mode of "Multiply" or even inverted to white with a blend mode of "Screen". You can also choose to do a color overlay of any color you choose. The .EPS files are wonderful for creating just about anything and as large as you like.
Notes
- Images and font used in the previews are not included.
- All 45 illustrated styles are not shown in the previews.